Sonos ‘The connection to Spotify was lost’ | Permanent Fix

20 Revisions

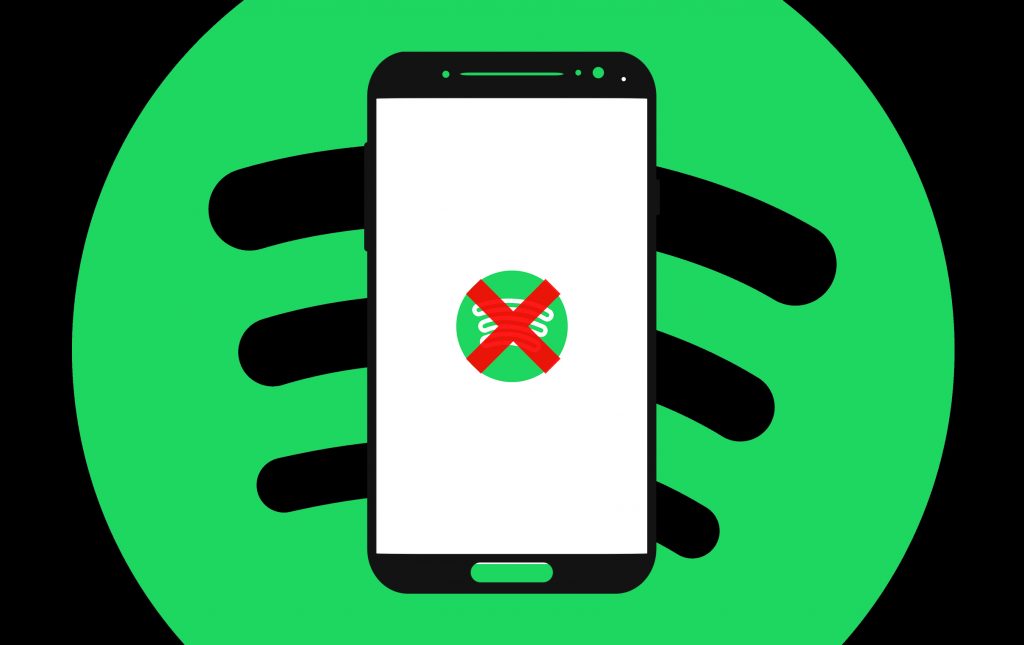
If you’re getting the error message “Unable to play XXX. The connection to Spotify was lost.” through your Sonos app, you’re definitely not alone.
Although it seems like there’s no permanent fix, in this post we’ve put together some recommended troubleshooting steps whenever you get the error message ‘The connection to Spotify was lost’.
Why you’re getting ‘The connection to Spotify was lost’ on Sonos
- The Internet is not stable — First, restart your router. Then, if your Sonos has an ethernet port, connect it directly to your router in case that the WiFi is unreliable.
- A bug with the current Sonos app — you’ll need to install a feature update.
- A bug with the Spotify app (especially when you can play Apple Music, Amazon Music, Radios) — it’s recommended to reinstall the Spotify app and if that doesn’t do the trick, you’ll need to wait for the next update.
- A temp issue with Spotify servers — check the Spotify server status or Sonos Status. If it’s down at the momment, all you can do is to wait for a few hours.
How to fix Sonos ‘The connection to Spotify was lost’?
Below you’ll find quick fixes to the connection error when you have issues making Sonos and Spotify work together:
1. Unplug your router for at least 60 seconds
Give the router a minute or two to start up again. Make sure your phone, tablet, or computer has reconnected to the correct Wi-Fi network before checking the Spotify app again.
If Sonos is wired to your router, check the Ethernet cable. Some Sonos users find it works when they change an Ethernet cable. But if you’re not sure the cable is causing the ‘The connection to Spotify was lost ‘, you can move on to the next fix below.
2. Turn off your VPN connection
If you use a VPN connection on your mobile device or computer, turn it off and check if your Sonos app reconnects to your system.
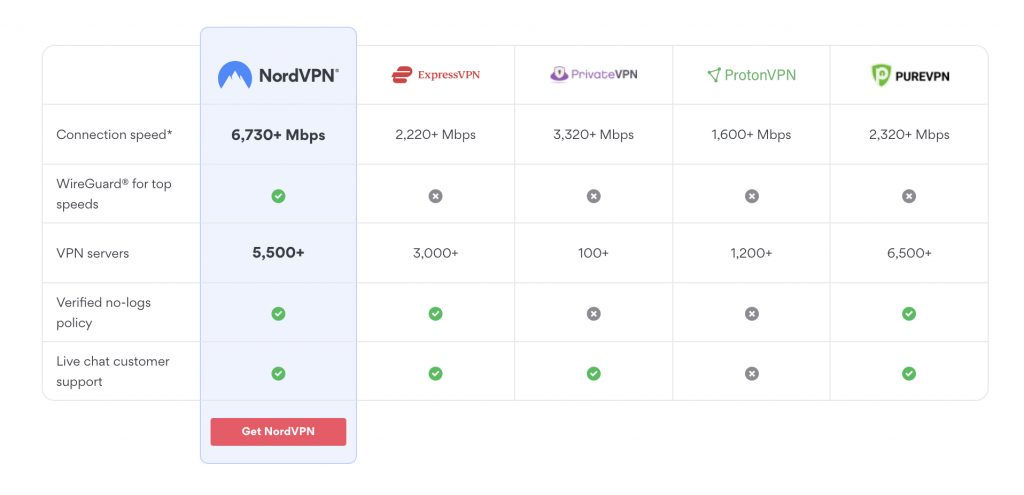
However, if you need a VPN to play Spotify or in case the problem is caused by your current IP address, you can use a much stronger VPN such as Nord VPN, which has over 5,500 ultra-fast servers worldwide. If you are not 100% satisfied, email them within 30 days of the purchase date and get a full refund.
3. Update your Spotify app (and the Sonos app)
It’s very likely that either the Spotify or Sonos app is acting up, so you may want to update both of them and see if anything changes. If this method doesn’t do the trick, try the next fix below.
4. Clear your queue on Spotify
Sometimes the fix is as simple as clearing the entire queue. Here’s how to clear a Spotify queue on mobile:
1) Click the track you’re currently playing.
2) Tap the Queue button at the bottom right corner.
3) Next to the Next in Queue, click CLEAR ALL.
5. Remove Spotify as a service
If you can play music through the Sonos app but not on your Spotify, we suggest that you remove Spotify from the Sonos app first and add it again later.
1) Open your Sonos App, and navigate to Services & Voice.
2) Locate Spotify to remove from Sonos and tap Remove Account.
3) Once removed, wait for about 5 minutes.
4) Go back to Services & Voice and add Spotify again to the list of approved services in the Sonos app.
Try playing music on Spotify again and see if the error ‘The connection to Spotify was lost’ persists.
6. Update your DNS server
By default, your ISP automatically dictates which preferred and alternate DNS server you use. However, it might slow down your streaming experience if your ISP is having troubles with their server or some content requires from other IP addresses. This might also affect your Spotify streaming experience, and here’s how to change the DNS on your phone:
How to change the DNS settings on Android
- Go to Settings > Network & Internet > Advanced > Private DNS.
- Select Private DNS provider hostname.
- Enter
dns.googleas the hostname of the DNS provider. - Click Save.
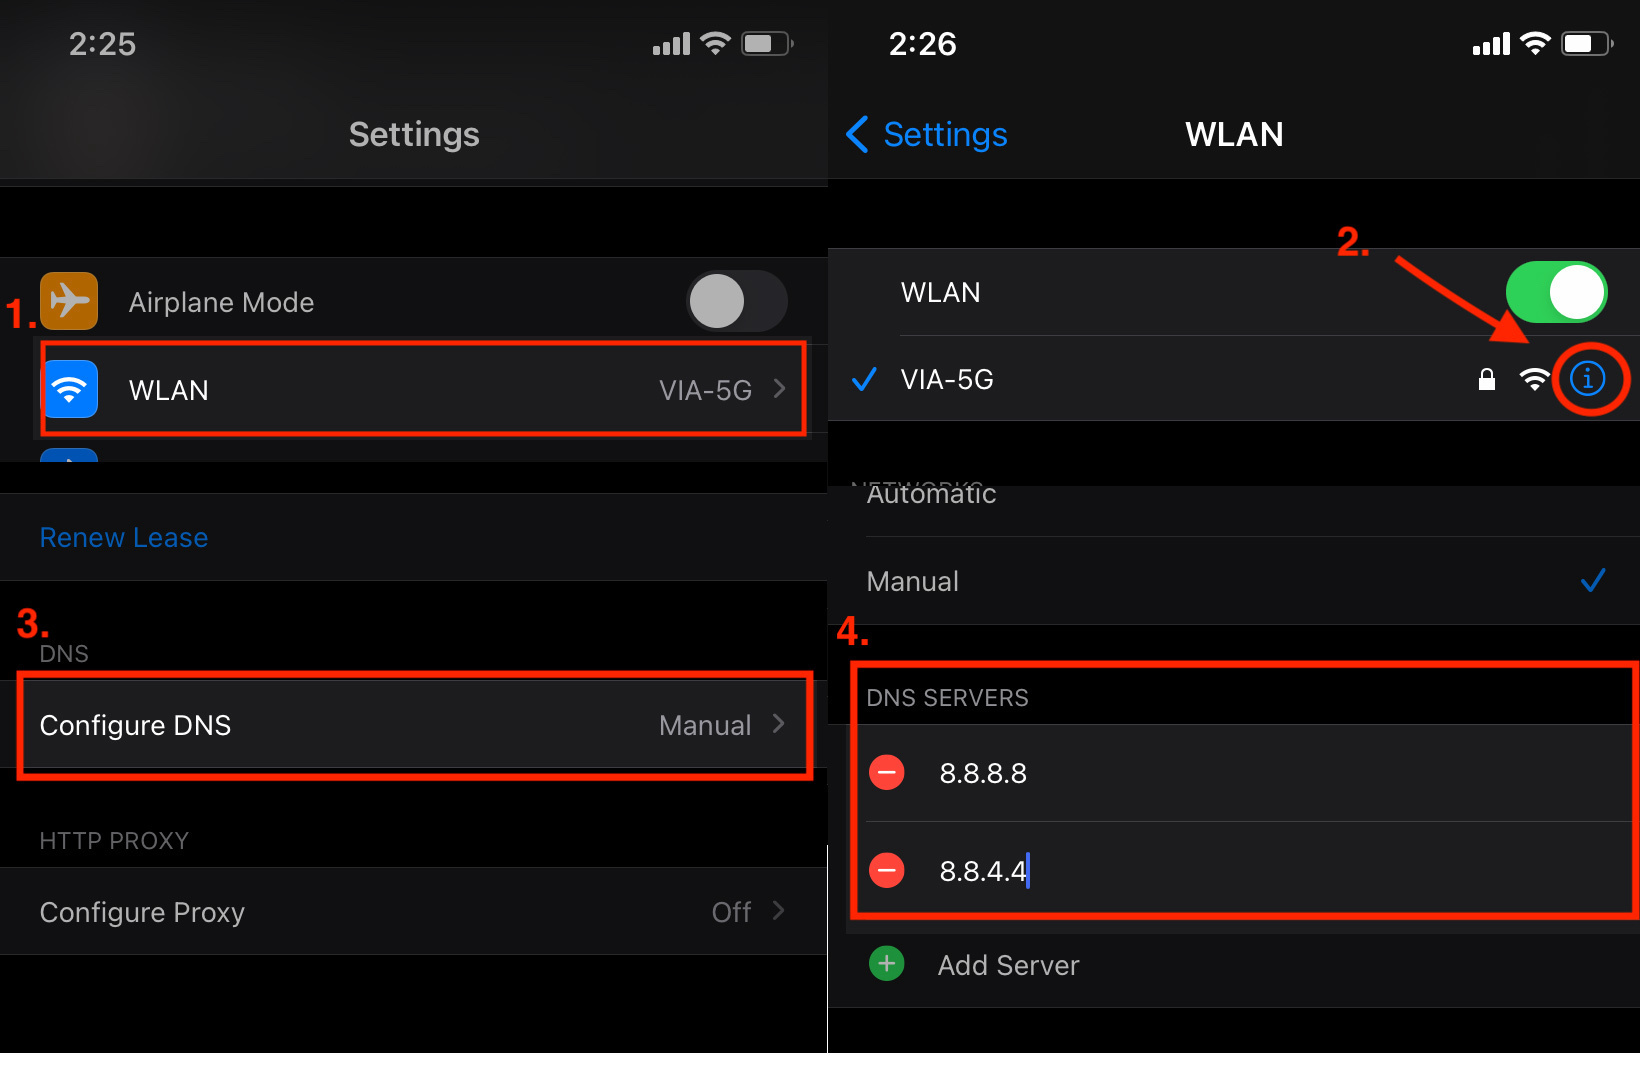
How to change the DNS settings on iOS
- Go to Settings > Wi-Fi.
- Tap the ⓘ icon next to the Wi-Fi network that you want to change DNS servers for. Scroll down to find the DNS section and tap Configure DNS.
- Tap Manual and add Google IP addresses. Optionally you can also remove all default DNS servers in the list.
- For IPv4: 8.8.8.8 and/or 8.8.4.4
- For IPv6: 2001:4860:4860::8888 and/or 2001:4860:4860::8844
- Click Save.
Switching back to Automatic will restore the DNS server specified by the Wi-Fi network.
Hopelly, you’ve get rid of the connection error by now. Feel free to drop us a line if you have any questions.

")


")
")
")

 in 2024")
")