How to Fix “Steam needs to be online to update” Error – 2024 Guide

21 Revisions

Steam is one of the popular gaming platforms where players can explore the gaming world. But for some players, they may run into certain issues when trying to download updates of games such as getting the error “Steam needs to be online to update.” If you happen to be one of them, don’t worry. In this post, we’ll walk you through some methods to solve this problem.
- Temporarily disable your antivirus
- Disable proxy settings
- Run Steam as an administrator
- Add -tcp parameter to Steam shortcut
- Use the Registry Editor
- Change your DNS server
1. Temporarily disable your antivirus
Many users report that Steam is usually in conflict with Windows Firewall and other antivirus software. Therefore, if you’re using any antivirus software, try to disable it before you launch Steam.
Despite the fact that antivirus software would sometimes prevent a trusted program from accessing the Internet, we still recommend you keep using an antivirus, especially one that can handle more demanding processes and protect your computer from viruses, hackers, and spies. Below are the ones that are recognized as trustworthy:
However, if disabling antivirus doesn’t work for you, it’s time to identify the issue by making sure your Windows Firewall isn’t blocking Steam. To do this, you’ll need to manually add Steam to the list of exceptions by following the instructions below.
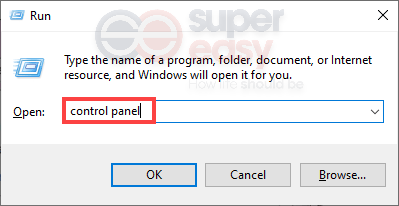
- On your keyboard, press the Windows logo + R keys simultaneously to open the Run box.
- Type or paste control panel and press Enter.
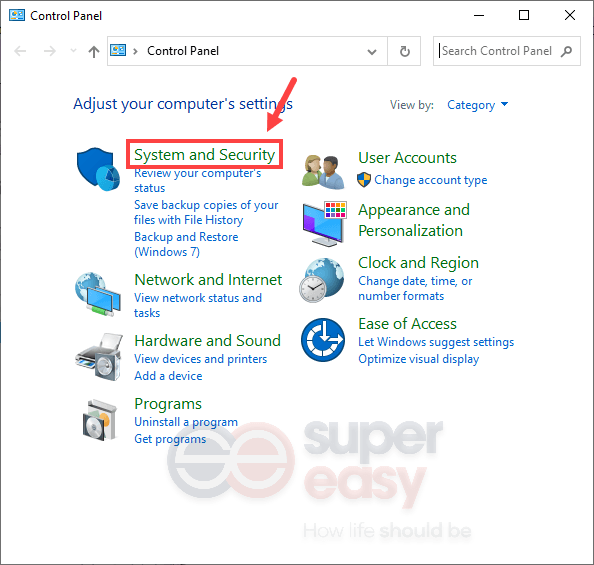
- Click System and Security. (Make sure you set Category as the “View by”. )
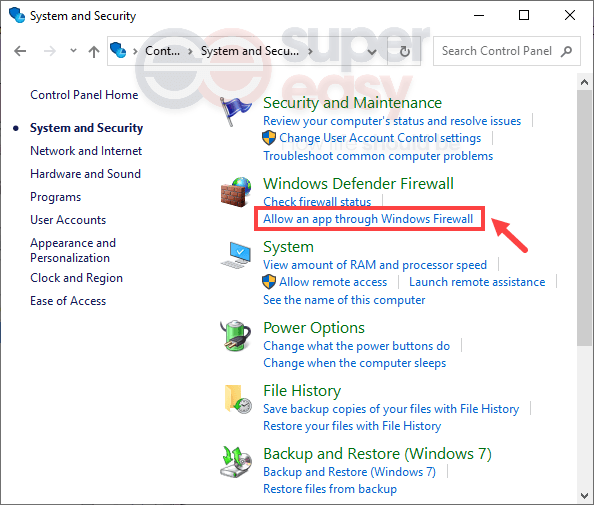
- Click Allow an app through Windows Firewall.
- In the search field, type steam. If it is on the list, then ignore the steps listed below and follow the instructions to disable Windows Firewall and antivirus software.
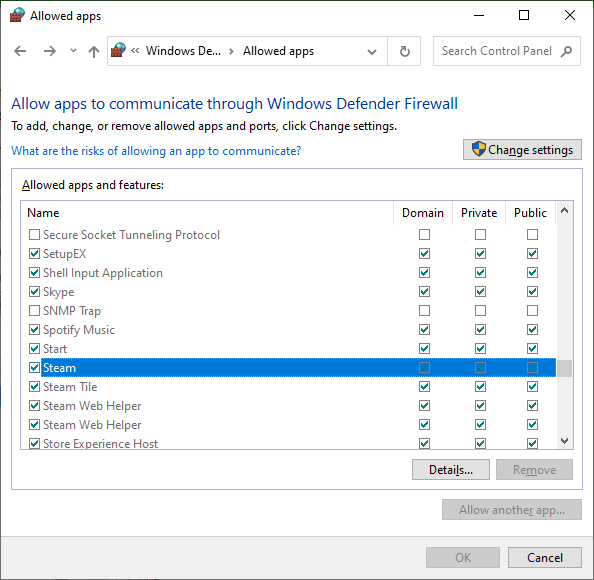
If Steam isn’t on the list, move to the next step. - Click Change settings > Allow another app….

- Click Browse…. Then navigate to your Steam app’s installation folder.
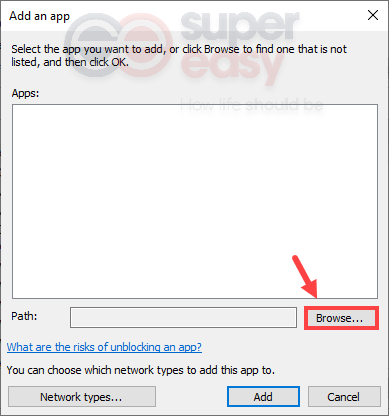
(Usually, it’s located at C:Program Files (x86)Steam. If you can’t find it, simply enter steam in the Search box and then you’ll see the Steam app from the list of results. Then from the right pane, click Open file location. )
- Click Add.
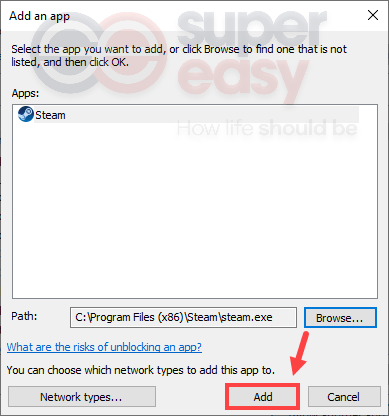
Then you need to make sure that Domain, Private, Public are checked.
After you’ve done this, launch your Steam client. If your problem persists, you need to disable Windows Firewall by taking the steps below:
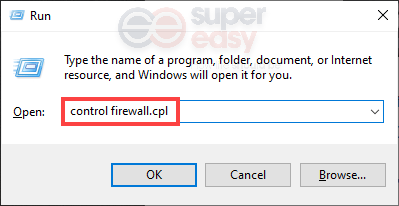
- On your keyboard, press the Windows logo + R keys simultaneously to open the Run box.
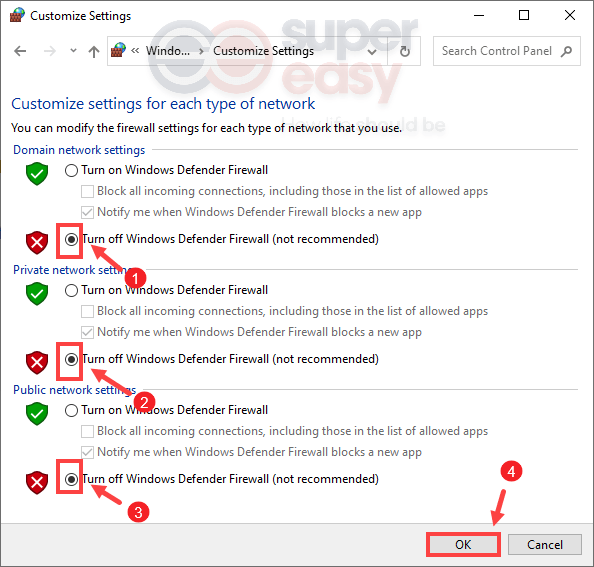
- Type or paste control firewall.cpl and press Enter.
- Click Turn Windows Defender Firewall on or off.
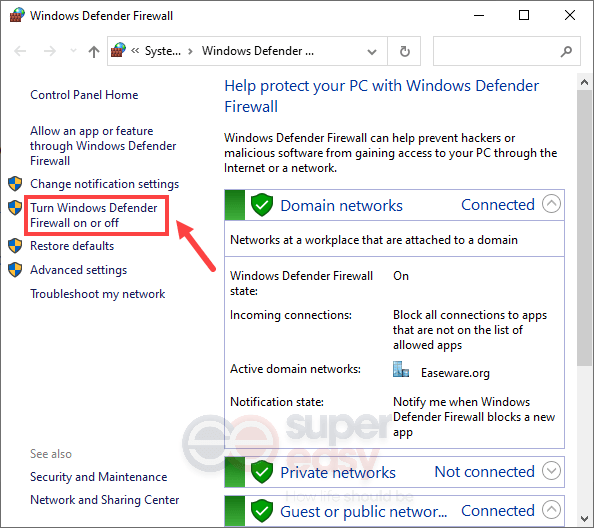
- Tick Turn off Windows Defender Firewall (not recommended) for Domain, Private, and Public network settings. Then click OK to save changes.
Then launch your Steam client. If you’re still getting the error, try the next fix below.
2. Disable proxy settings
Large amounts of bandwidth are required when you’re using proxy servers to sustain the burden of heavy traffic. This could lead to a bad internet connection. To prevent this from happening, you should disable proxy settings. Below are the steps you can follow:
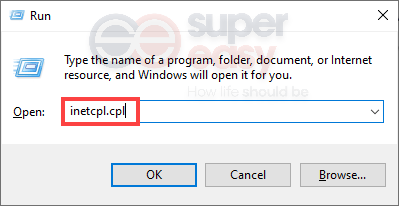
- On your keyboard, press the Windows logo + R keys simultaneously to open the Run box.
- Type or paste inetcpl.cpl and press Enter.
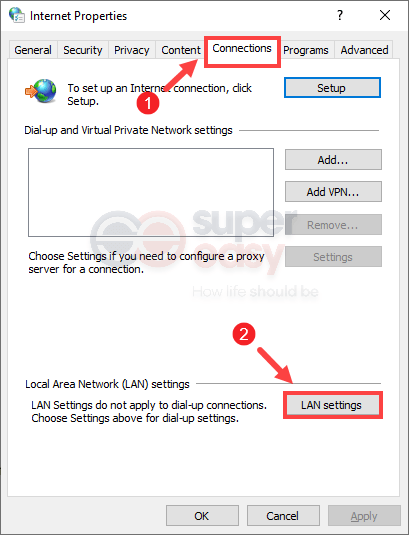
- Select the tab Connections and click LAN settings.
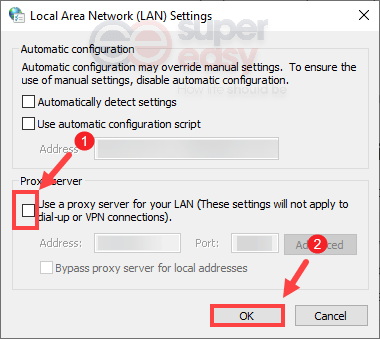
- Uncheck Use a proxy server for your LAN. Then click OK to save changes.
When the changes are applied, open your Steam client and check if your problem is solved. If your problem persists, don’t worry. There are a few more methods for you to try.
3. Run Steam as an administrator
Some programs won’t work properly just because they lack administrative rights. To fix the issue you’re having, try to grant administrator access to Steam. Here’s how you can do this:
- On your desktop, right-click on the Steam icon and select Properties.
(If you don’t have a shortcut, simply go to Steam’s installation folder and right-click Steam.exe and select Send to > Desktop (create shortcut). )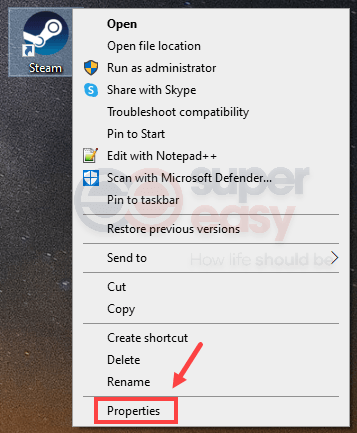
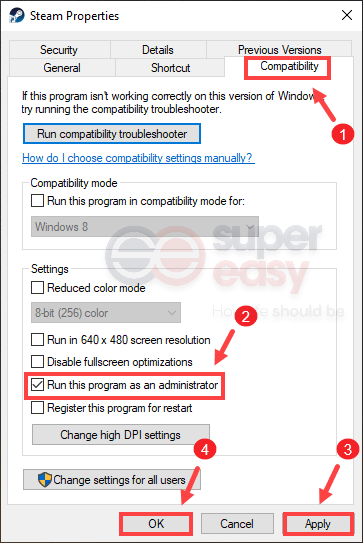
- Select the Compatibility tab. Check Run this program as an administrator. Then click Apply > OK.
After applying the changes, open your Steam client and your problem should be gone. However, if running Steam as an administrator doesn’t give you any luck, proceed to the next fix.
4. Add -tcp parameter to Steam shortcut
Steam uses UDP, User Datagram Protocol for data transmission. Though UDP is faster, TCP, Transmission Control Protocol is more reliable. In order to get rid of the update error, you can attempt to change protocols:
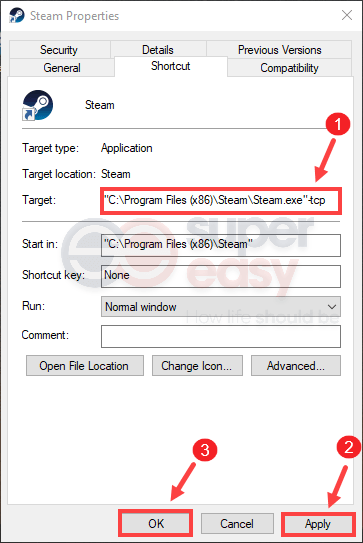
- On your desktop, right-click on the Steam icon and select Properties.
- Select the Shortcut tab. In the Target section, add -tcp after the quotation marks.
If this doesn’t give you any luck, try the next fix below.
5. Use the Registry Editor
Using the Registry Editor to reset some data value is a classic fix. also for the Steam update error. Follow the steps below to do this:
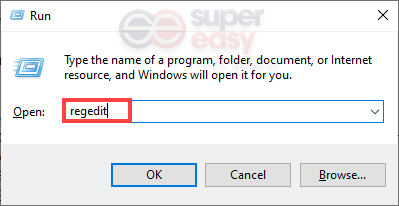
- On your keyboard, press the Windows logo + R keys simultaneously to open the Run box.
- Type or paste regedit.
- Go to the following folder: HKEY_CURRENT_USERSOFTWAREValveSteam
Then double-click the string value AlreadyRetriedOfflineMode on the right pane.
- Make sure the value is set to O. Then click OK to save changes.

If this doesn’t work for you, proceed to the next fix.
6. Change your DNS server
When troubleshooting the Internet connection, switching the DNS server is one of the recommended steps. This can provide you with better connectivity and performance for your internet connection. Here we would like to recommend Google Public DNS. Follow the instructions below to set Google Public DNS as your DNS server:
- In the bottom-right corner of your desktop, right-click on the network icon and select Open Network & Internet settings.

- In the Status tab, scroll down and click Change adapter options.

- Right-click on your network connection, whether it’s Ethernet or Wi-Fi, and select Properties.
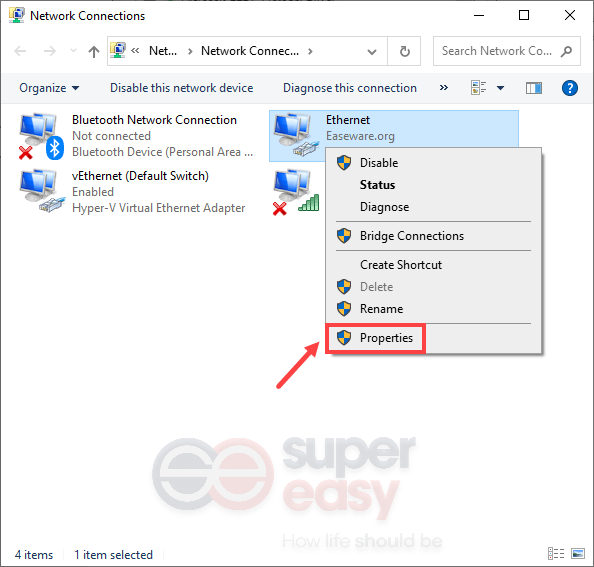
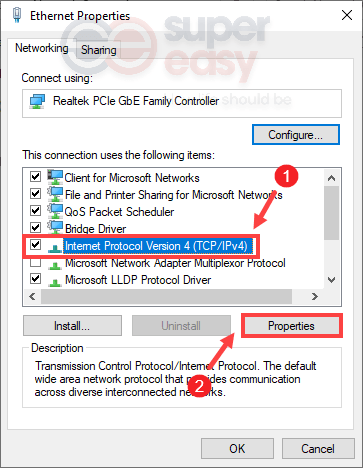
- Under This connection uses the following items, select Internet Protocol Version 4 (TCP/IPv4). Then click Properties.
- Tick Use the following DNS server addresses:. If there are any IP addresses listed in the Preferred DNS server or Alternate DNS server, write them down for future reference. Then replace those addresses with the following ones:
Preferred DNS server: 8.8.8.8
Alternate DNS server: 8.8.4.4
Then click OK to save changes.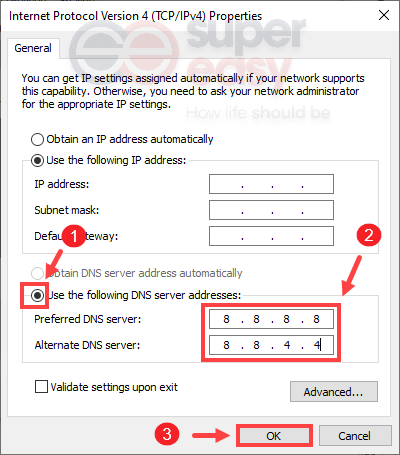
After you’ve done this, launch your Steam client and your problem should be resolved.
Hope this post helped! If you have any ideas or questions, feel free to drop us a line in the comment section below.


")
")
")

 in 2024")
")