Building your first gaming PC setup – What to buy in 2021 & how to build it

81 Revisions

Switching to PC gaming from an XBox or Playstation? Or just in the market to upgrade your laggy old PC so it can handle all the latest games?
Either way, you’ve probably already discovered that off-the-shelf gaming PC setups are super expensive. (You may also know that they’re usually not very good either. But more on that later…)
So unless you’re made of money, your only real option is to build your own gaming setup.
But if you’re like most people, that’s a pretty daunting idea. The technologies involved and the huge range of very similar options make the DIY approach intimidating and overwhelming.
So what do you do? How do you build your own complete gaming setup without spending a fortune or enrolling in a computer science degree?
Well, if you’re asking yourself these questions, you’ve come to exactly the right place. This article has everything you need to know to build the perfect gaming PC setup, on any budget. What to buy, what it does, how much to pay, what to look out for, and how to put it all together for the ultimate PC gaming experience.
And it’s not just about the PC itself. This article covers everything from the case, CPU and graphics card, right through to the mouse, monitor and keyboard. And everything in between.
So settle in, and start reading! By the time you’re done, you’ll be more than confident enough to buy all the components you need and build your own gaming PC setup.
In this article:
- Who should build their own gaming PC setup?
- Why not buy a pre-built gaming PC setup?
- What are the components of a gaming PC setup?
- The best gaming PC setup for your budget
- How to actually build your gaming PC setup
- Optimizing & maintaining your gaming PC
Who should build their own gaming PC setup?
Almost anyone! Unless you’re terrified of computers or you have zero time, you should be fine to build your own gaming PC setup.
And don’t worry, it’s not like you see in the movies. You don’t need a thick pair of geek glasses and a soldering iron. It’s really just a question of choosing your components and connecting them all.
Usually, choosing your components is the tricky part, but luckily for you, we’ve written this guide, so that part’s easy now too!
Why not buy a pre-built gaming PC setup?
For the best gaming experience, you need the right gaming setup.
It’s true you can buy decent pre-built gaming PC setups. But you do have to know where to look. Most stores – both online and off – don’t have the faintest idea what really makes a good gaming PC, and even when they do, they’re quite often just trying to sell off their outdated parts, so you end up with a less-than-ideal build.
Perhaps more importantly, you’ll pay through the nose for it. A typical pre-built gaming PC setup will cost you 2-3 times what you’ll pay if you build it yourself.
For most people, that’s more than enough motivation.
What are the components of a gaming PC setup?
A gaming PC setup has pretty much the same type of components as any other PC. The big difference is that you need to choose the individual model of each component, because some are made for gaming, and some aren’t.
Here’s a rundown of the basic components you’ll need, and what they each do. (Skip to the best components for your PC gaming setup (and budget) section for recommendations on what actual components to buy right now.)
 Motherboard

The motherboard is the backbone of your computer. It’s a circuit board that all the other components plug into. The motherboard’s job is to:
- Connect all your hardware components, so they can all work together.
- Enable your computer to play sounds (most motherboards do this).
- Enable your computer to connect to computer networks and the internet with a cable (most motherboards do this).
 CPU / processor

The CPU is the brain of your computer. (CPU stands for ‘central processing unit’, and it’s often called just the ‘processor’.)
It’s a small chip that plugs into your motherboard, and it performs all the calculations needed to execute instructions (e.g. running programs).
When you look at the specs of a CPU, you’ll see a lot of stuff about ‘cores’, ‘threads’ and ‘frequency’. For all of these specs, basically the higher the better. The more cores and threads, the better the CPU will handle multiple tasks. And the higher the frequency, the faster it will process calculations.
The better the processor, the faster the calculations, and the faster your computer and most of your games will perform. Without a good CPU most games will lag or perhaps even fail to run at all.
But a good CPU, alone, isn’t enough to ensure smooth gaming. You also need a good graphics card.
 CPU cooler

The CPU cooler / heatsink is a vital component that prevents your CPU from overheating. There are two basic types of CPU cooler:
- Air coolers – CPU cooling fans remove heat by transferring it into heatpipes, then pushing it away with a fan. Firstly, the heat from the CPU is transferred into a baseplate using thermal paste applied to the CPU. The baseplate then transfers the heat into heat pipes, then the heat pipes then move the heat into an array of conductive metal fins known as a heat sink. A fan attached to the heatsink then pushes the hot air out from the heatsink. When deciding on an air cooler, you need to balance power and noise. The more powerful the cooler, the larger and noisier it will tend to be. If it’s too loud it can be irritating, and if it’s too large it may not fit in your case or it might get in the way of other components such as your RAM.
- Water coolers – All-in-One (AIO) coolers and custom water cooling loops cycle water around the CPU to keep its temperatures down. The heat from the CPU is transferred into a baseplate using thermal paste just like an air cooler, however, the baseplate is part of a water block that contains coolant inside of it. The coolant extracts the heat from the CPU and moves it through a tube towards a radiator that is attached to an array of fans. These fans then cool down the warm coolant and transfer it into a different tube that flows back into the water block, supplying the waterblock with cold coolant again. The cycle then continues.
Water coolers are slightly more effective at cooling than air cooling, but they also tend to be more expensive, and they rely on a physical pump, which introduces a greater risk of failure (and replacement cost). It also depends on the materials and build quality of the cooler in question.
 Graphics card

A graphics card (also called a ‘video card’ or ‘display card’, and sometimes a ‘GPU’) is a circuit board that plugs into your motherboard and enables your computer to display stuff on your monitor. One end of the graphics card protrudes out the rear of your PC and it has ports there that you can plug a monitor – usually more than one – into.
Your graphics card doesn’t just send images to your monitor. It’s nowhere near that easy; it actually has to do a lot of processing before it can send them. In fact, because most modern games have high-definition, life-like graphics, vibrant colours and a lot of fast movement, this job takes more processing power than anything else your computer is likely to do.
So your choice of graphics card is incredibly important. If you choose the wrong one, your games will be laggy and in-game movement will be jolty. Some games may not run at all.
As a rule of thumb, you should spend about half of your budget on your graphics card. But there’s more to it than just the price:
- Architecture – The architecture of a GPU is the systems inside the GPU that dictate how the GPU cores and threads handle tasks. Very complex to look into and understand but simply put, newer graphics cards = newer architecture which = faster more efficient performance. Older GPUs and different GPU manufacturers (NVIDIA and AMD) use different architectures.
- Amount of VRAM – VRAM stands for Video Random Access Memory. It’s basically just graphics card RAM, and it determines how well / fast your graphics card can render complex textures and 3D meshes. However, more VRAM doesn’t necessarily mean better performance unless you’re already utilizing 100% of your VRAM.
- Ray Tracing Cores – Ray Tracing cores are specifically designed cores, by NVIDIA only, that have been introduced to bring more real time, simulated lighting, shadows and effects. These cores are very recent and are prevalent only on the 20 and 30 series graphics cards released by NVIDIA. Important if you’re looking to experience high quality rendered gameplay, extremely taxing on the gpu and not supported by every game, but very stunning and hopefully will be supported by more developers.
- GPU core base clock and boost clock – Core clock refers to the frequency speed of the cores inside the GPU and the boost clock refers to the overclock guaranteed that the GPU will set its cores frequency when under intensive load/stress.
- Manufacturer – All graphics cards have an embedded graphics processing unit (GPU). This is a little chip that’s the brains of the card, and it’s usually not made by the company that made the card. You need to consider both manufacturers when buying a graphics card. E.g. A video card made by MSI, Gigabyte or Asus will have a GPU that was made by NVIDIA or AMD.
TIPS:
- If you want multiple displays, you need to make sure you buy a graphics card that can support it.
- A good graphics card, alone, isn’t enough to ensure smooth gaming. You also need a good CPU.
 Storage device

A data storage device is where your computer saves files and installs programs (and a few other things).
There are three main types of storage devices used today:
- Hard disk drives (HDD) – HDDs are an older, slower type of storage, but they’re also much less expensive, so you get a lot of storage space for your money.
- Solid state drives (SSD) – SSDs are a newer, faster type of data storage, but more expensive. This type of SSD connects via a cable that plugs into a SATA port on the motherboard.
- M.2 SSD – M.2 storage is an SSD that plugs directly into your motherboard with an M.2 interface. (i.e. Much as RAM plugs in – no cables.) Simplistically put, an M.2 SSD can be 3.3 to 6.7 times faster than standard SSD (if it supports the right bus standard and data transfer protocol).
In gaming, the speed of your data storage device will impact how long your game takes to load and how long things like in-game menus take to load. It won’t affect how smooth and lag-free the game feels (e.g. movements and colours). That’s determined mostly by your graphics card and CPU.
TIP: If you need fast storage and a lot of storage, you should consider getting both an HDD and an SSD (either type). You can have both at once on your computer.
 RAM / memory

RAM stands for ‘random access memory’. It’s where your computer stores frequently accessed data, like what’s currently on your screen, what’s currently in your clipboard, programs that are currently running and files that are currently open.
But it only stores this data temporarily. (Unlike your data storage device, which stores data long-term.)
Your computer uses RAM for this sort of storage because it’s much, much faster than a HDD or even an SSD.
The more RAM you have, the faster your computer will be – especially when switching between programs. But it won’t always speed up your games.
IMPORTANT: Do not touch the gold strip along the bottom of the RAM stick.
 Power supply

The power supply (also known as the power supply unit (PSU)) is what delivers power to all your PC’s other components. One end of it protrudes out the rear of your PC and it has a port there that you can plug a power cord into (it comes with a power cord).
Not all power supplies are created equal. You need to consider:
- Wattage – You want a power supply that’s capable of delivering enough grunt to power all your setup’s components – especially your graphics card. But you don’t want to get one that draws too much power from the grid, because it will cost you more to run. If you have a pretty basic graphics card and just one display, you won’t need much power. But if you have a powerful graphics card and multiple displays, or you plan to overclock your CPU, you will.
- Efficiency – More efficient power supplies draw less power and product less heat and noise. (80 Plus Platinum is the best, then Gold, Silver and Bronze, then just the plain 80 Plus.)
- Quiet – Some PSUs have really noisy fans, which can be very distracting and annoying when you’re playing a game.
- Size – Your power supply has to be the right size to fit your computer case. E.g. An ATX power supply will fit in any ATX type computer case.
- Connectors – You need to ensure your power supply has the necessary connectors to support all your components. Particularly your graphics card.
- Modular – The best power supplies are modular, which means you can remove any unused cables. As a result, your power supply takes up less room inside your computer case, collects less dust and looks better if you have a clear case.
- Rails – If you’re building a high-end gaming setup, you’ll need to pay particular attention to your power supply’s rails. In particular, the 12V rail, which is the one that powers your CPU and graphics card, has to have sufficient amperage to do the job.
 Case
Case

In days gone by, a case was just a case. Really the only differentiating features were the size and the quality of the cooling fan. These days, the appearance of the case is just as important – particularly for gaming PCs:
- Size – Some components (like the power supply, multiple graphics card, motherboard, cooling radiators) will only fit in certain cases. For example, an ATX motherboard is too big to fit in a Micro-ATX case. So you need to choose your case after you’ve chosen your components.
- Cable management – Even when your case is theoretically compatible with all your components, it’s possible that they still may not fit properly. That’s because most components attach to the motherboard (and sometimes each other) with cables. And often those cables are numerous, thick and long. So you have to choose a case that’s big enough to accommodate the cables you’re likely to be stuck with.
- Cooling – Most computer cases come with at least one cooling fan preinstalled. If you plan to add more cooling, you’ll need to ensure you get a case that will fit it. (i.e. Only some cases can fit certain radiators and other water cooling accessories.) Also if you’re planning to add a non-stock CPU fan you’ll need to make sure there’s enough clearance between the CPU fan and the front panel, because CPU fans can be quite large. Also ensure that it won’t cover your RAM slots.
- Appearance – Today’s gaming PC setups are almost as much about appearance as they are about performance. Most gamers prefer a case with at least one transparent side and also some sort of LED lighting. But obviously it has to have a bit of class about it; you don’t want it to look cheap and nasty, or to be distracting while you’re playing.
 Display
A display (or ‘monitor’ or ‘screen’) is obviously where your computer displays information and graphics.
Although it’s possible to buy very cheap displays, you shouldn’t, because display quality has a huge impact on gaming experience. You should also consider the following:
- Size – It’s important that you don’t have a tiny screen, but it doesn’t have to be huge. Big displays are EXPENSIVE, and size isn’t the only factor leading to an immersive PC gaming experience.
- Resolution – Computer displays are made up of hundreds of thousands or even millions of pixels. A pixel is a tiny dot that lights up and can change colour. The more pixels a display has, the better its picture quality. A display with a ‘1080p’ resolution is 1,920 pixels wide and 1,080 pixels high, which means it has a total of 2,073,600 pixels (1,920 x 1,080 = 2,073,600).
- Refresh rate – When your computer displays an image on your screen, it’s not just a static image. It’s actually being redrawn, again and again, and very quickly. The speed at which it is redrawn is known as the display’s refresh rate. It’s measured in Hertz (Hz). E.g. A 60Hz display redraws the image 60 times per second. If the image is just sitting still, a display with a slow refresh rate will look much the same as a display with a fast refresh rate. But if the image is moving (e.g. you scroll down a page or move from side to side in a game), you’ll really notice the difference. The display with the fast refresh rate will seem much smoother.
- Response time – The speed at which a screen’s pixels can change colours is known as the screen’s response time. When the screen has a slow response time, you’ll see a trail of pixels behind fast-moving objects. This is called ‘ghosting’, because the trail of pixels looks kinda like a ghost.
TIP: If you want multiple displays, you need to make sure you buy a graphics card that can support it.
 Keyboard

Most modern games require a lot of keyboard input, so a good keyboard can make a massive difference to your PC gaming experience. By “good keyboard”, we mean something that ticks as many of the following boxes as possible:
- Mechanical key switches – A mechanical keyboard has a physical spring under the keys, rather than a rubber dome on a regular keyboard. This means they last a LOT longer (particularly if you hit the keys hard, which can happen when you’re gaming), are more precise, sound better and feel better.
- High or unlimited key rollover – If your keyboard has key rollover, you can press multiple keys at once, and your keyboard will detect them all. For example, if you have a keyboard with 8-key rollover, you can press 8 keys at once. The higher the number, the better. The best is N-key rollover, which means there’s no limit on the number of keys you can press at once. Key rollover is important in gaming because it’s very easy to press two keys (or more) at once when you’re rushing.
- Recordable macros – If your keyboard can record macros, you don’t need to repeatedly use your mouse pointer to perform common tasks. Instead, you just record a macro for each task. E.g. You might create a keyboard macro to start recording gameplay with ShadowPlay or turn on auto-run in Dayz.
- Backlighting – Most PC gamers like to play in the dark, but that can be a problem if you can’t see your keyboard keys. Fortunately gaming keyboards are backlit with LED lights, under the keys, so you can always see what you’re pressing.
 Mouse
Mouse

For most PC games, your mouse is your primary input device – particularly for moving around. So you want to make sure you buy a good one. Here’s a list of the features you should look out for:
- Optical sensor (not laser) – While laser mice might be a bit better for glossy surfaces, they can be oversensitive, inconsistent and inaccurate. Optical mice are a more reliable bet.
- Shape – The shape of your mouse is the main factor in how comfortable it is to use. You should choose a shape based on how you usually grip a mouse. There are three different grip types – palm, claw and fingertip – and some mice are designed specifically for one or the other. That said, some are also designed to suit all grip types.
- Weight – Weight comes down mostly to personal preference, but the rule of thumb is if you require speed and precision, a lighter mouse is better. That’s why most first person shooter (FPS) gamers prefer a very light mouse, whereas most other gamers (e.g. RPG, MMO, RTS, MOBA) don’t tend to care too much about weight. That said, your choice will also depend on how you move the mouse. If you use just your fingertips, you may find a lighter mouse better, no matter what the game.
- Adjustable DPI – DPI refers to the sensitivity of the mouse (the number of dots per linear inch that it can detect). Higher DPI = more sensitive = faster pointer speed. In some gaming situations, a faster pointer is good, but in others, a slower pointer is good. So it’s a good idea to buy a mouse that lets you adjust the sensitivity, and then just keep tweaking your setting until you find the right balance for you.
- High polling rate – Polling rate means how often the mouse reports its position to your computer. E.g. A mouse with a 500 Hz polling rate reports its position 500 times per second. The higher the polling rate, the less lag you’ll get.
- Wired – Wired mice tend to be more responsive, less laggy, lighter and cheaper. In fact, the only real downside is the cable. If you have your PC sitting on your desk and there’s nothing for your mouse cable to get caught on, then a wired mouse should be fine.
- Adjustable / infinite scroll wheel – Most mice have an incremental scroll wheel that scrolls down the page in small steps. Scrolling tends to be slow and rough. But a few (mostly Logitech mice) can switch between this mode and a free-spinning mode, known as an ‘infinite scroll’. When in infinite scroll mode, you can scroll quickly and smoothly, from top to bottom. You just set the wheel spinning and the page scrolls until the wheel stops spinning of its own accord. This is probably most useful when browsing the internet and working on documents, but it can also be convenient if you want to do something like quickly scroll through your inventory in a game.
- Programmable buttons – Good gaming mice tend to have a few buttons that you can program to perform tasks. Like switching weapons, reloading, throwing a grenade, scoping, boosting health, casting spells, activating voice chat, etc. Being able to do this with a quick push of a mouse button is a huge time-saver. And in PC gaming, where every millisecond counts, that’s important.
 Mouse pad

Most new gamers underestimate the importance of a good mouse pad. It will have a huge impact on how quickly you can move your mouse, how precise your control is (e.g. aiming), how comfortable you feel, and possibly even how your typing feels. Here are some things to consider when choosing a gaming mouse pad (also known as a ‘mouse mat’):
- Size – The number one thing you DON’T want is for your mouse to be constantly running off the edge of your mouse pad. You need a full range of movement. Unless you use a very sensitive mouse that requires very little movement, you’re going to want a reasonably large mouse pad. In practice, the bigger, the better! In fact, we recommend you buy an extended mouse pad that also sits under your keyboard, and go all the way back to your monitor or further. Then the only things that can get in the way of your mouse are your keyboard and the front edge of your desk.
- Materials – The materials of your mouse pad are critical. You want a low-friction surface that allows for fast, precise movements, won’t wear down the feet of your mouse, and won’t feel like you’re dragging your hand across canvas. And you don’t want it moving across your desk when you move your mouse! Pretty much all mouse pads have a rubber base to stop them slipping, so the only choice is whether to go with a soft (fabric) or hard (plastic or metal) upper surface. As a rule of thumb, hard mouse pads cause less friction so your mouse moves a bit more smoothly, but they’re also noisier and harder on your wrist, and can be both sticky and slippery (depending on how sweaty your hands get).
- Manufacturing quality – You don’t want any bumps, irregularities, rough edges or fraying. So it’s important you choose a brand that’s known for its manufacturing quality.
- Thickness – Generally speaking, the thicker the mouse pad, the more comfortable it will be during long gaming sessions.
 Headset

A headset is a device that has both earphones and a microphone. So you can hear game sound effects and other players in network games, and other players can hear you.
(You don’t actually need a headset; you could use a pair of normal headphones and a desktop microphone. But you’d pay a lot more that way, because a desktop microphone capable of delivering the same level of quality will be very expensive. Plus then you’d have to fiddle with two devices instead of one.)
When choosing a headset, you should consider:
- Sound quality – You want to be able to accurately hear the world around you. And you want to hear it in stereo, so you can tell whether people / dangers are to the left or right of you.
- Microphone quality – If you have a good mic, the people you’re playing with (using voice chat) will hear you clearly, without you having to yell.
- Comfort – Because games can go for a long time, you want a headset that will be comfortable. You don’t want a headache, or sore or hot ears.
- Built quality – If you game a lot, you want a headset that will withstand a bit of punishment. In particular you want the cable connections to protect against disconnection of the internal wiring.
- Features – Some headsets are bare bones, whereas others come with lots of bells and whistles (e.g. a swivel boom arm, a pop filter, a mute function and LEDs to indicate if the mic is muted, detachable cords and microphone).
- Connectivity – Headsets connect to your computer via a cable or bluetooth. Bluetooth is more convenient because you don’t have to worry about tangles, but it’s also more expensive.
 USB wifi adapter (if you can’t run an ethernet cable to your gaming PC)

For best gaming performance, you should connect to the internet via an ethernet cable. But if you can’t get a cable to your gaming PC, you should be able to get by with just Wi-Fi.
For this, though, you’ll need a USB Wi-Fi adapter. It plugs into a USB port on your computer, then connects to your wireless access point on your router, similar to how a laptop or phone connects to the internet when you’re at home.
The best gaming PC setup for your budget
Alright, so here comes the exciting part! This is where we tell you exactly what products to buy, based on your budget. Motherboard, CPU, graphics card, display, keyboard, the lot. Even what mouse to get if you’re left-handed!
IMPORTANT:
- Don’t try to mix and match different components from the setups recommended below, because they may not work. In particular, the motherboards are designed to work with specific processors and memory types, and they won’t work with others at all.
- Unfortunately, because graphics cards are also used in cryptocurrency mining, they go out of stock VERY quickly. (Scalpers often set up bots to buy them as soon as they’re listed, so they can then sell them on eBay at inflated prices.) So when you see one, you have to act fast. In fact, we recommend visiting the retailer every day, or even several times per day, to see if new stock has landed. We also recommend subscribing to a notification service if they have one or setting up a Google Alert if they don’t.
Choose your budget to jump ahead to our recommendations.
- The best budget gaming setup (approx US $1,200)
- The best mid-range gaming setup (approx US $2,000)
- The best high-end gaming setup (US $3,000+)
The best budget gaming setup (approx US $1,200)
| Component | Name & model | Comments |
| Motherboard | AMD Ryzen – ASRock B450M PRO4 AM4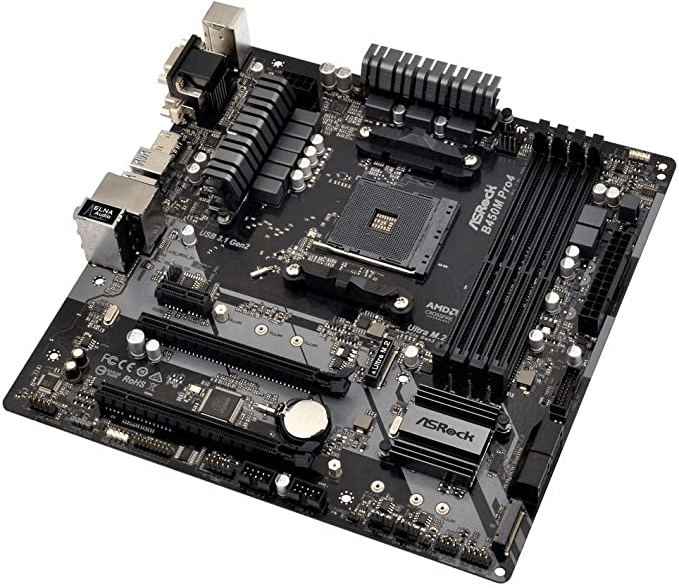 | Gets the job done with memory speeds of up to 3200+ with overclocking, and it has 4 RAM slots for upgradability. (If you can’t get the AMD motherboard, the best alternative is the Intel Gigabyte H410M S2H. Note that if you do this, you’ll also need to buy the Intel CPU below.) |
| CPU / processor | AMD Ryzen 3 3100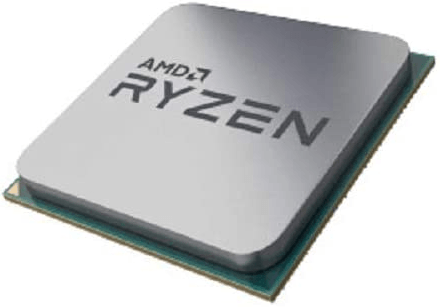 | This is definitely your best bet for a budget CPU, providing excellent performance for a very low price. (If you can’t get the AMD CPU, the best alternative is the Intel i3 10100. Note that if you do this, you’ll also need to buy the Intel motherboard above.) |
| Graphics card | NVIDIA 1650 Super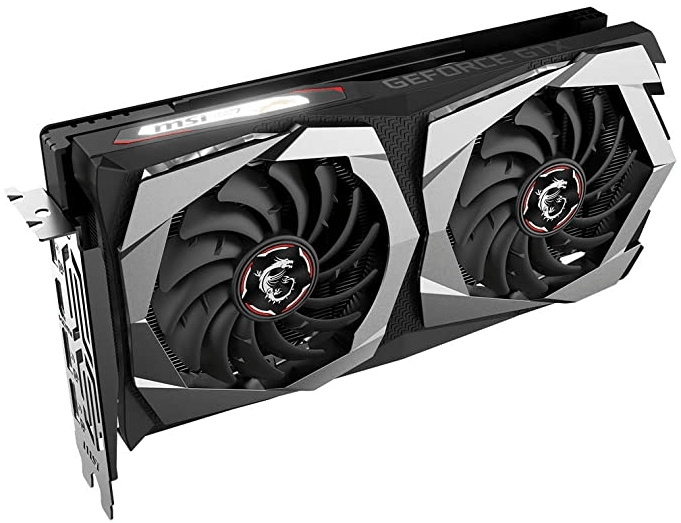 | Provides good graphics power for the price. If you’re lucky, you may even be able to pick one up for less than $300. |
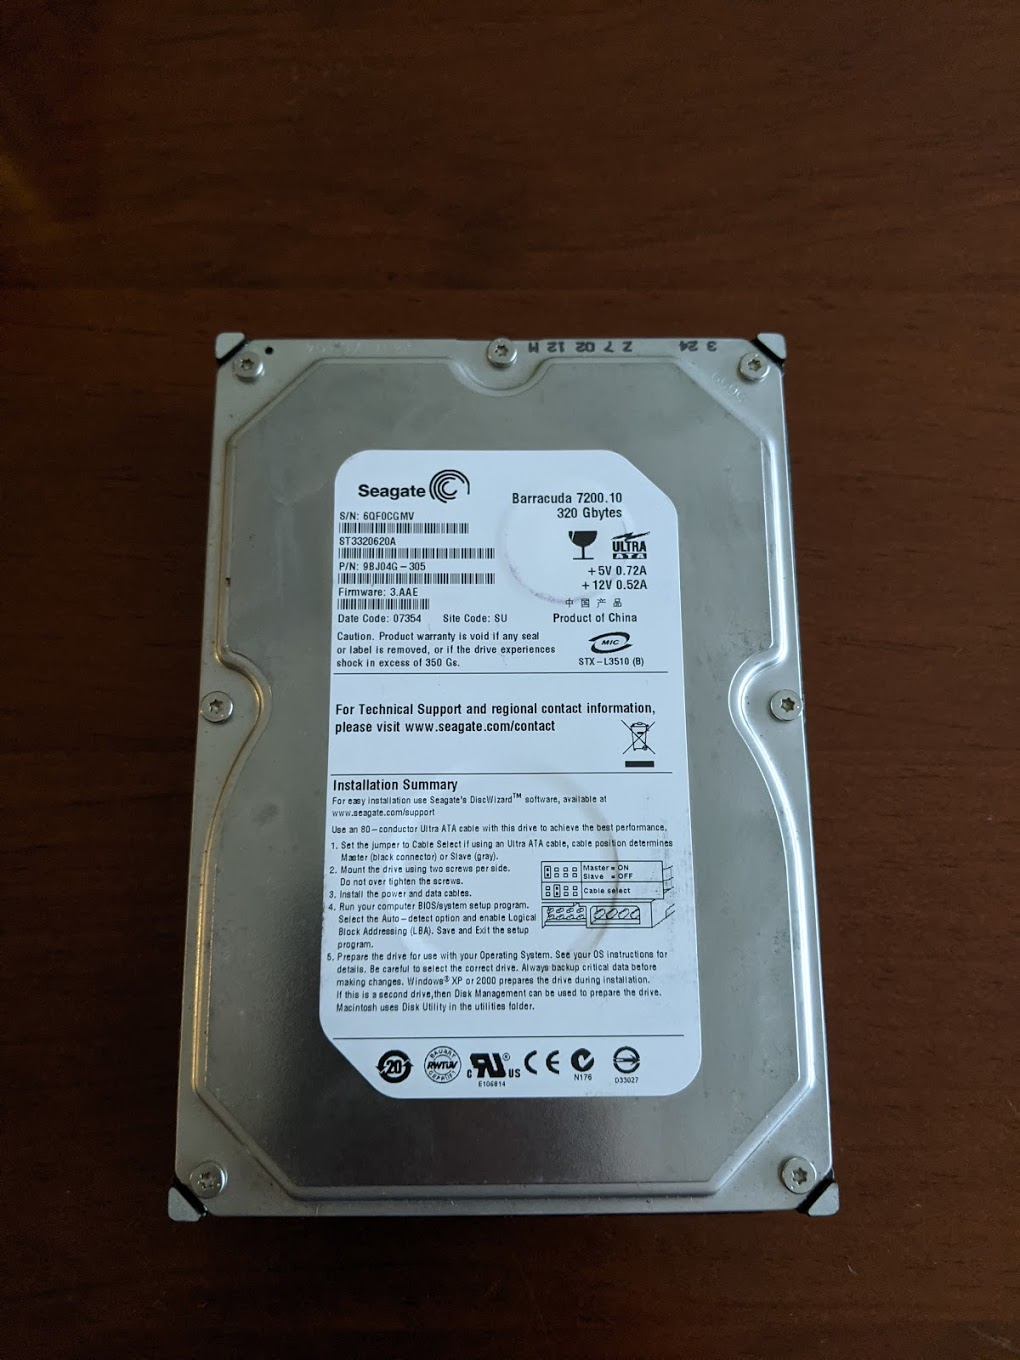
| Storage device | Seagate BarraCuda 2TB Internal Hard Drive HDD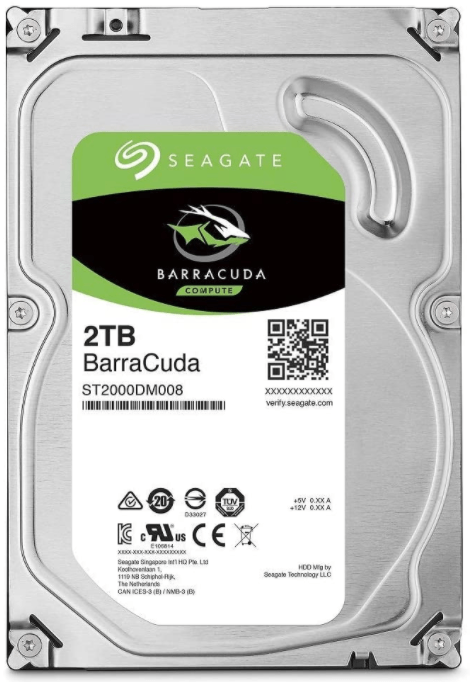 | Fast RPM for the price. Slower than an SSD but has 8x the amount of storage compared to a similarly priced SSD. |
| RAM / memory | Corsair Vengeance LPX 2×4 8gb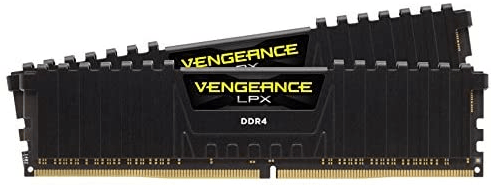 | Reliable RAM that can also be overclocked with the XMP profiles for Ryzen CPUs. |
| Power supply | Corsair CX450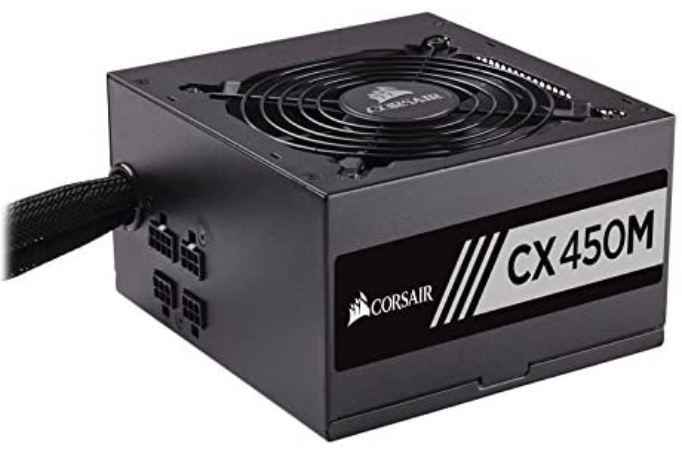 | Great price to performance ratio. |
| Case | SilverStone Technology FARA R1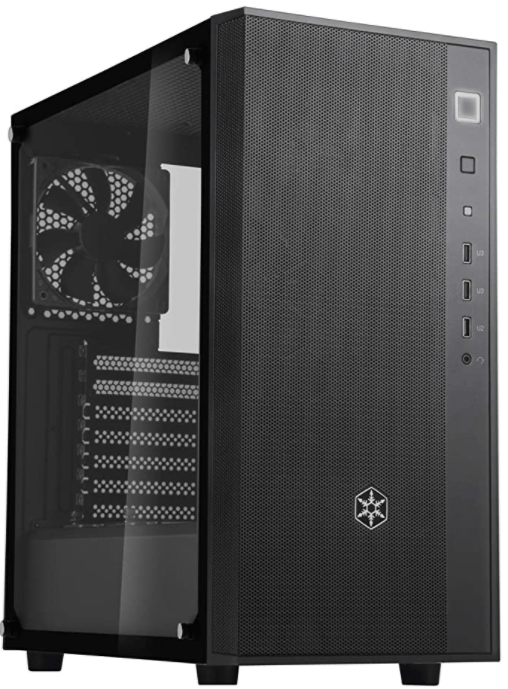 | Perfect budget case with decent build quality that will provide optimal airflow. |
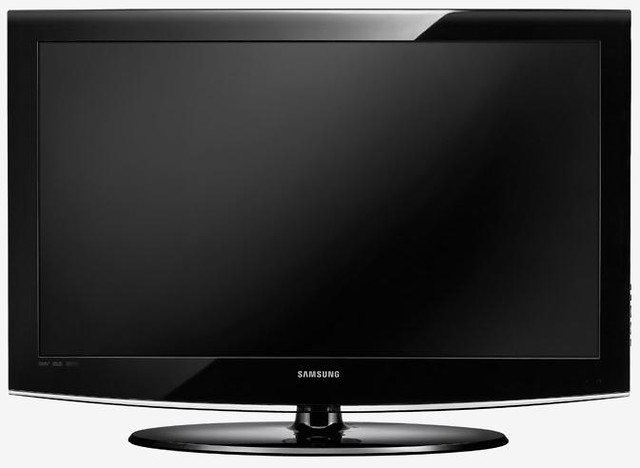
| Display | Asus VP228HE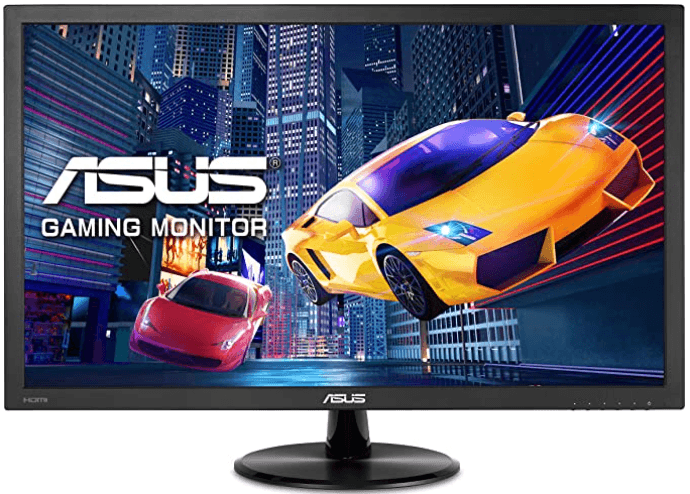 | A little on the small side but a great overall gaming monitor for the price. |
| Keyboard | Redragon K552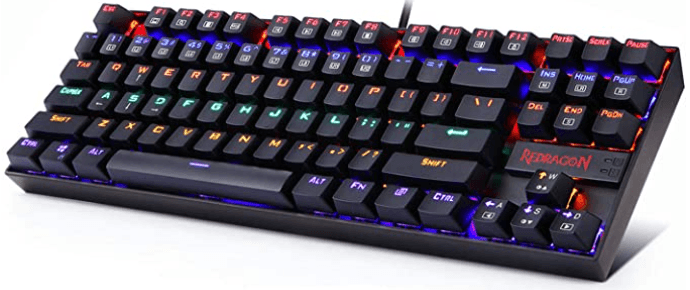 | Best budget mechanical keyboard with a tenkeyless design and red switches for fast input and smooth typing experience. |
| Mouse | If you’re right-handed: Razer Viper Mini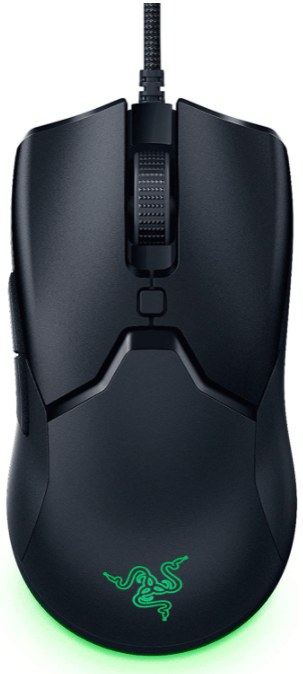 | Great bang for your buck. It does have an asymmetrical design and 2 side buttons on the left side of the mouse, so it’s better for right-handed users. |
If you’re left-handed: SteelSeries Sensei 310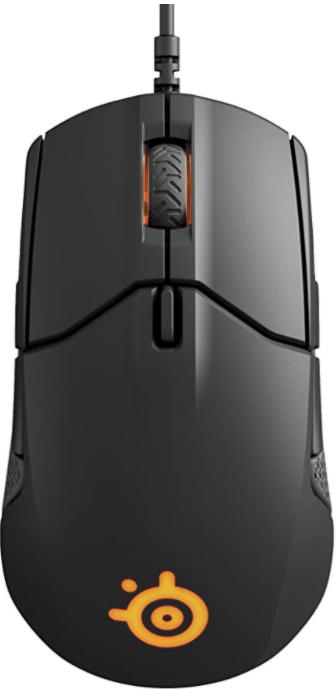 | You could actually use the Razer Viper Mini mentioned above, but if buttons are important to you, then the SteelSeries Sensei 310 is the way to go. | |
| Mouse pad | SteelSeries QcK Mousepad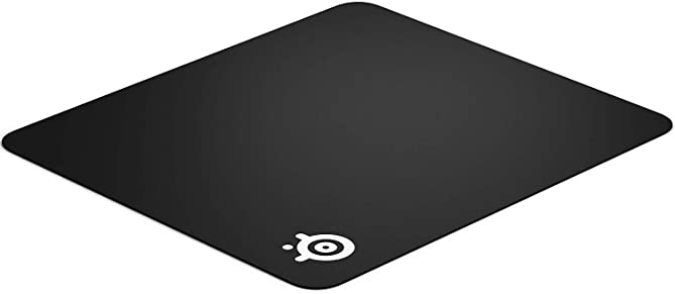 | Solid budget mousepad, great for even more expensive setups. |
| Headset | Corsair HS35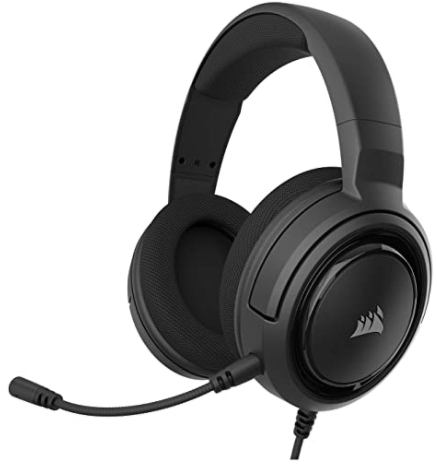 | |
| USB wifi adapter | TP-Link Archer T3U Plus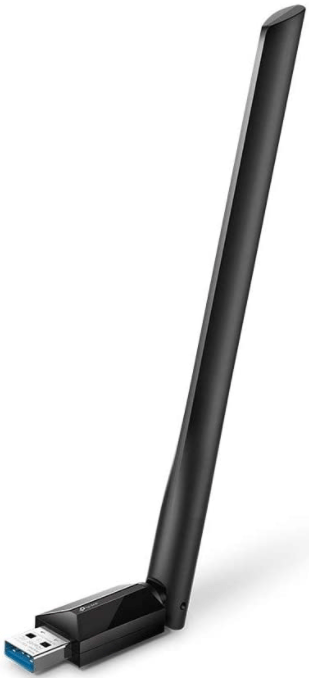 | Budget-friendly USB antenna that will provide adequate wireless internet speeds. |
The best mid-range gaming setup (approx US $2,000)
| Component | Name & model | Comments |
| Motherboard | AMD Ryzen MSI B450 Tomahawk Max II | Great value motherboard for the feature set. |
| CPU / processor | AMD Ryzen 5 3600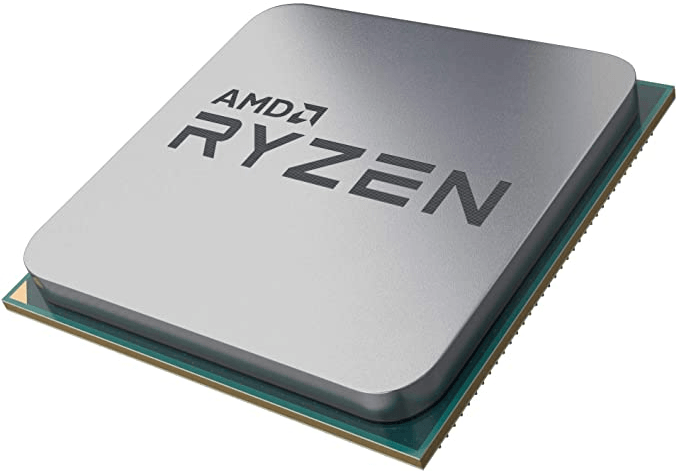 | Best price to performance CPU in the $250 range |
| CPU cooler | Cooler Master Hyper 212 Black Edition | |
| Graphics card | NVIDIA Geforce RTX 3070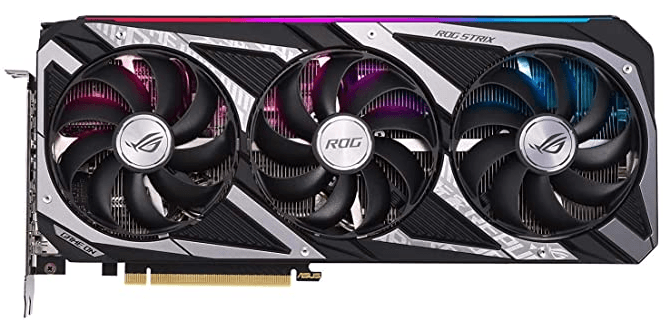 | A very new graphics card that will provide great 1440p gaming, amazing graphics, and handle games on high settings with ease. With patience, you should be able to pick one up for around $500. |
| Storage device | Crucial MX500 1TB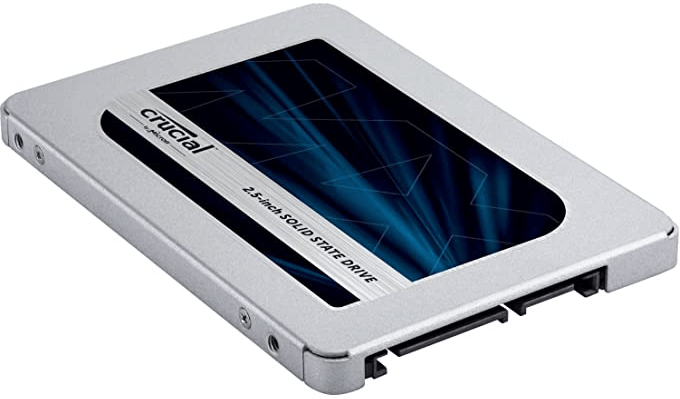 | A reliable SSD choice with DRAM cache to ensure fast speeds when using the OS. |
| RAM / memory | Corsair Vengeance LPX 16GB DDR4 DRAM 3200MHz C16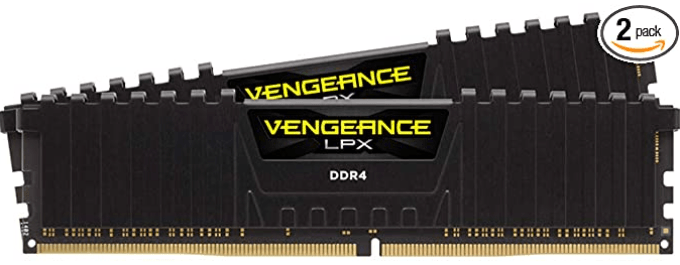 | Low latency, 16GB RAM that’ll be perfect for all games. |
| Power supply | CORSAIR HX Series, HX750, 750 Watt, 80+ Platinum Certified, Fully Modular Power Supply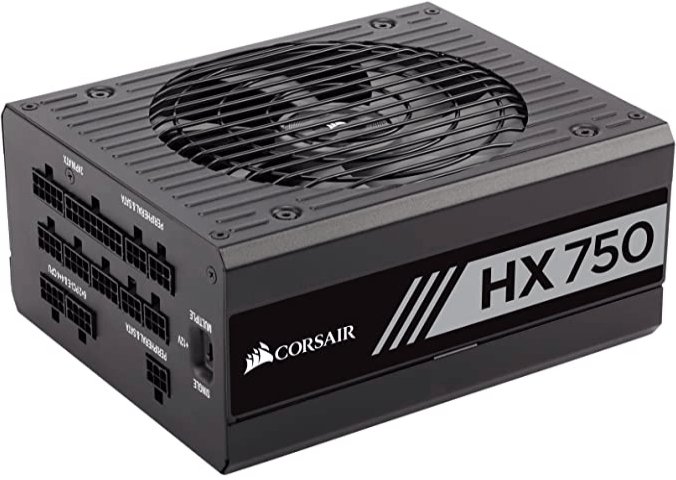 | A solid power supply that’ll provide sufficient power to your system. |
| Case | Cooler Master MasterBox NR600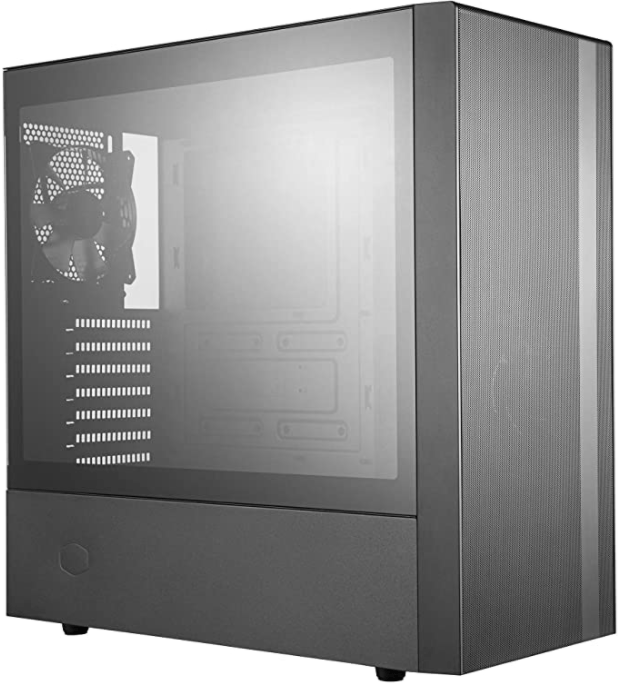 | Great airflow for the price and if adding an extra exhaust fan in the future, it will provide even greater thermal performance. |
| Display | Gigabyte G27F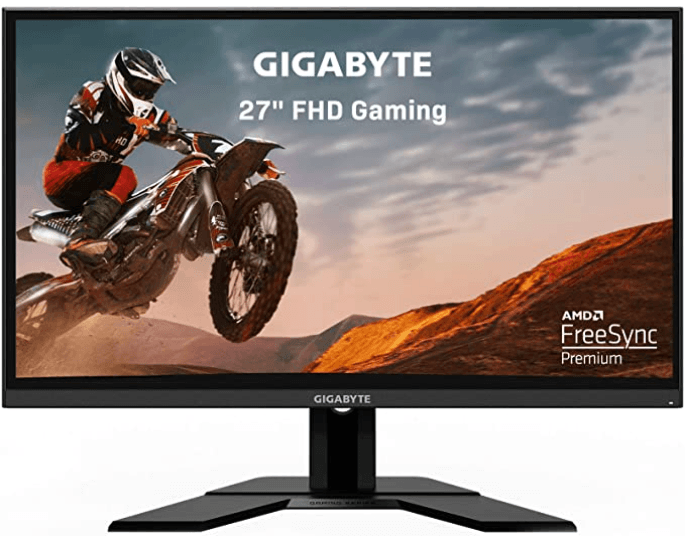 | Although it’s only 1080p, this display has a 144hz refresh and low latency, which means you’ll be able to experience smooth, fast gameplay. |
| Keyboard | GK61 Mechanical Gaming Keyboard with yellow switches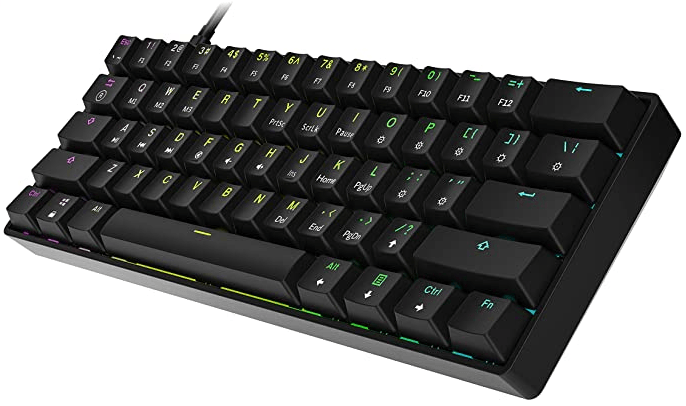 | A great beginner’s mechanical keyboard that has fast gateron yellow switches, and can be completely customized in the future. |
| Mouse | If you’re right-handed: Glorious Model O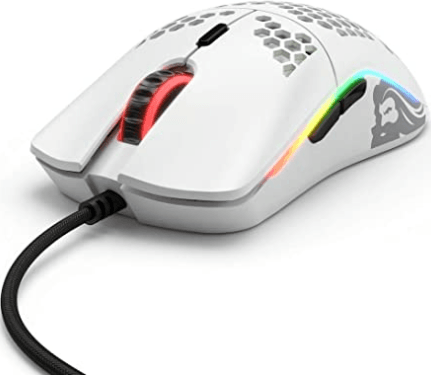 | A serious pro-level mouse at a low price. |
If you’re left-handed: Razer Viper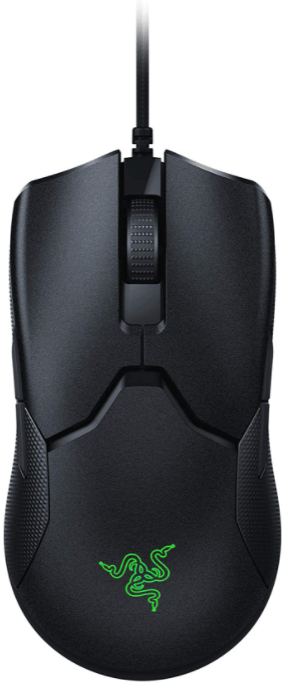 | ||
| Mouse pad | SteelSeries QcK Mousepad | Solid budget mousepad, great for even more expensive setups. |
| Headset | Razer BlackShark V2 X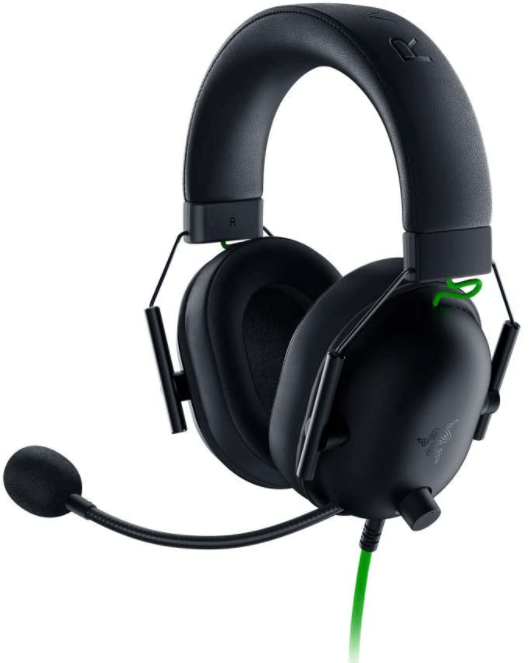 | |
| USB wifi adapter | TP-Link Archer T4U Plus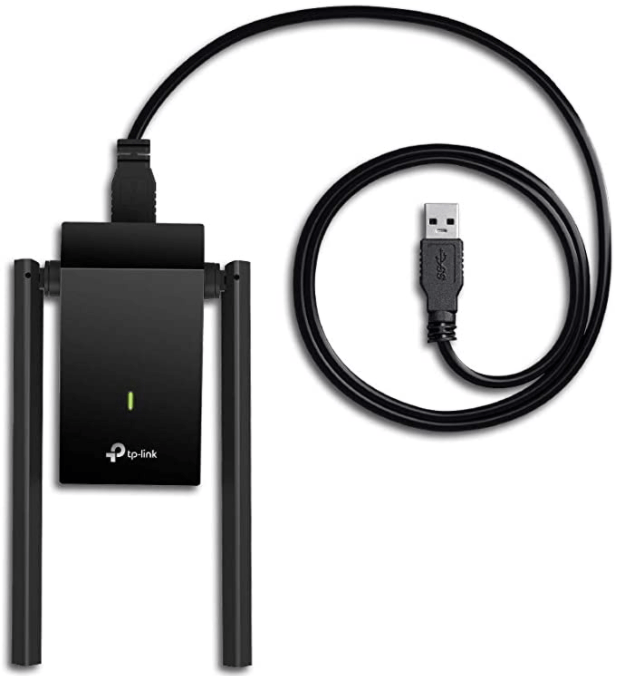 | Offering 400 – 800mps and dual antennas for strong signal strength and fast speeds. |
The best high-end gaming setup (US $3,000+)
| Component | Name & model | Comments |
| Motherboard | AMD Gigabyte X570 AORUS Elite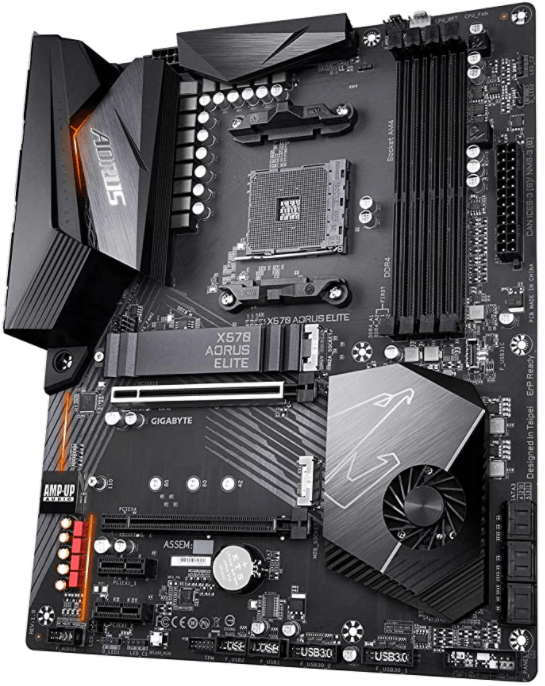 | A high-performing motherboard with a long, high-quality list of features. Perfect choice to ensure your gaming PC setup will last you for many years to come. |
| CPU / processor | AMD Ryzen 7 5800X | For around $450 this CPU is unmatched, not only at gaming but also for other CPU intensive tasks. |
| CPU cooler | Noctua NH-D15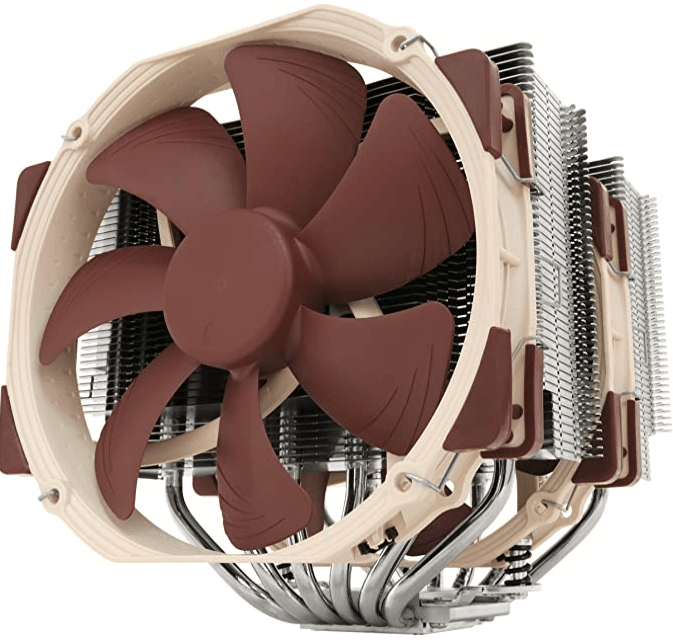 | The best, most reliable CPU cooler out there. Perfect for this system build but will suffice for future generation CPUs too. |
| Graphics card | NVIDIA Geforce RTX 3080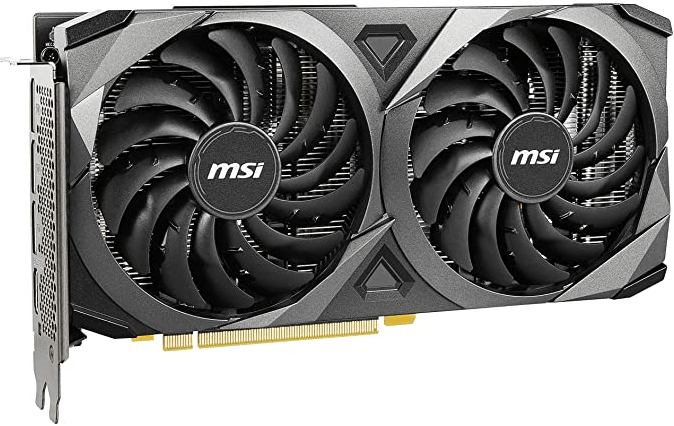 | For price-to-performance, the 3080 is in another league. It’s perfect for 1440p gaming and 4k gaming, great for VR and it’s ray tracing capabilities are incredible. With patience, you should be able to pick one up for around $700. |
| Storage device | Samsung 970 EVO 1TB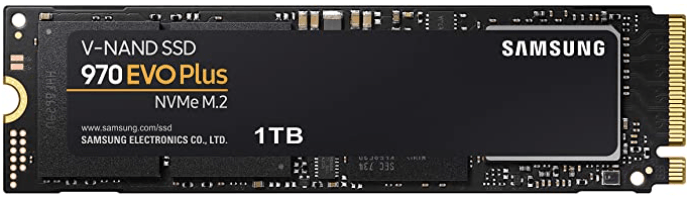 | This m.2 NVME SSD will ensure you don’t have to wait forever for your games to load. Daily tasks that require you to move and transfer files will be blazing fast as well. |
| Secondary storage device | Seagate BarraCuda 2TB Internal Hard Drive HDD | The 1TB of storage delivered by your SSD may not be enough, so we’d recommend a secondary hard drive (HDD) to store files that don’t need the speeds of an SSD, such as documents, movies and music. |
| RAM / memory | G.Skill Trident Z Neo Series 32GB (2 x 16GB) DDR4 3600 CL16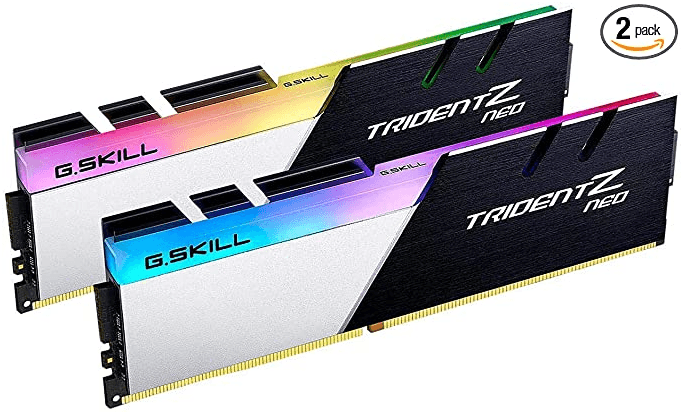 | 32GB of 3600MHz cl16 timings will be more than sufficient, ensuring you’re getting the most out of your CPU and GPU performance. The added RGB lighting is also a nice touch. |
| Power supply | Corsair HX850 850 Watt 80 Plus Platinum Certified Fully Modular Power Supply Unit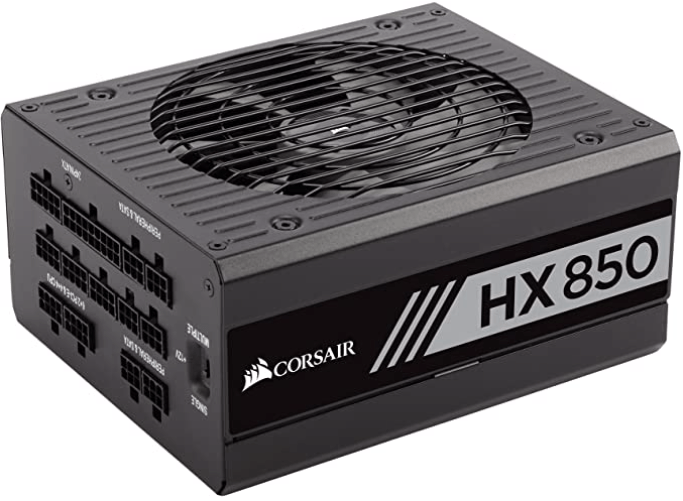 | Another great reliable power supply that will be more than sufficient for this system. |
| Case | Cooler Master MasterBox TD500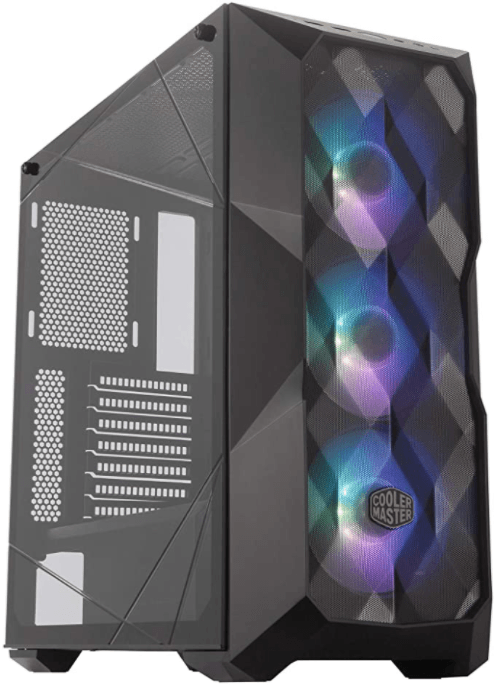 | A great case, with excellent build quality, room for every component you’d want, sufficient airflow. |
| Display | LG 27GL83A-B 27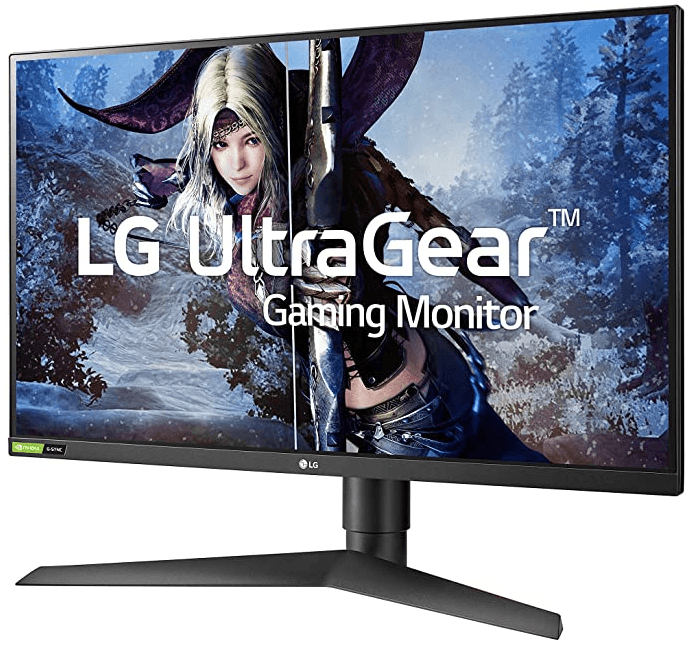 | This monitor is a 1440p 144hz NVIDIA G-SYNC monitor that will ensure you’re able to experience your games with the lowest latency and greatest detail. |
| Keyboard | HyperX Alloy Origins 60%/TNK/Full Size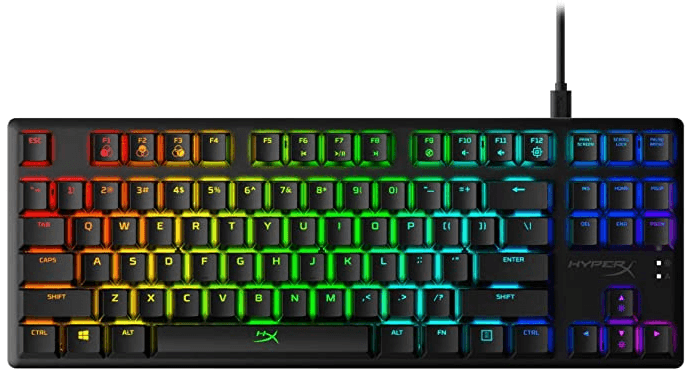 | Whether you like the smallest keyboard you can get, the largest or something in between, the HyperX Alloy Origins is the keyboard for you. The build quality is fantastic and their new aqua switches make a great typing and gaming experience. |
| Mouse | Razer Viper Ultimate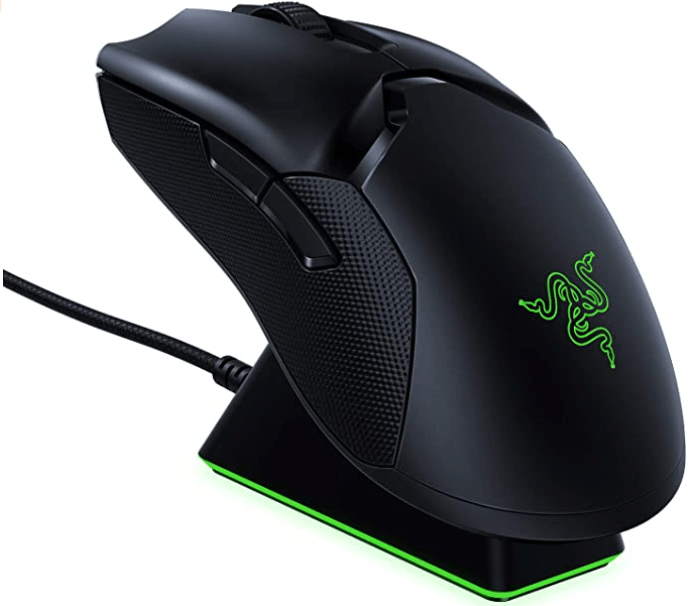 | The Razer Viper Ultimate has a great optical sensor, is wireless to ensure no cable drag, delivers very low latency, and boasts exceptional built quality and an overall a great design, so you can play for hours in comfort. Also, it’s an ambidextrous mouse, so you can use it even if you’re left-handed. |
| Mouse pad | Corsair MM350 PRO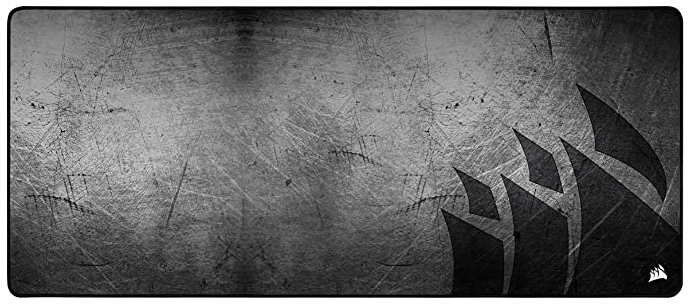 | The MM350 PRO is a high-end mouse pad meant to make your mouse even more effortless to move. |
| Headset | Razer BlackShark V2 Pro Wireless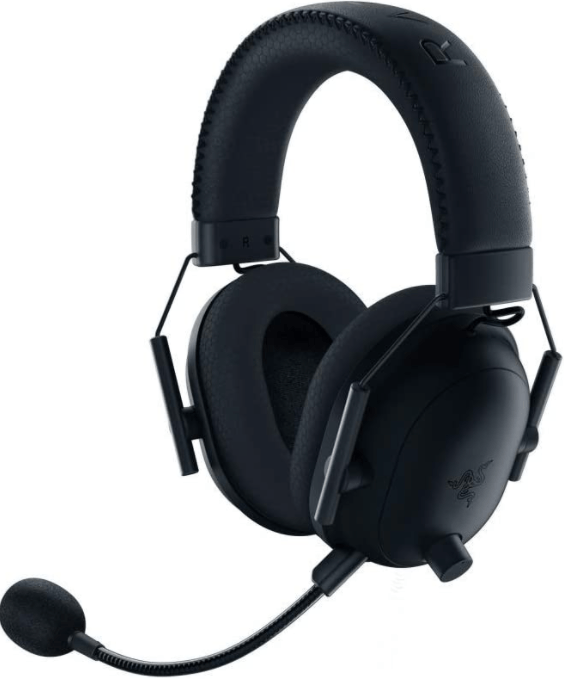 | Very similar to the Razer Blackshark V2 and V2 X however V2 Pro is wireless, providing you with absolutely free movement while gaming. |
| USB wifi adapter | TP-Link WiFi 6 AX3000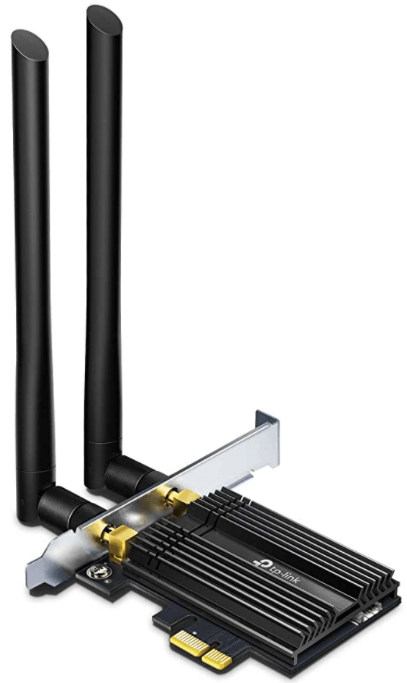 | Perfect if you’ll be gaming wirelessly for long periods at a time. If not (i.e. if you’ll be using ethernet), you can just use one of the cheaper alternatives above. |
How to actually build your gaming PC setup
Building a computer isn’t as scary as it sounds. It’s more tedious than technical, and requires more patience than computer skills.
That said, you do need to ensure you do things the right way, and in the right order. This guide will help you do exactly that.
- Before you start
- Install any on-board motherboard components
- Prepare your case
- Install your motherboard
- Install your power supply
- Install your graphics card
- Install your storage device(s)
- Connect (and tidy) all your cables
- Plug in your mouse, keyboard & headset
- Install Windows
- Install a network driver
Before you start
WARNING: Don’t just jump in and unbox everything! Wait ‘til it’s time to install that particular component before unboxing it. Otherwise you’ll end up with a mess of components and cables, and something is bound to get lost or damaged.
Now here’s what you’re going to need in order to build your new gaming PC:
- A suitable workspace – You’ll need a large, clean surface that will prevent electrostatic discharge from occurring. E.g. A large wooden table.
- A Phillips head screwdriver – For screwing cards into your case.
- Zip ties – For cable management.
- Scissors – For cable management.
- Anti-static mat & bracelet (OPTIONAL) – If you’re anxious about electrostatic discharge causing damage to components, you can buy an anti-static mat and bracelet. You can definitely do without them though. TIP: If you work barefoot, you’ll be grounded, so the chance of electrostatic discharge is reduced. (Socks, on the other hand, can cause static.)
Install any on-board motherboard components
STEP 1: Unbox your motherboard
Remove your motherboard from the anti-static bag and place it on your work surface.

STEP 2: Install your CPU
- Take a photo of the socket / socket cap – On your motherboard there’ll be a CPU socket. It should look like a large square, about 2.5 x 2.5 inches, probably covered by a plastic shroud/cap.
On the cap or the socket itself, you’ll see a small arrow or triangle. This is important because it tells you which way to install the CPU. (If it’s on a cap, take a photo before you remove the cap.) - Remove the CPU socket cap (if it has one) – If your CPU socket is capped, you now need to remove the cap. To do this, you need to use the small metal retention lever next to the socket:
Press the lever down and away from the CPU (it may take a bit of pressure), and the cap should pop off.
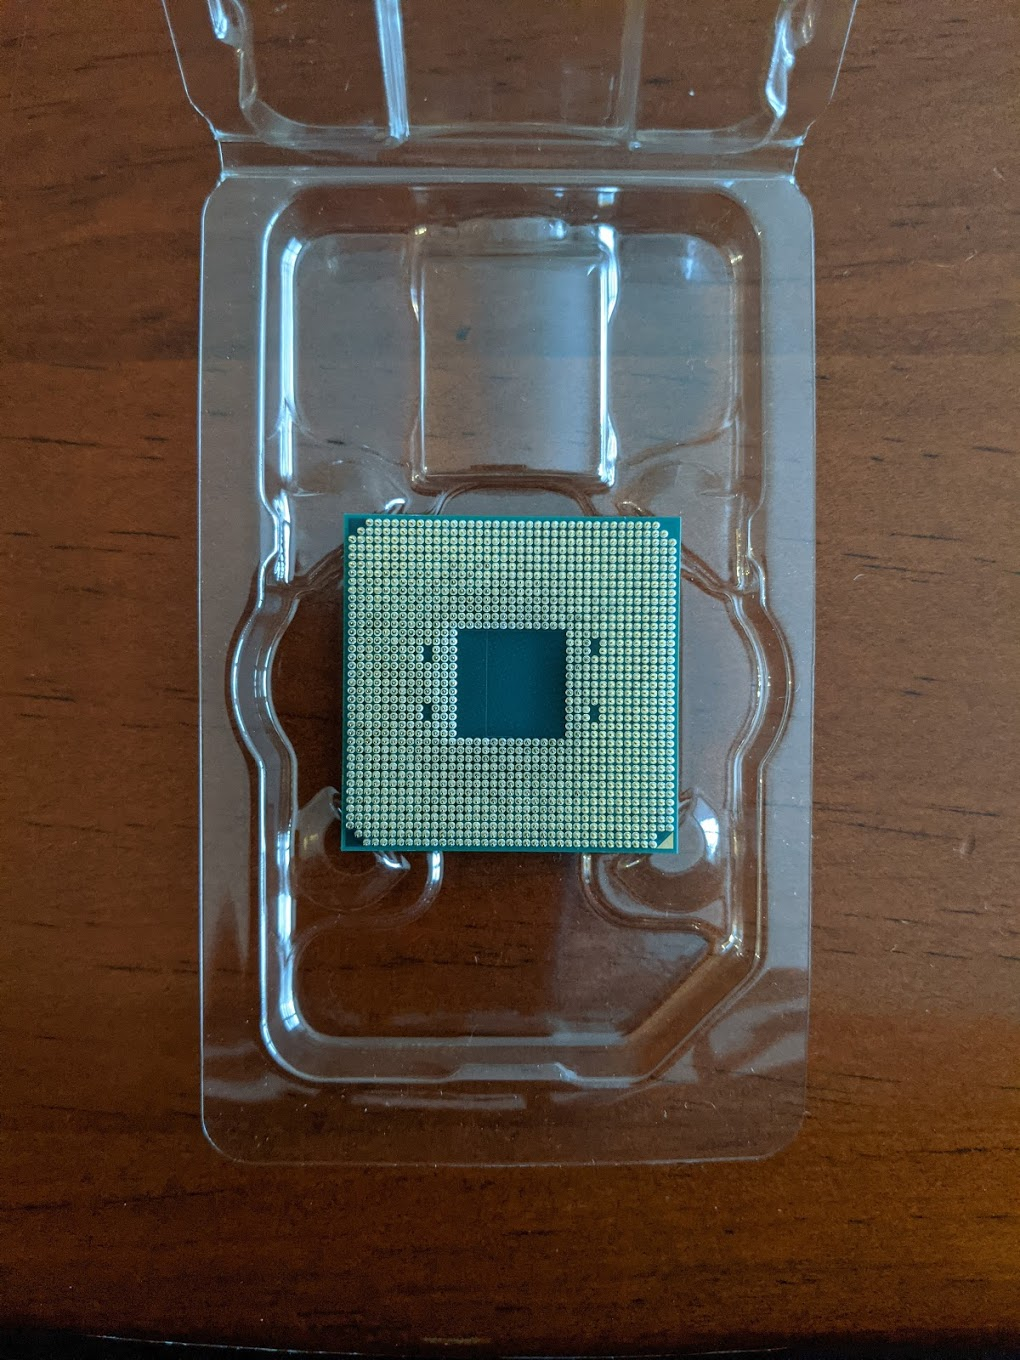
WARNING: Don’t touch the socket as you may damage it. - Unbox your CPU – WARNING: Don’t touch the bottom of the CPU as the pins are precisely manufactured and even the slightest bend will destroy your CPU. Instead, handle it by the edges.
- Locate the small triangle – Find the small triangle on the CPU corner:
- Insert your CPU into the CPU socket – Place it with the little arrow in the same corner as the arrow on the socket. Carefully place the CPU into the socket and wiggle it, very slightly and gently, to ensure that all the pins are seated. DON’T apply excessive force, as this will damage the pins and destroy your CPU.
- Lock it in place – To lock your CPU in place in the socket, you need to use the metal retention lever again. Press it down and towards the CPU socket. It may take some pressure but that’s alright. If it feels like you’re using too much force stop and access whether you’ve completed all the above steps correctly.


STEP 3: Install your M.2 storage device (if you have one)
- Locate the M.2 drive slot – It will be a small horizontal slot on your motherboard, with a small screw across from it. It may be located underneath a shield, as per the below photos:
- Remove the screw – But keep it handy, as you’ll need to re screw it back in afterwards.
- Gently insert the M.2 drive into the slot – It will sit at an angle when first installed, but once you re-insert the screw, it will straighten up.
- Re-insert the screw – Push down on the M.2 card until it’s flush with the hole where the screw was, then screw in the screw again. Refer back to your manual if your motherboard has multiple M.2 drive slots or you’re installing more than one.


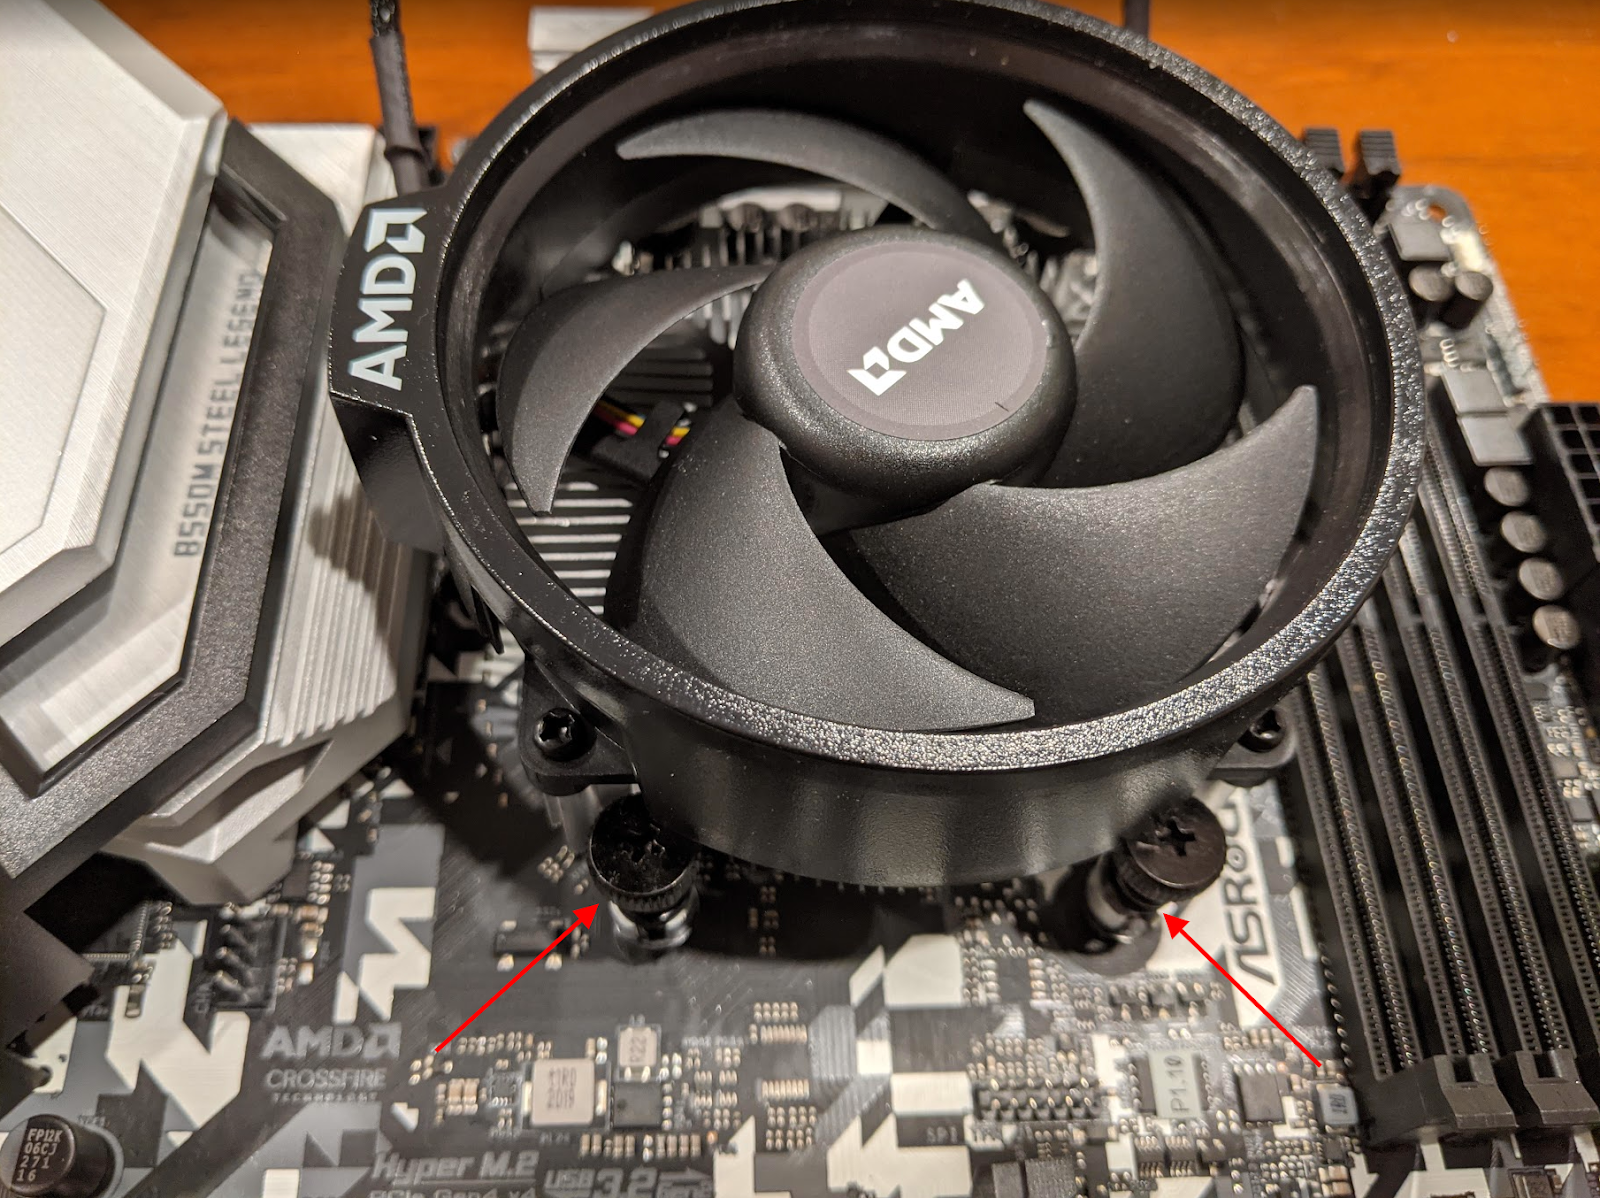
STEP 4: Install your CPU cooler(s)
There are many different types of CPU coolers, and nearly as many ways to install them. Below are the instructions for an AMD Wraith Stealth cooler. (For other manufacturers, please refer to your user documentation.)
- Remove the preinstalled CPU cooler mounting bracket on your motherboard. Keep them, though, because if you ever upgrade your CPU cooler, you may need them.
- Locate the cooler screw holes in the motherboard:
- Position the cooler with the screws above the correct holes on the motherboard around the CPU. Ensure its cable can reach the motherboard:
- Gently screw down each corner, working clockwise around the cooler (you may need to do each corner a couple of times to ensure the pressure is distributed evenly):


NOTES:
- The process for installing an Intel cooler will be very similar to the above, except that, instead of screws, it will have pins at each corner, which you push down to lock into place.
- Some CPU coolers (NOT Intel or AMD) require you to add thermal paste between the CPU and the cooler. This removes gaps and increases cooling efficiency, thereby minimizing the risk of heat damage. Please refer to your CPU’s manual to find out if you need to add thermal paste. If you do, a rule of thumb is to put a pea-sized blob on top of the CPU before installing the cooler.
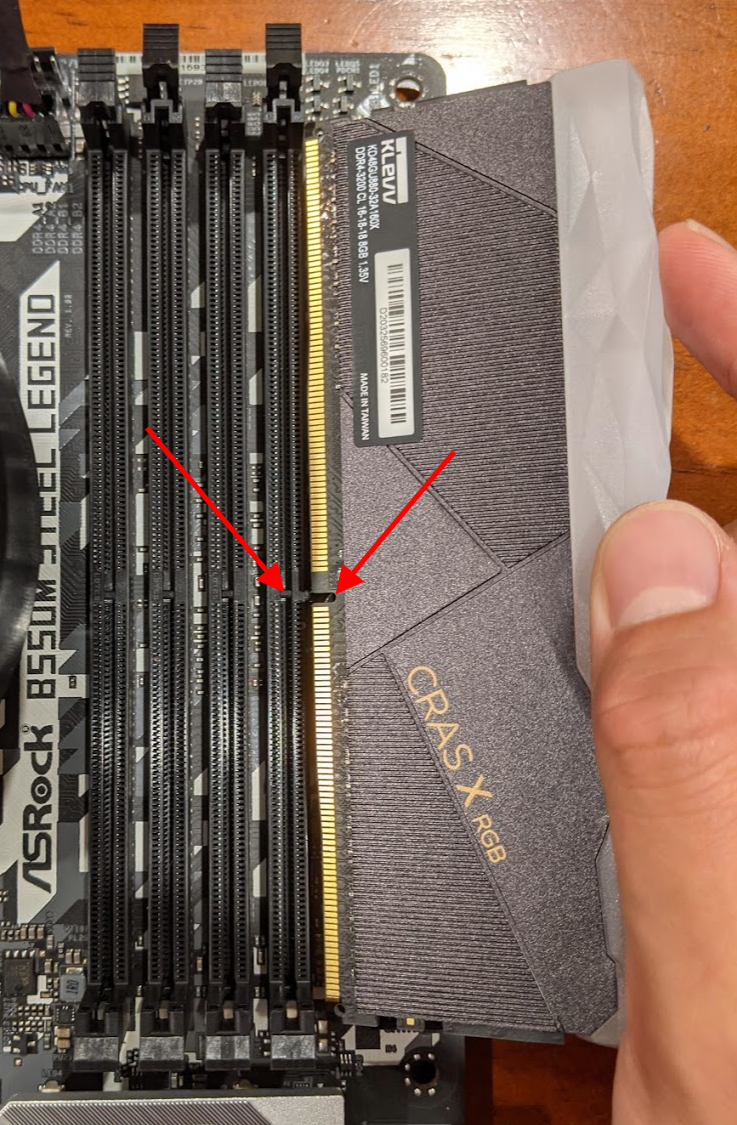
STEP 5: Install your RAM
- Locate the RAM slots on your motherboard. There should be either 2 or 4, located next to the CPU socket:
IMPORTANT: If you’re using 2 sticks of RAM in a motherboard with 4 slots, you should use slots 2 and 4. - Release the clips at each end of the RAM slots that are located at each end:
- On your RAM sticks, locate the gap in the gold pins along the bottom of the stick. This gap tells you which way to install the stick into the RAM slot (it can only be inserted one way).
- Place the first RAM stick in a slot, and apply equal pressure at both ends until both clips click back into the place. You may have to push pretty hard.
- Repeat for the remaining sticks.


Prepare your case
- Unbox your case.
- Remove its side panels:
You’ll probably need to remove some screws at the rear of the case to do this:

Install your motherboard
TIP: You may find the process of installing your motherboard easier if you lie your PC case on its side.
- Check if your motherboard has a pre-installed metal IO shield for the motherboard ports (e.g. audio out, mic in, USB, ethernet):
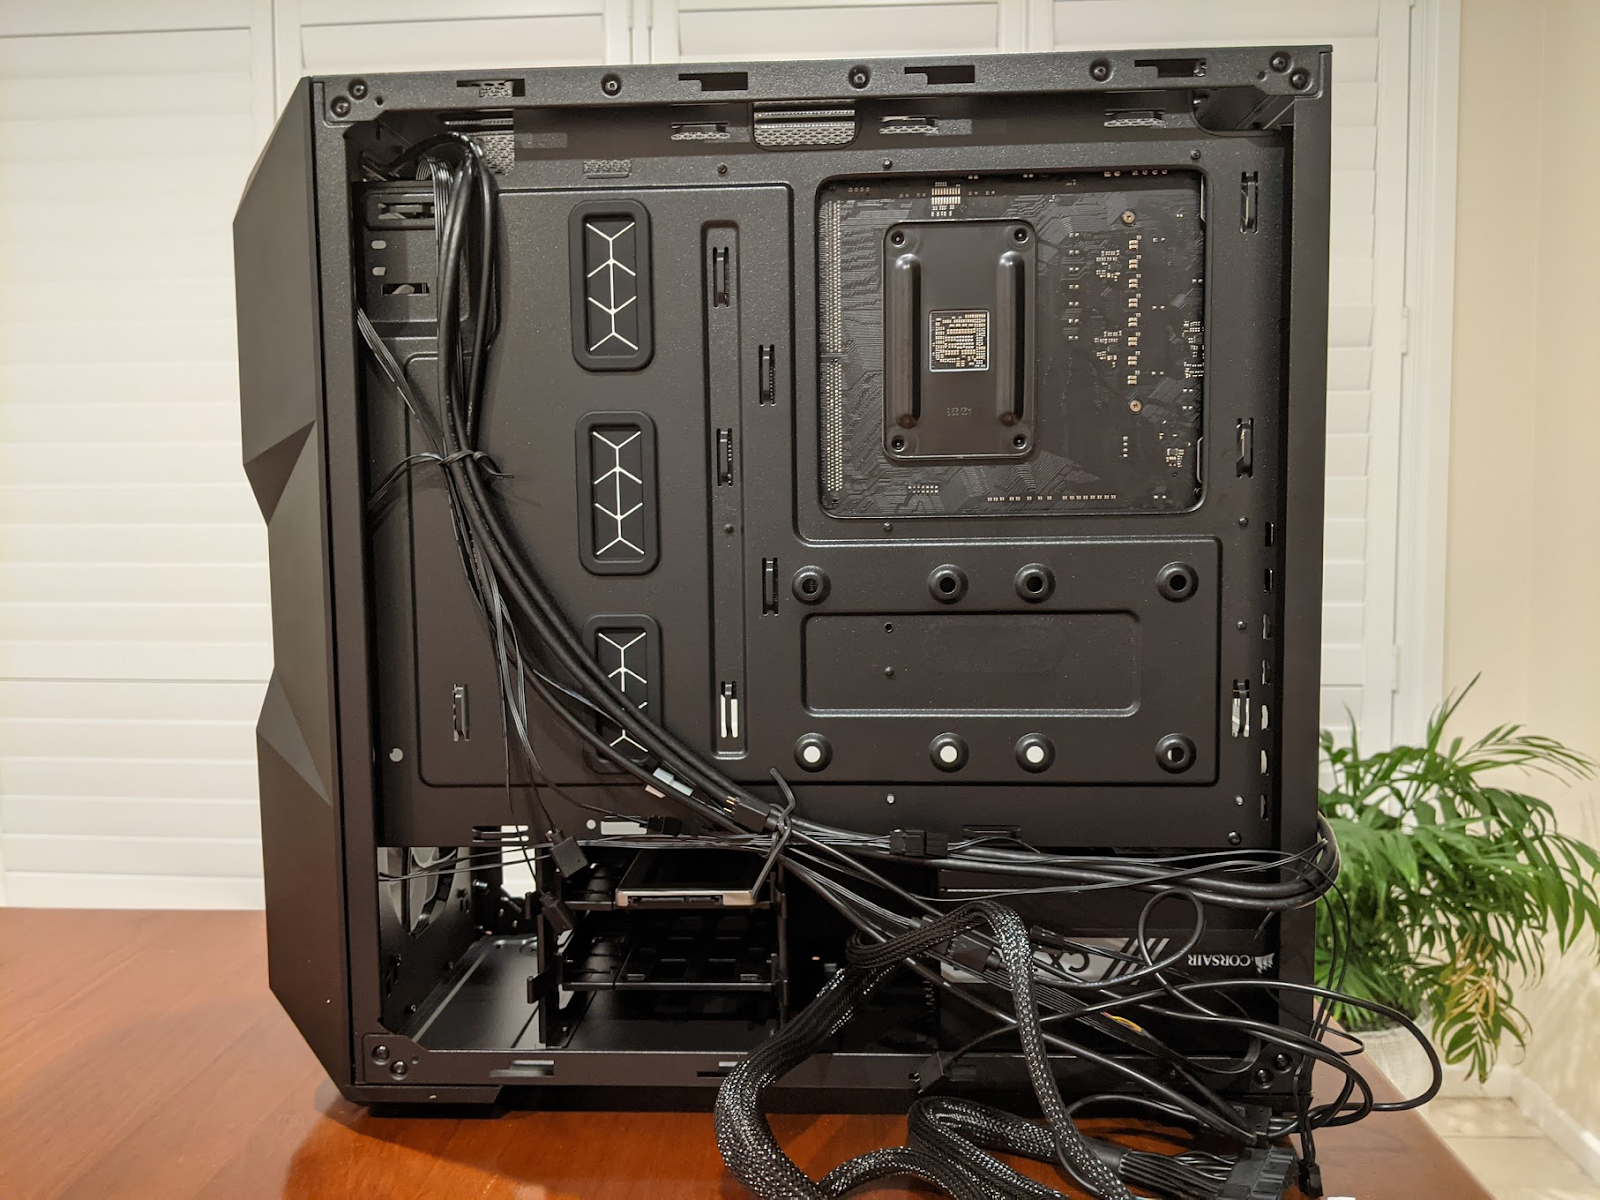
If not, a standalone shield should have come with your motherboard. You’ll need to install it on the back of the case in the top right corner. Install it from inside the case. - In the side panel of your PC case, locate mounting metal standoffs with screw holes inside them:
If you see just holes (without any raised standoffs) like the two lower holes in the photo above, you’ll need to install the standoffs yourself. If so, they should have come with your case, and you should consult your case’s manual for instructions. - Place your motherboard on top of the standoffs and align the mounting holes in the motherboard with the holes in the standoffs:
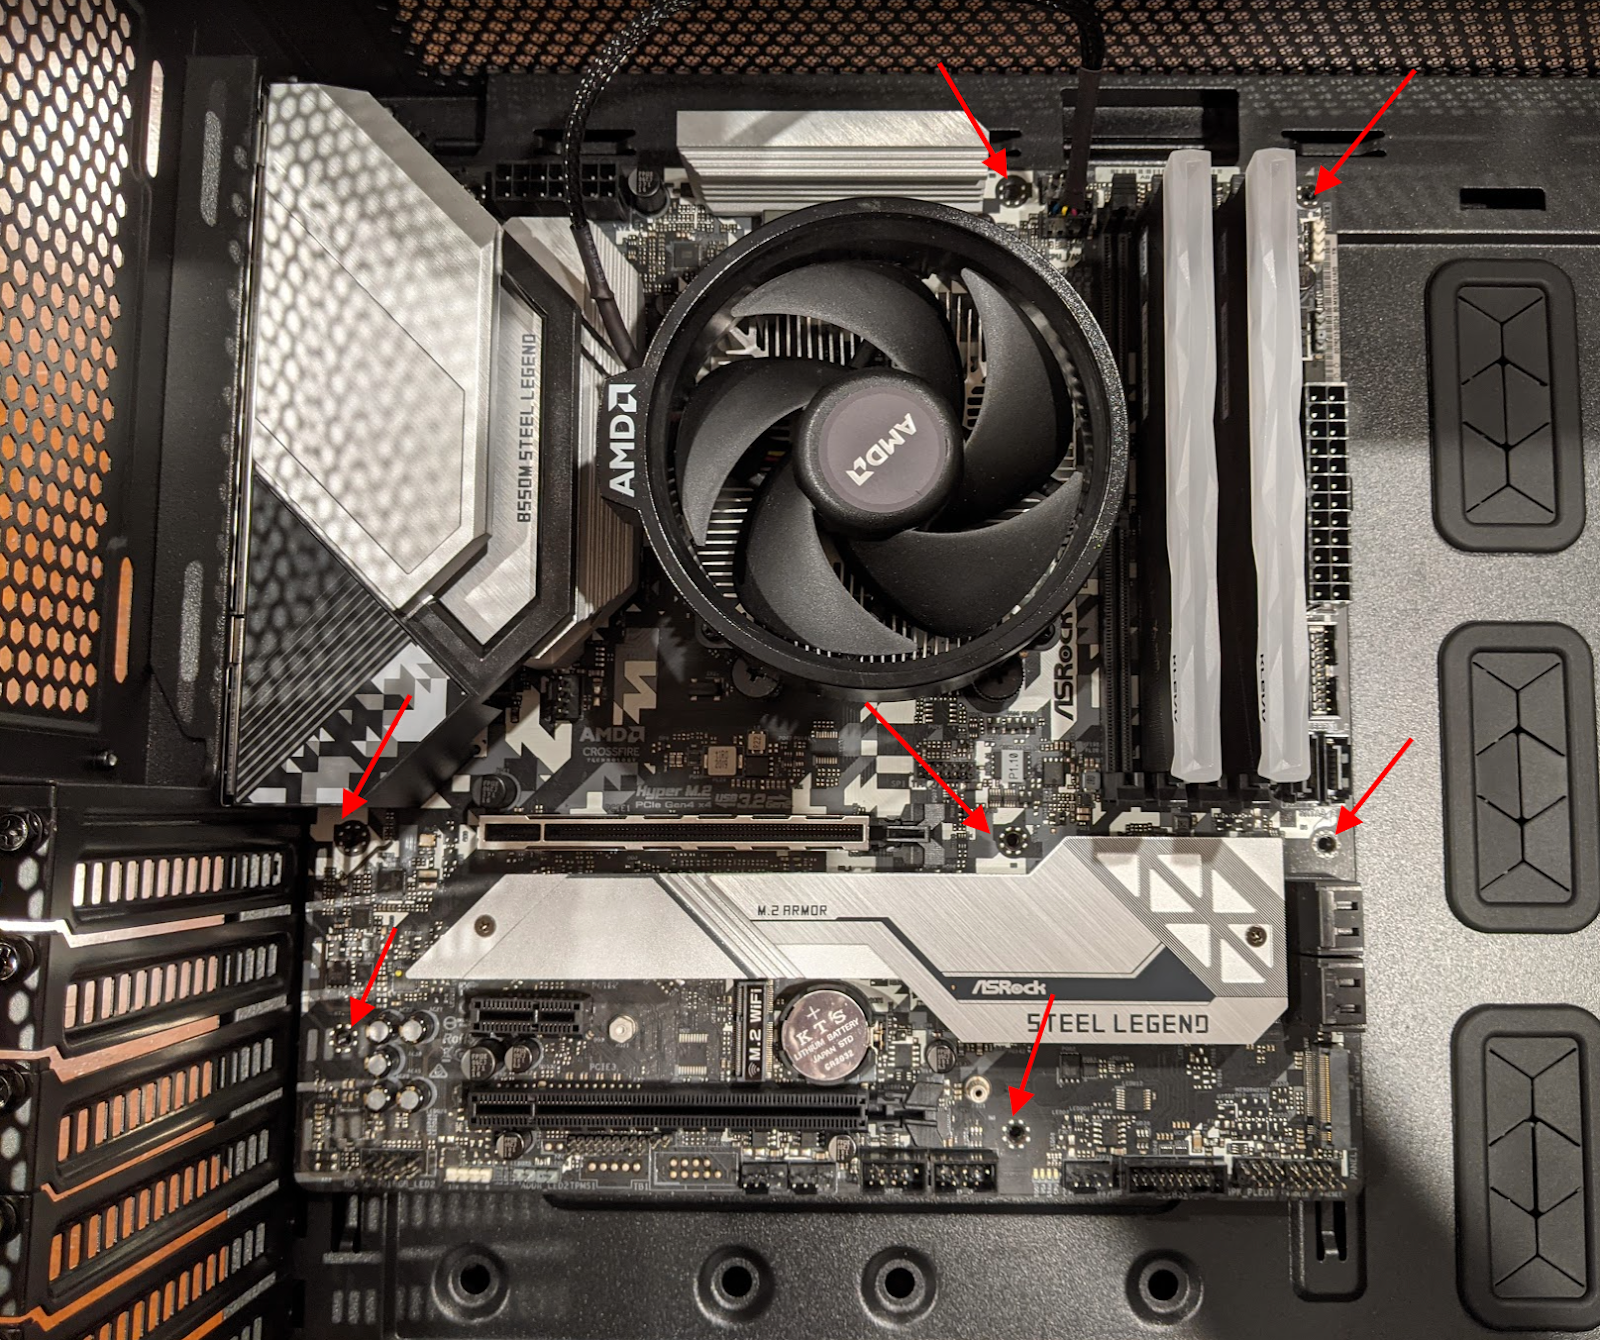
It should look like this from the back of the case: - From the centre outwards, use the screws that came with the standoffs to mount the motherboard to the case:


Install your power supply
WARNING: Do NOT plug in and turn on the power supply until you’ve completed the build. If you do, you may damage your components and potentially injure yourself. Double-check the manufacturer’s instructions in the manual that came with your power supply.
- Locate the power supply housing. It will be a large square space at either the top or the bottom of the case:
If you can’t find it, consult the manual for your case. - Feed all the cables out the side of the case of your case (the side with the solid mounting plate fixed in place). We’ll feed them back through later, one at a time, if we need to.
- Check if your case has an open vent in its base:
- If it does, position your power supply with its fans facing the bottom of your case. If not, position it with fans facing towards the top.
- Fit the power supply into its slot in the case and screw it in:


Install your graphics card
IMPORTANT: Double-check the manufacturer’s instructions in the manual that came with your graphics card before installing.
- Locate the graphics card slot in your motherboard. It will be a large, PCIe x16 slot, probably just underneath the CPU socket:
Depending on your motherboard, it may actually have multiple graphics card slots. - Check if your case has a metal IO bracket shield covering the gap on the back of the case that your graphics card ports will protrude from.
If it does, remove it. (Depending on the size of your graphics card, you may actually need to remove two.) - Lay your computer case on its side, so the motherboard is horizontal.
- Take your graphics card out of it’s anti-static packaging, and place it into the PCIe slot in your motherboard, with the fans facing down. It will fit only one way:
Push down at both ends of the card with equal pressure until the clip clicks into place. You may have to push pretty hard. - Using screws that came with your PC case, screw in the graphics card into the IO bracket on the back of the case. (Where you removed the bracket shields.):


Install your storage device(s)
- Locate the drive bays in your PC case. They’ll probably be towards the front and bottom of the case (but they may be elsewhere):
- If possible, remove one of the bays:
- Clip or screw your storage device into place in it. (Some cases have toolless trays that use a simple pin and clip system instead of screws. If your case requires screws, the screws will have come with the case.) Then re-insert the bay:


NOTE: If your storage device is a solid state device (SSD), there’s no real need to mount it (e.g. in a bracket with screws or clips), because SSDs have no moving parts, so they don’t move around by themselves. You can just place it in one of the drive bays or even in the bottom of your PC case, if you want. But if you want to mount your SSD, you can. The procedure varies, depending on whether your case has dedicated SSD bays. If your case doesn’t have dedicated SSD bays, but you still want to securely mount your SSD, you can buy an SSD drive adapter that allows you to fasten your SSD to one of your 3.5” hard disk drive bays.
Connect (and tidy) all your cables
Button switch, reset switch, power LED indicator & HDD LED indicator cables
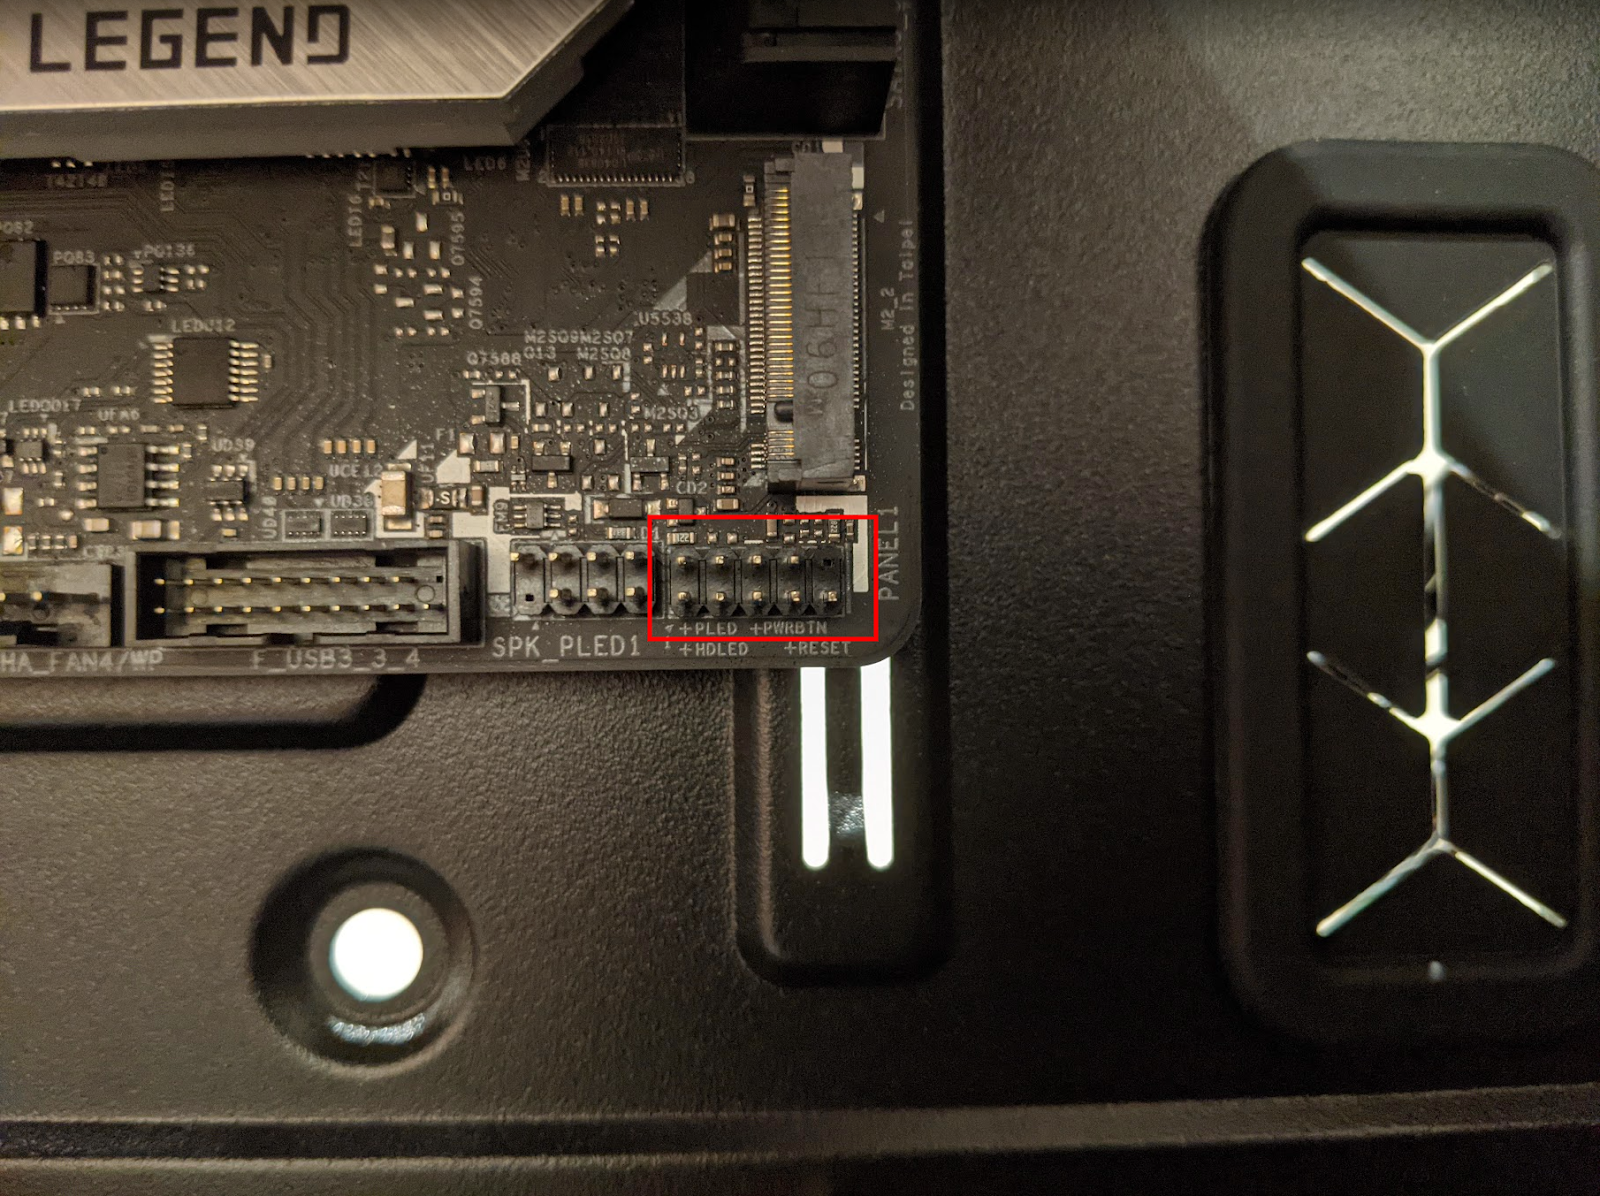
This isn’t too difficult, but it’s very tedious. Chances are, they’ll all plug in somewhere in the bottom right hand corner of the motherboard, but check your motherboard’s manual to be sure. Also be sure to check and double-check that the labels on the cable match the labels on the pins.

USB port cables
The wires for your USB ports connect to the motherboard pins that are labelled USB. Again, refer to your motherboard’s manual for details.


Audio port cables
- Locate the HD_AUDIO cable that connects to the audio ports on the front/top of your computer case:
- Locate the audio pins on your motherboard (probably labelled ‘AUDIO’, but check your motherboard’s manual to be sure):
- Gently slide the HD_AUDIO cable on top:


Case cooling fan cables
If your case has a cooling fan (not to be confused with the CPU cooler discussed below), connect its cable to the appropriate plug, which will probably be labelled ‘CASE_FAN’, ‘PWR_FAN’ or ‘CHA_FAN’, but check your motherboard’s manual to be sure.


CPU cooler cables
Your CPU cooler cable will connect to a plug that’s probably labelled ‘CPU_FAN’ or ‘SYS_FAN’ and is probably located near the top of the CPU socket. Refer to your motherboard’s manual to be sure. Once connected, make sure the cable connection is fully secured in and clipped in.


Hard disk drive (HDD) / solid state drive (SSD) cables
First you need to connect the HDD/SSD to the motherboard:
- Locate the SATA cable provided with either the HDD/SSD or the motherboard. It will look like one of the following (it might not have the metal retention clip):
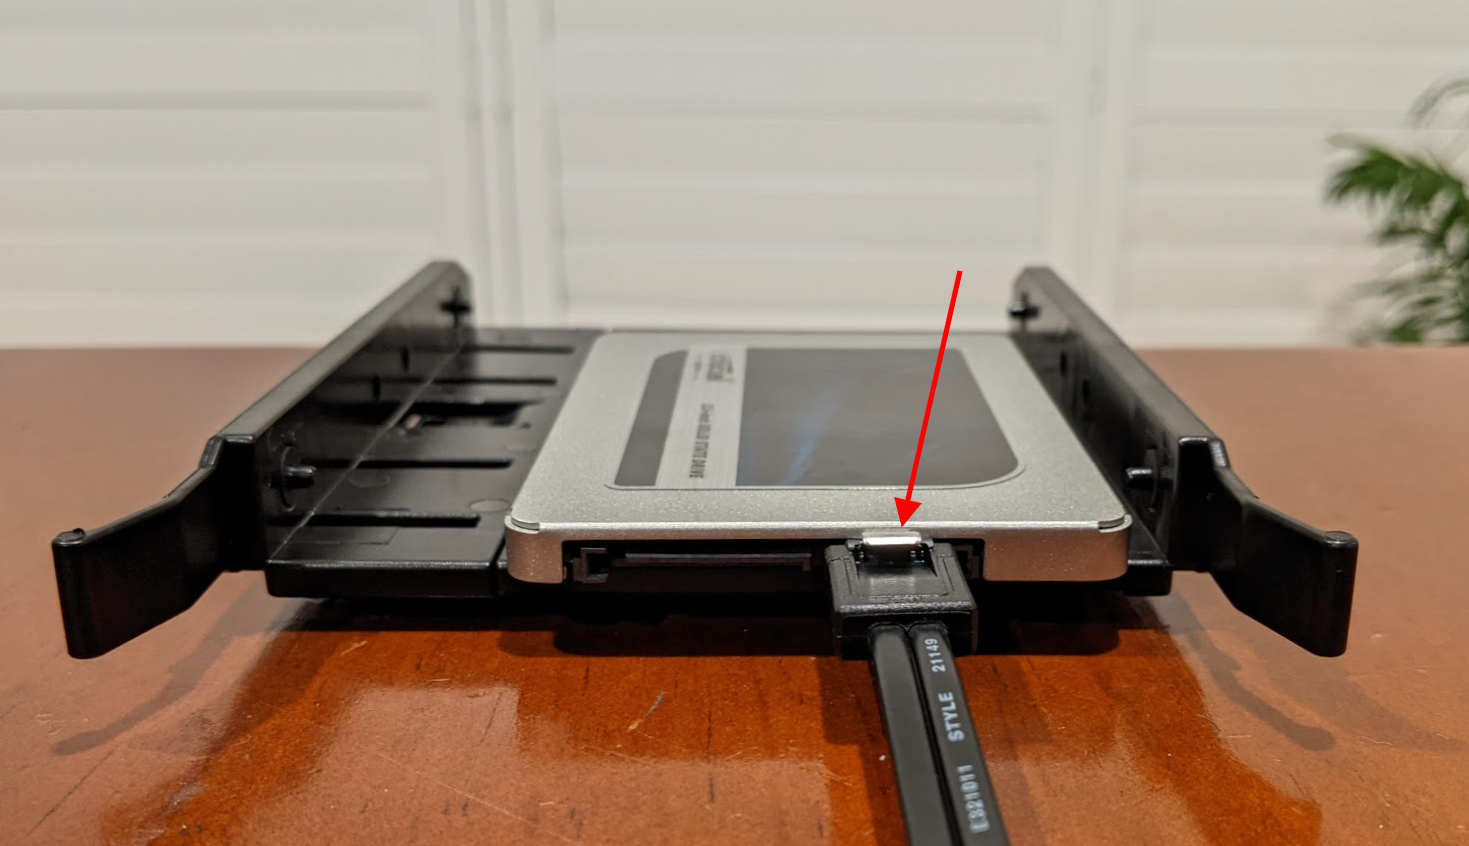
- Plug one end of the SATA cable into the HDD/SSD (if your cable has a right-angle connector, that end usually connects to the HDD/SSD):
- Plug the other into one of the ports labelled ‘SATA’ on your motherboard. Consult your motherboard’s manual to locate these ports.


Then you need to connect the HDD/SSD to your power supply:
- Locate the SATA power cables feeding out of your power supply:
- Plug one of these cables into the power port on your HDD/SSD. This port should be located right next to the SATA connector, but consult your HDD/SSD’s manual to be sure.


Motherboard power cables
- Locate the 24 pin ATX main power cable feeding from your power supply. It’s most likely the largest plug and it’s hard to miss:
- Route this through your computer case and plug it into the appropriate ATX_PWR1 plug on your motherboard. There’s a little clip so make sure that it’s fully secured and the clip locks in.


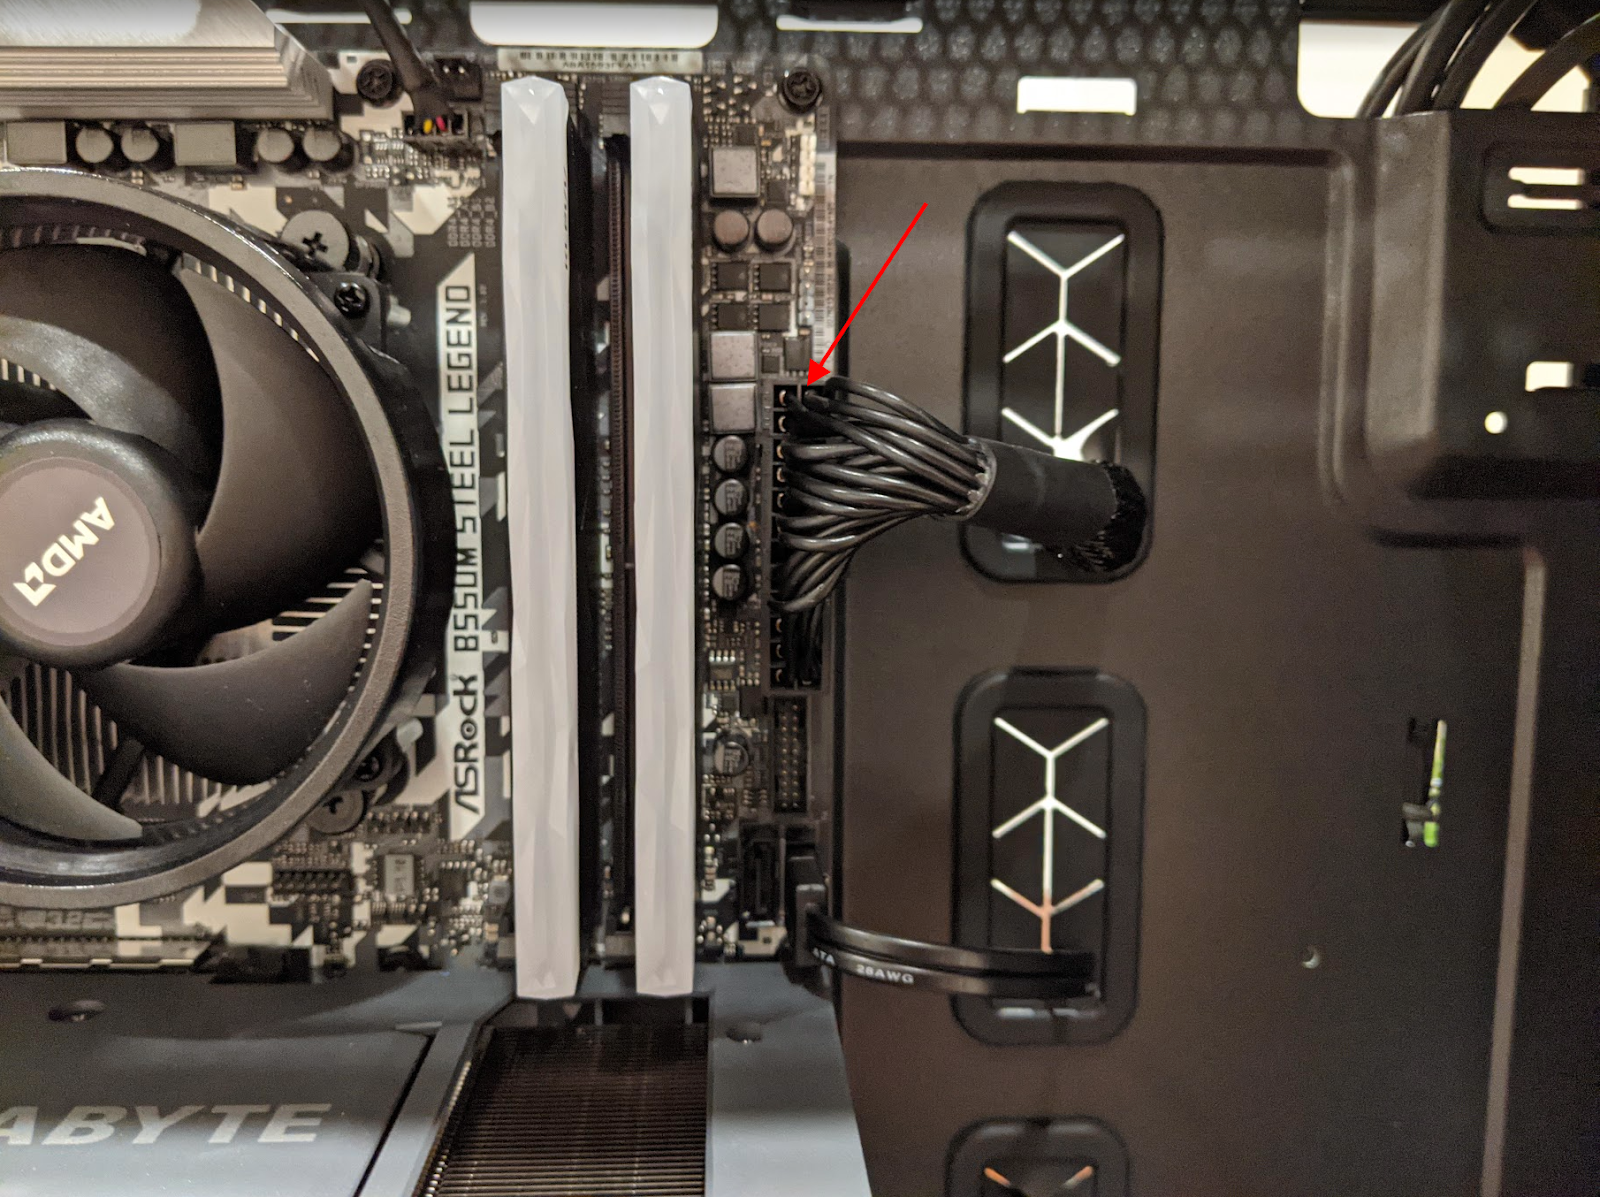
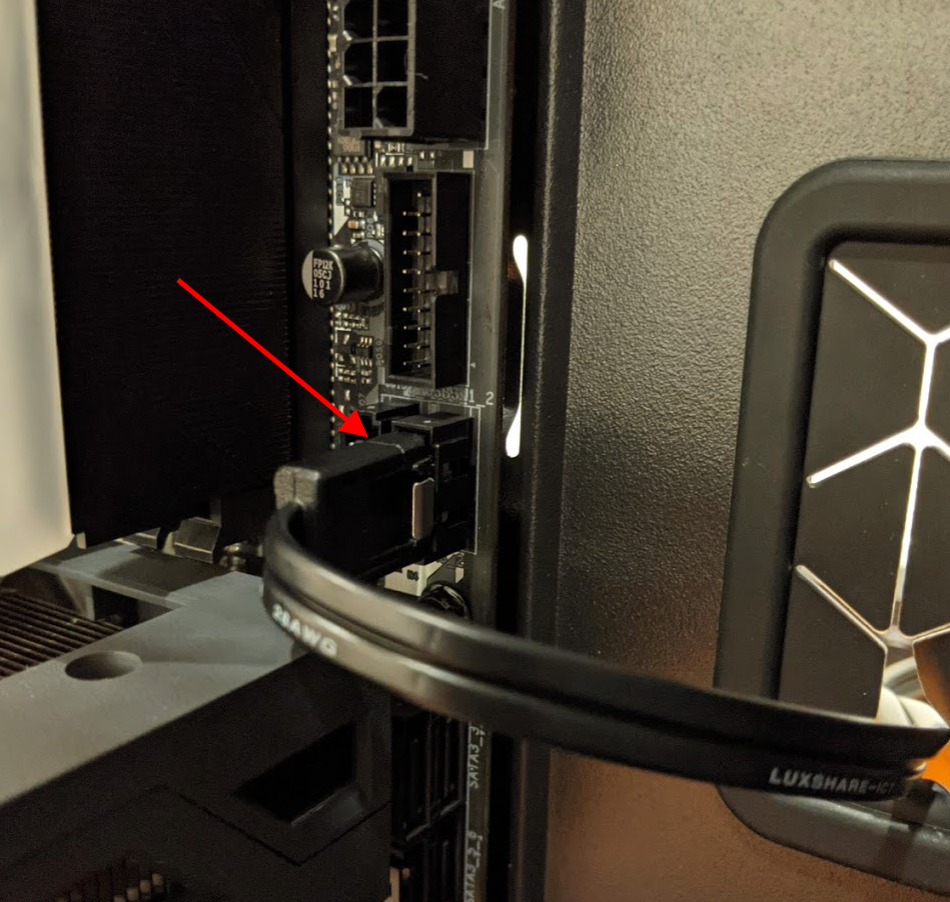
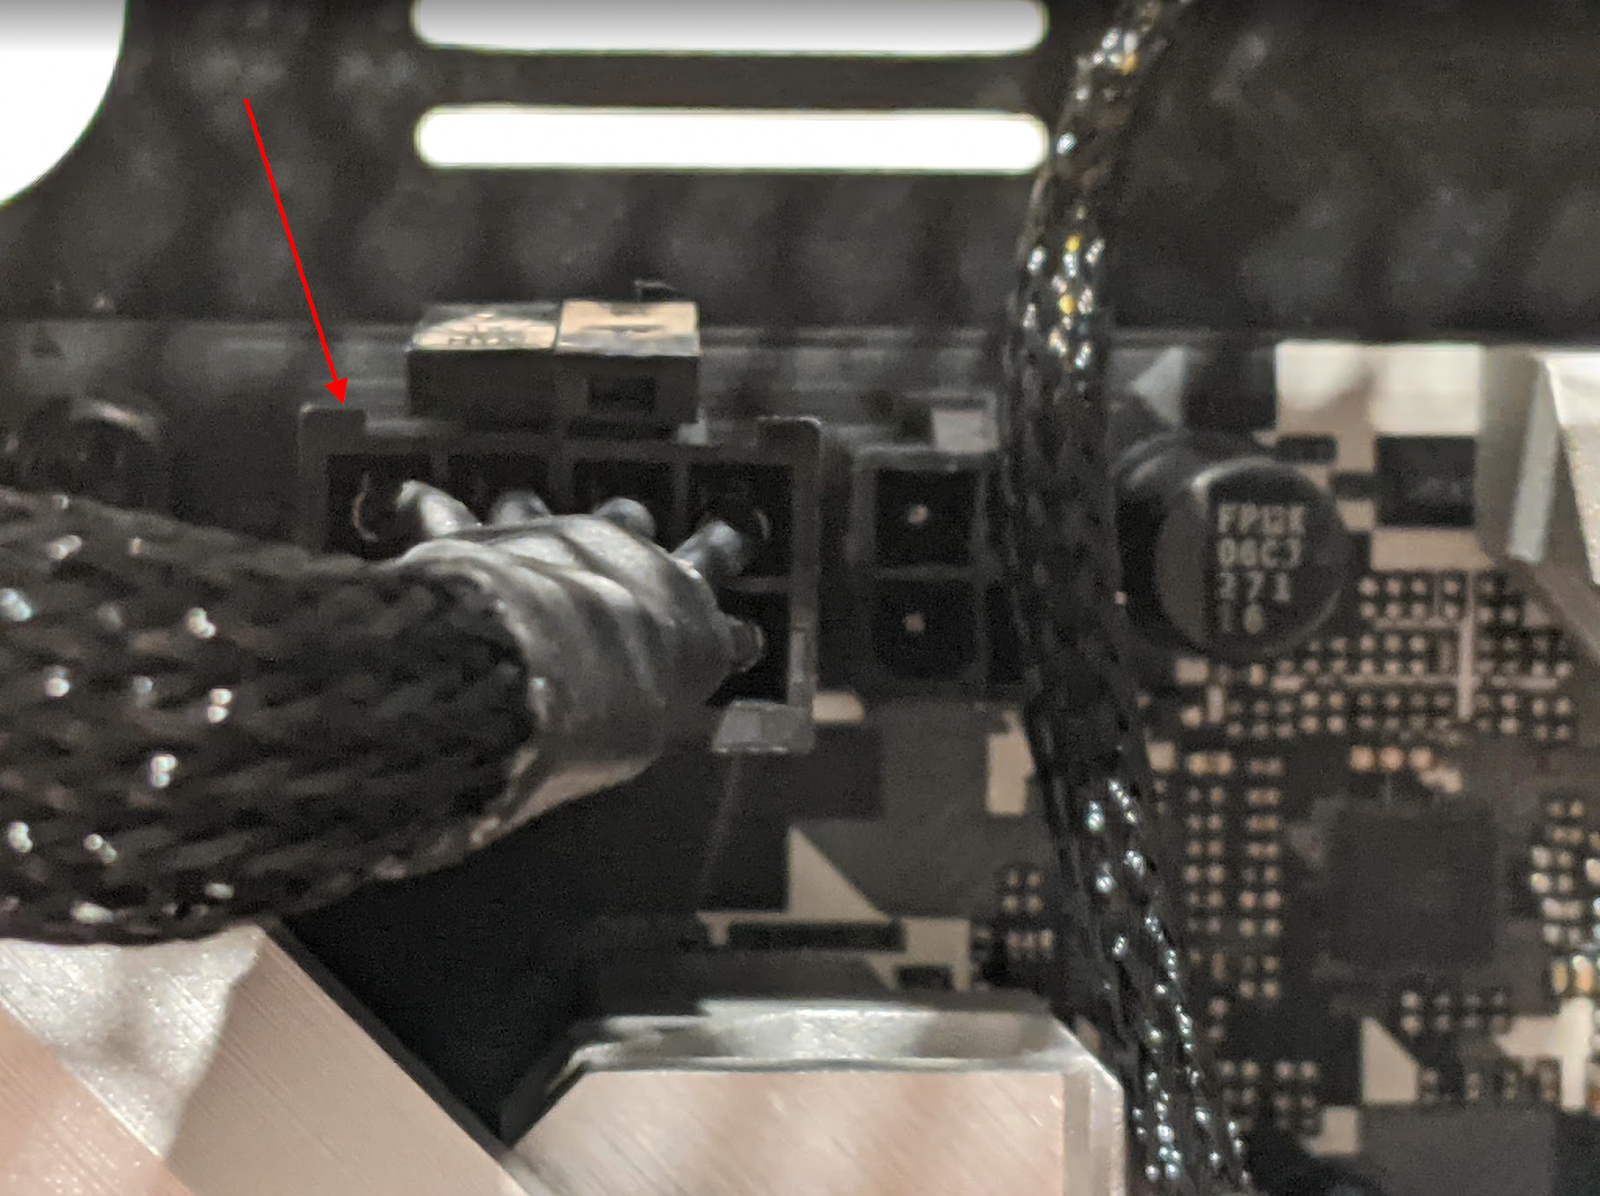
CPU power cables
- Locate the 8 pin CPU power cable feeding from your power supply:
- Route this through your computer case and plug it into the CPU power plug on your motherboard. There’s a little clip so make sure that it’s fully secured and the clip locks in.

Graphics card power cables
Some graphics cards may not require external power from the power supply, and can simply be powered from the motherboard. But as graphics cards become more and more powerful, they require more and more power.
- If your graphics card requires power, it will have a power plug on the card that will look something like this:
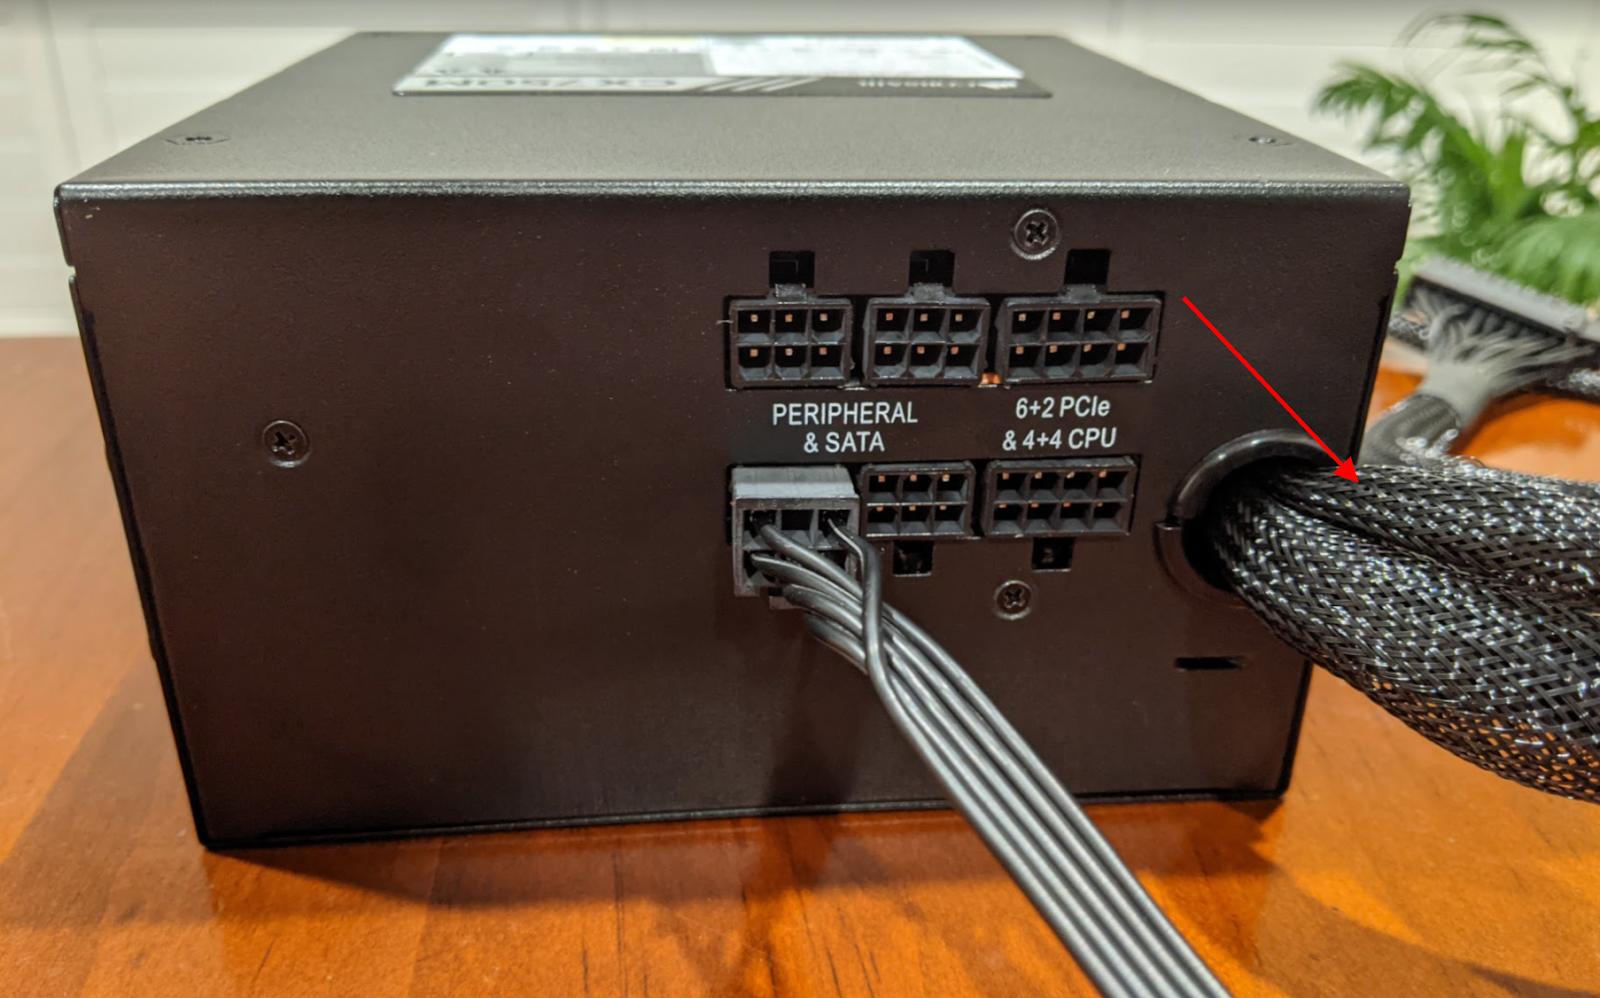
- Locate the appropriate PCI express cable feeding out of your power supply:
Note that if you have a modular power supply, this cable might not yet be connected to your power supply, and you’ll have to plug one end of it into the 6+2 PCIe port: - Plug PCI express cable into the power plug on your graphics card (mentioned above):


Tidy all your cables
Most people don’t give much thought to cables when building their gaming PC, but it’s actually one of the most important steps.
Messy cabling makes it very difficult to work in your PC case, because they always get in the way. Plus they take up a lot of space, so you can’t fit as much hardware in your case as you should be. And, of course, if you have a see-through side panel on your case, they make the inside of your case look terrible!
The basic rule of thumb is to try to route all cables behind the fixed, interior side-panel where they won’t be seen.

Plug in your mouse, keyboard & headset
You’re just about there!
Now you just need to plug in your mouse and keyboard.
- Wired – If you have a wired mouse / keyboard, just plug it into a spare USB port, and you’re ready to go.
- Wireless – If it has a USB receiver, plug that in and the setup process will start automatically when you boot into Windows. If it’s a bluetooth mouse, you’ll need to connect it to your computer when you boot into Windows.
Power it up, and turn it on
Congratulations! You’ve successfully built your very own gaming PC!
Now, before putting the side panels back on your case, you should test to see if the computer will boot up.
- Turn the power on at the wall
- Turn the power switch on at the back of the case
- Press the start button on the front / top of the case to turn on the computer
You should hear things whir into motion, and see one or two lights turn on. In around a minute, it should display the boot screen. The appearance of this screen will vary, depending on the manufacturer of your motherboard, but it will look something like:

Problems?
If your computer doesn’t display the boot screen when you power it up, or if it does display this screen but then doesn’t respond to any input, review all the steps to this point, to make sure you didn’t miss anything or get anything wrong.
If you’re sure you followed the instructions properly (both here and in your user manuals), do a Google search for the problem, to see if there are any troubleshooting tips online.
If this doesn’t help, it’s probably best to take your PC to your local computer repair shop.
Replace the side panels
Once you’ve tested that your new PC starts properly, you can put the side panels back on your case, and get everything clean and tidy ready for installing windows. (i.e. Clean up your workspace, dust everything down, get your mouse mat in place and get everything positioned on your desk properly.)
Install Windows
What we’re going to do here is install the unactivated, free version of Windows 10. This version has all the normal functionality of Windows, but:
- It has a small watermark in the bottom right-hand corner; and
- You won’t be able to change personalization settings (e.g. changing colours and themes).
Once you’ve installed the free version, you can activate it with an existing license, or buy a new license, to remove the watermark and customize the personalization settings.
What you’ll need to install Windows:
- A minimum 8GB USB flash drive. IMPORTANT: All the data on this drive will be erased during the installation process, so if there’s anything important on it, back it up first.
- Another Windows computer that’s connected to the internet.
- If you’re installing Windows onto an old hard drive that has data on it, be sure to back up all of that data before proceeding.
How to install the free version of Windows 10:
- Plug your USB flash drive into the other computer (the one with internet access).
- Open File Explorer (click the Start menu, type file explorer and click File Explorer):
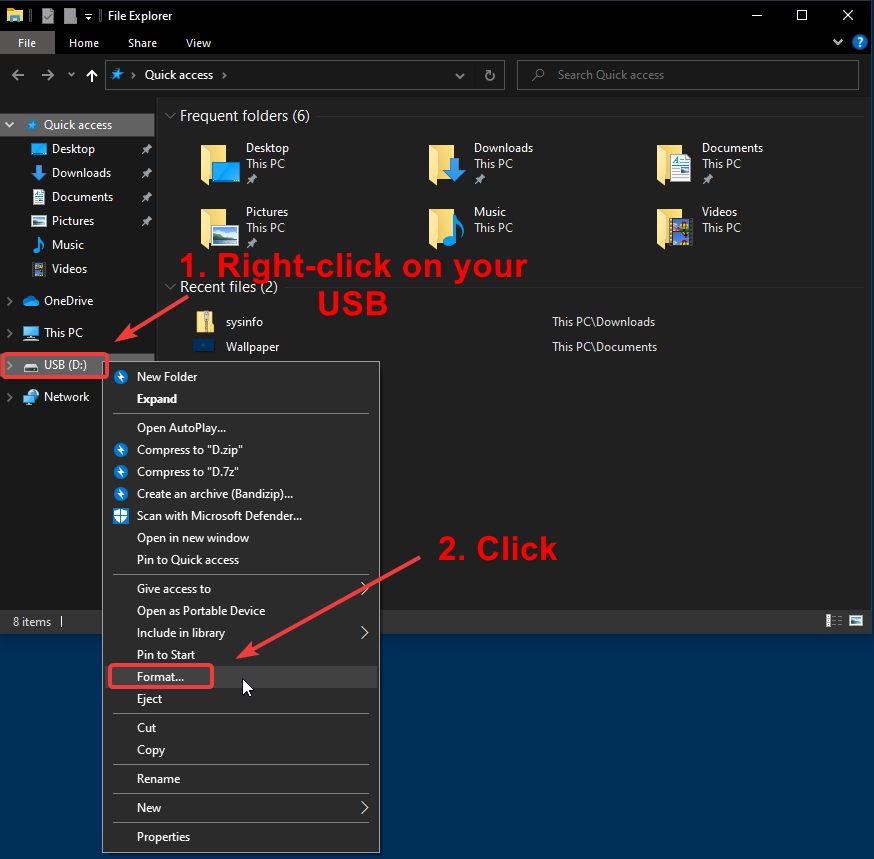
- Now you’re going to format your USB flash drive. This will erase all data on the drive, so be sure to back it up first. Then Right-click the drive and click Format:
- Select FAT32, make sure Quick Format is selected, and click Start:
- Download the appropriate Windows 10 Disc Image.


- Run the downloaded disc image file.

- Select Accept:
- Select Create installation media for another PC then click Next:
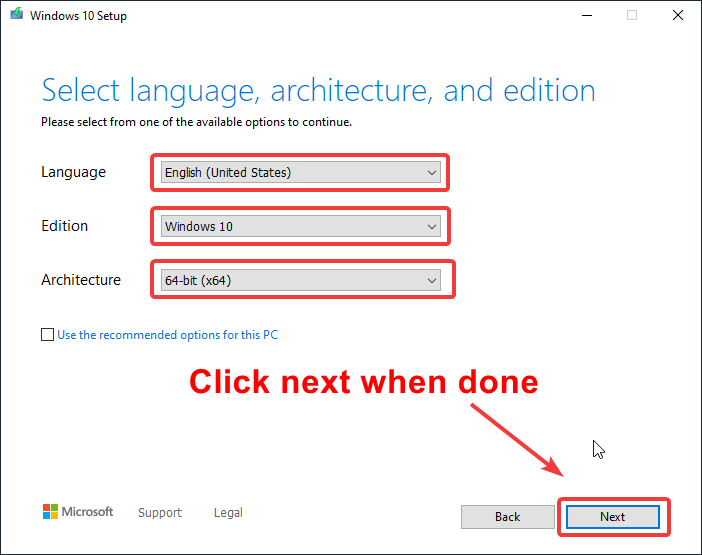
- Select your language, choose Windows 10 as the edition and 64-bit (x64) as the architecture, then click Next:
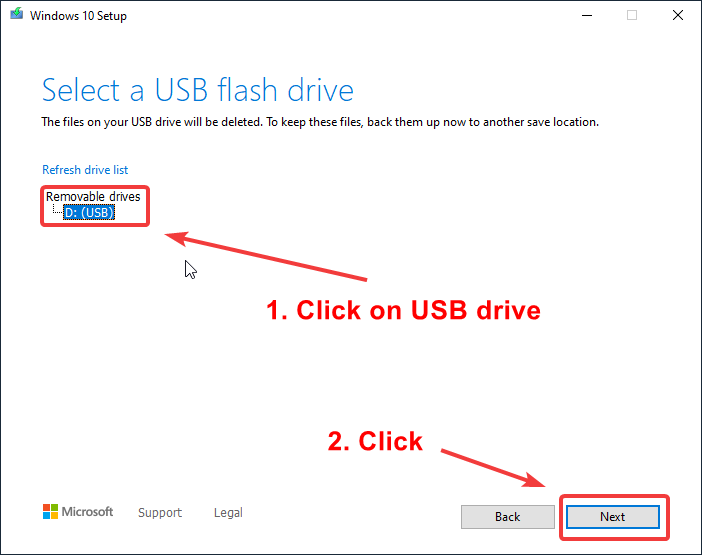
- Select USB flash drive then click Next:
- Select the USB flash drive you’re using and click Next:
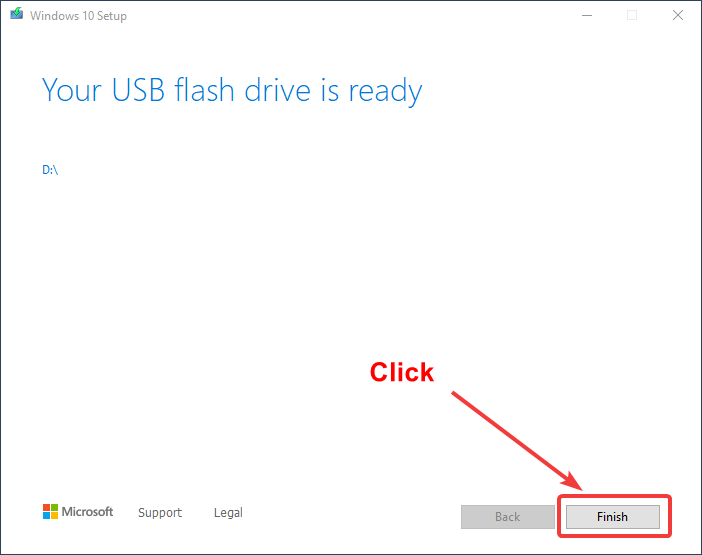
The formatting process will now begin. It may take several minutes to complete. - Once the format is complete, click Finish.


- Back in File Explorer, right-click on the USB drive in the left pane, and select Eject. (IMPORTANT: Don’t just pull the USB drive out, because this can corrupt the data on it.)
- Plug the USB flash drive into your new PC.
- Turn your new computer on.
- The Windows setup process should automatically start. (If it doesn’t, you need to set your computer to allow booting from a USB drive.)
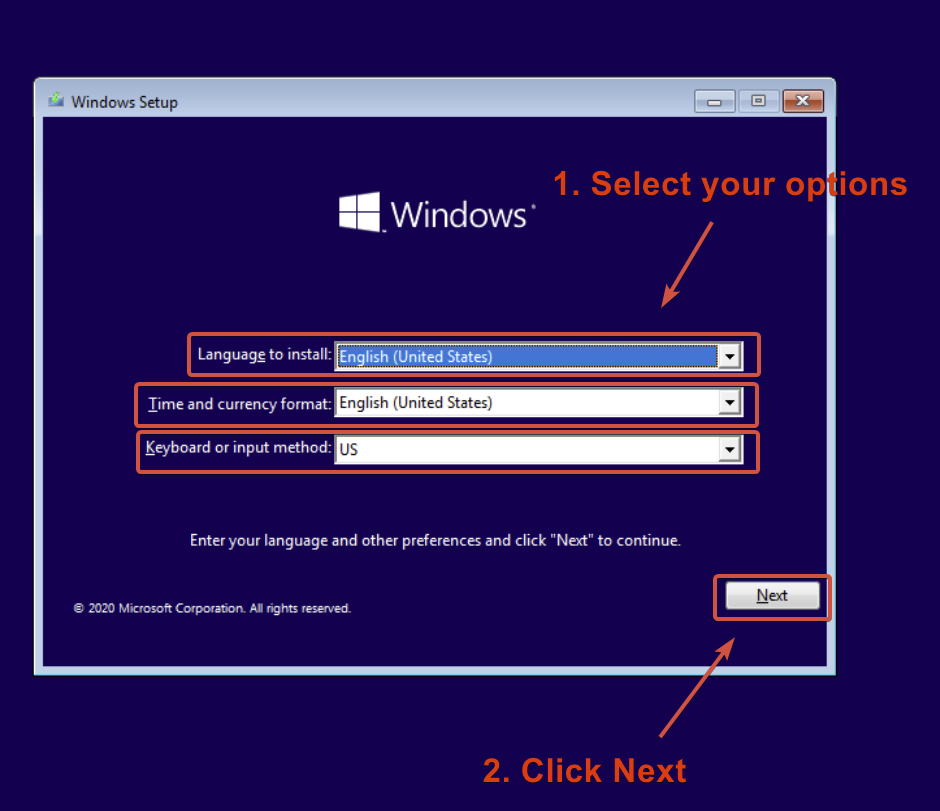
- Select your language, time and currency format, and your keyboard input then click Next:
- Click Install now:
- At the Activate Windows screen, enter your product key if you have one or select I don’t have a product key. (You can always activate a product key later through Windows if you want.)
- Select which version of Windows you’d like to install and click Next:
- Tick the the I accept the terms and conditions checkbox and click Next:
- Click Custom installation:
- Select the hard drive you want to install Windows on. (If you have an SSD, we recommend installing it there, so starting Windows is faster, day to day.) Then click Next.
- Your computer will then restart. When it does, remove the USB drive so your computer doesn’t boot off it again.
- Windows is now installed! Follow the on-screen instructions to complete the setup.


Install a network driver (if you can’t connect to the internet)
If you can’t connect to the internet when Windows is installed, don’t panic. Sometimes the network driver that comes with Windows doesn’t work, straight out of the box.
To solve this problem, you can connect to the internet with a Wi-Fi adapter (if you have one), then download and install the required network driver. Once it’s installed, you’ll be able to connect to the internet via ethernet cable.
If you don’t have a Wi-Fi adapter, you can install a network driver by doing an ‘offline scan’ with Driver Easy.)
Optimizing & maintaining your gaming PC
If you want to get a few good years of gaming fun out of your new setup, you need to keep it in tip-top shape. For the most part, this comes down to a few basic regular housekeeping tasks:
- Keep it clean
- Perform a Windows Update
- Update your drivers
- Test your memory
- Test the integrity of your storage device
- Check for missing or corrupt system files
- Uninstall unused your browser extensions
- Turn off unnecessary animations
- Clear your temp files & other clutter
- Run a virus scan
- Run a malware scan
- Update your applications
Keep it clean
If your computer case gathers dust, it can quickly overheat. At best, this will cause performance problems; at worst, it will cause damage and potentially even a fire.
Part of the solution is to make sure your computer case is:
- not on the ground
- not on carpet
- not in an enclosed space with no airflow / ventilation
You should also regularly check the rear of your computer for built-up dust – particularly on and around any vents (e.g. power supply and cooling fan vents). If there is dust on these vents, use a compressed air can and/or a microfiber cloth to remove it.
Finally you should keep an eye on the interior of your computer case. Dust can make its way into the case. Every 6 months or so, you should remove the sides of your case and check inside for accumulated dust. If you see any, you should use a vacuum cleaner with a soft brush attachment to remove it.
Perform a Windows Update
Windows has an inbuilt service called Windows Update that installs the latest fixes and security improvements, as well as some driver updates.
To perform a Windows Update:
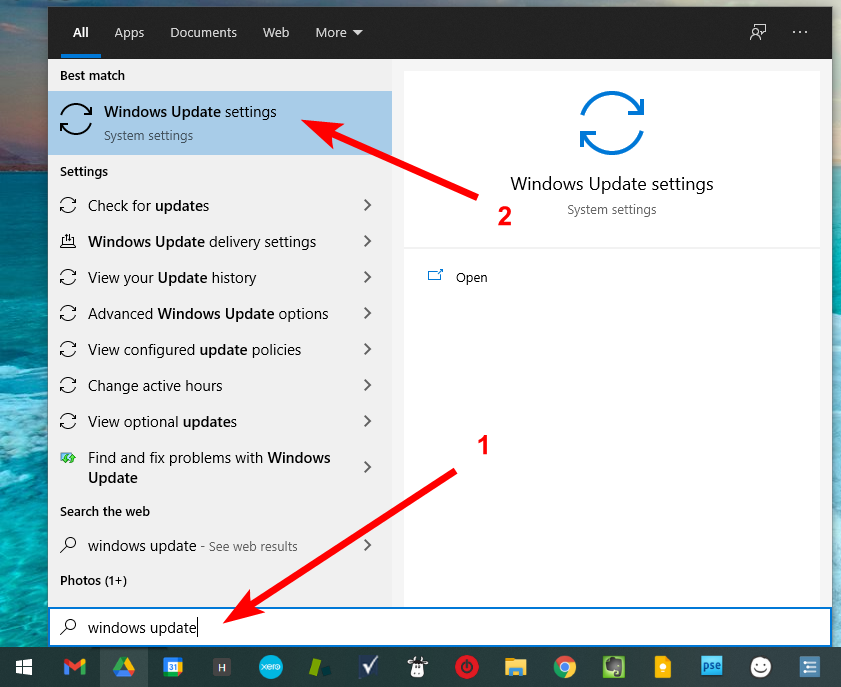
- Select the Start button and type Windows Update, then select Windows Update Settings:
- Windows will automatically check for and download any available updates. (If it’s been a while since you last did a Windows Update, it may say “pending install” next to each listed update for quite a while, without any way to install them. But eventually it will prompt you to install them. Click Install now:
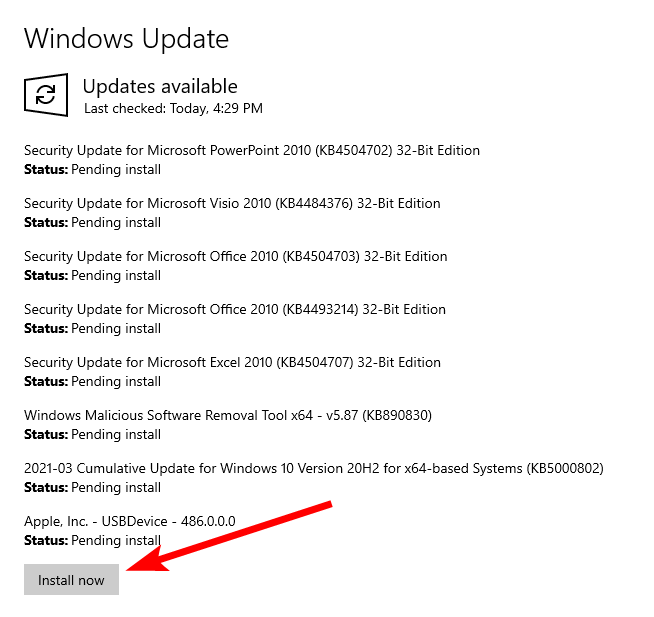
Windows will then install the updates. This can take quite a bit of time, and your computer may restart several times in the process.
Update your drivers
To keep your gaming computer in good shape, you need to keep your device drivers up to date.
Drivers are like interpreters between Windows and your devices, and if they’re out of date, you’ll probably start experiencing problems. Your computer may slow down, start freezing or crashing, or potentially even refuse to start up altogether. In particular, if you let your display driver get out of date, you’ll eventually have problems playing games (e.g. laggy performance, blocky graphics, games crashing and hanging).
Windows is supposed to automatically update your drivers (through Windows Update), but it doesn’t do a great job of it. Partly because the device manufacturers often take a long time to get their drivers into a Windows Update, and partly because Windows Update ignores driver updates it considers ‘optional’ (even when they provide important functionality). Learn more about why you can’t rely on Windows to keep your drivers up-to-date…
You can update your drivers manually if you have the time and expertise, but in our opinion, the best way to ensure your drivers remain up to date is to use a tool like our product, Driver Easy Pro. With Driver Easy Pro, you can update all your drivers with just one click. You don’t have to know anything about computers, and all the drivers come direct from the manufacturer.
Here’s how Driver Easy Pro works
Step-by-step instructions
To automatically update to the correct version of all the drivers that are missing or out of date on your system:
- Buy and download Driver Easy PRO.
- Run the downloaded executable file and follow the on-screen prompts.
- Run Driver Easy and click UPGRADE.
- Enter the software key you were emailed when you bought Driver Easy.
- Click Scan Now. Driver Easy will then scan your computer and detect any devices with missing or outdated drivers.
- Click Update All. Driver Easy will then download and update all your outdated and missing device drivers, giving you the latest version of each, direct from the device manufacturer.


That’s it. You can go grab a coffee, while Driver Easy does all the work for you!
Test your memory
There are many tools available for testing your gaming computer’s memory (RAM) – some free, and some paid. We’ve found the best option is to use both Windows Memory Diagnostic and MemTest86. Both are free tools.
Note that both these tools take quite a long while to scan your RAM, and you won’t be able to use your computer while they’re scanning.
How to test your RAM with Windows Memory Diagnostic
Windows Memory Diagnostic is the easiest of the two tools to use, but also the least powerful. It’s a good starting point though. To scan your memory with Windows Memory Diagnostic:
- Click the Windows Start menu and type memory
- From the search results, select Windows Memory Diagnostic
- Select Restart now

When your computer restarts, the diagnostic tool will run. When it’s complete, your computer will restart, and Windows should display a message showing the results of your test.
If you don’t see the results appear automatically when you restart Windows, you can access them through the Windows Event viewer:
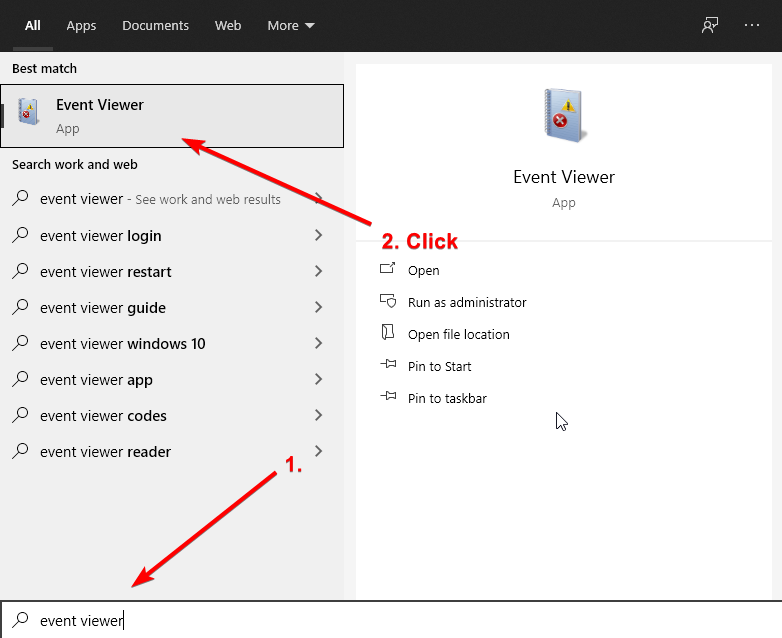
- Click the Windows Start menu, type Event Viewer and click Event Viewer:
- Expand Windows Logs, then click System:
- Click Find in the right pane, then type memorydiagnostic in the find dialog and click Find Next:
- You’ll see the results appear in the lower half of the window:


How to test your RAM with MemTest86
MemTest86 is a much more powerful memory testing tool than the native Windows tool, but it’s also a little more difficult to use. Note that MemTest86 takes quite a long while to scan your RAM, and you won’t be able to use your computer while it’s scanning.
To scan your memory with MemTest86:
- Insert a USB drive (e.g. a thumb drive) into your computer
- Visit https://www.memtest86.com/ and click DOWNLOAD:
- Unzip the downloaded zip file:
- Browse to the unzipped memtest86-usb folder, and double-click the imageUSB.exe file:
- Click Yes when prompted to allow the app to make changes to your device
- Select your USB drive, then click the Write button.
- Once it’s finished, click OK then Exit. You now have a bootable USB drive.
- Next you need to boot your computer from the bootable USB drive you just created. To do this, your computer must be set to allow booting from USB. The easiest way to test whether your computer can boot from USB is to simply restart your computer with the USB drive inserted. If your computer is set to allow booting from USB, it will restart in the MemTest86 product (a DOS type screen) and immediately begin testing your RAM. If it’s not set to allow booting from USB, it will restart into Windows as per usual. In this case, you’ll need to set it to boot from USB.
- Once MemTest86 is scanning your RAM, you can just sit back and wait for it to finish. At the bottom right corner, it will show you how many errors it finds.
- When it’s finished scanning, it will beep and display a result. Hopefully you’ll see “PASS” in big green letters.


What to do if you get errors
If either test returns errors, it’s likely that at least one of the following is true:
- At least one of your memory sticks is faulty; and/or
- At least one of your motherboard’s RAM slots is faulty.
So you need to test for faulty RAM sticks and motherboard slots.
This is a process of elimination. It’s a bit tedious, but it’s the only way.
Here’s how to do it if you have 4 RAM sticks (if you have only 2 RAM sticks, skip to step 3):
- Remove two of your RAM sticks, and run the test again. (IMPORTANT: Don’t remove two that are right next to each other. Remove sticks 1 and 3 or sticks 2 and 4.)
- Did you get the error again?:
- NO – The plugged-in sticks (and their slots) are fine. The problem is with the sticks you removed (or their slots) and you can skip to step 3.
- YES – One of the plugged-in sticks (or its slot) is faulty. But you can’t assume that’s the ONLY problem. One of the other two may have a problem as well. So you need to replace the sticks you removed, remove the other two, then test again.
- Once you’ve identified which pair of RAM sticks / slots caused the error, you need to figure out which stick or slot is faulty. To do this, test again with just one of those sticks plugged in.
- Did you get the error again?:
- NO – The plugged-in stick and its slot are fine. The other stick (or its slot) is faulty.
- YES – The plugged-in stick or its slot is faulty. But you can’t assume that ONLY that stick / slot is faulty. The other one may be too. So you need to plug in the other stick into its original slot, remove the stick you just tested, then test again.
- Once you’ve identified the problematic RAM stick & slot combination, you need to figure out whether it’s the stick or the slot that’s the problem. To do this, switch out the stick with another that you know is fine, and test again.
- Did you get the error again?
- NO – The stick you removed is faulty.
- YES – The current slot is faulty. But you can’t assume that the slot is the ONLY problem. You still need to rule out the stick you removed. To do that, remove the stick you just tested, plug the other stick into another slot and test again.
- Did you get the error again?
- NO – The stick is fine.
- YES – The stick is faulty.
If you have a faulty RAM stick, you can just buy a replacement. (Make sure you buy the same type and size as you already have.)
If you have a faulty RAM slot on your motherboard, unfortunately, you’ll probably have to buy a new motherboard.
Test the integrity of your storage device
Although modern data storage devices are generally pretty reliable, they can still have problems. For example, they can have corrupt entries in their master file table (MFT), bad security descriptors associated with files, incorrect information about saved files (e.g. time stamp or file size) or bad sectors (e.g. badly saved data or physical damage).
Windows has an inbuilt tool, called Chkdsk, that scans for these sorts of problems and attempts to fix some of them (it can’t fix physical damage, but it will mark those bad sectors so they won’t be used again).
IMPORTANT: The following scan takes a long time, so it’s best if you do it once you’re finished working for the day.
To run a disk error check:
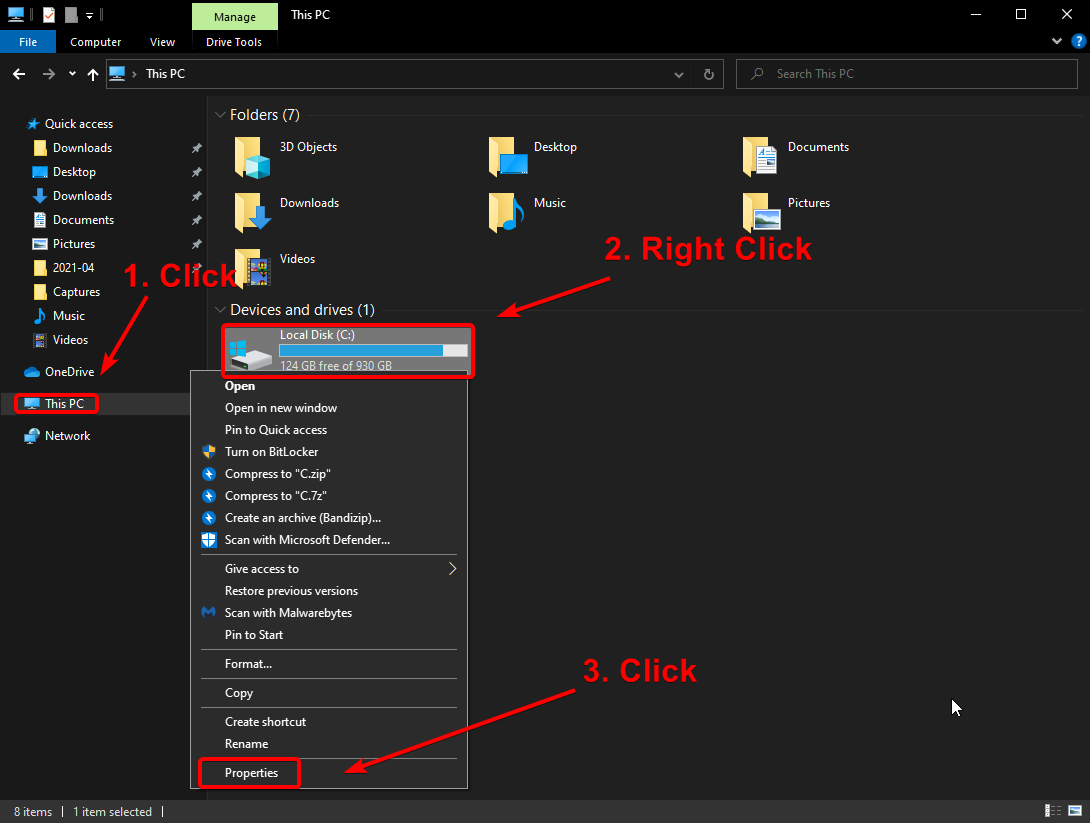
- Click the Start menu and type file explorer, then click File Explorer:
- Select This PC in the left pane, then right-click on your system disk (e.g. C:) and select Properties:
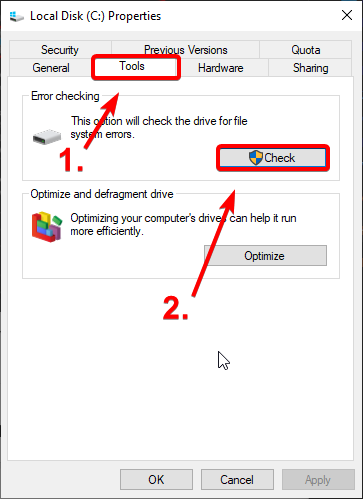
- Click the Tools tab, then in the Error-checking section, click Check:
- Repeat steps 1 through 3 for any other physical disks in your computer (e.g. D:).

Check for missing or corrupt system files
If Windows itself has missing or corrupt files, you’ll experience problems (e.g. hanging, crashing, blue-screens).
Windows has an inbuilt tool for identifying missing and corrupt system files.
IMPORTANT: This scan can take up to 30 minutes to complete.
To check for problems:
- Click Start, type cmd, right-click Command Prompt from the list of results, then select Run as administrator, and then select Yes:
- Type DISM.exe /Online /Cleanup-image /Restorehealth (note that there are spaces before each forward-slash) and press Enter on your keyboard:
- When you see “The operation completed successfully” type sfc /scannow (again note that there’s a space before the forward-slash) and press Enter on your keyboard.
- When you see “Verification 100% complete” you can close the black command prompt window.


Uninstall unused browser extensions
All your browser extensions use system resources. So the more you have installed and enabled, the slower your computer will run. Especially if they’re buggy extensions.
Fortunately, extensions are very easy to disable or remove:
If you’re using Google Chrome
- In the Chrome address bar, type chrome://extensions/ and press Enter on your keyboard. You’ll then be able to see all your extensions.
- To uninstall an extension, click Remove:


If you’re using Firefox
- In the Firefox address bar, type about:addons and press Enter on your keyboard:
- Click Extensions and Plugins on the left side of the window to see all your add-ons. Click the three dots to the right of the ones you don’t need and click Remove to uninstall them:


Turn off unnecessary animations
Visual effects such as animated windows and fading menus may look great, but they can also slow your computer down, especially if it has limited memory (RAM). Fortunately, you can easily turn off animations:
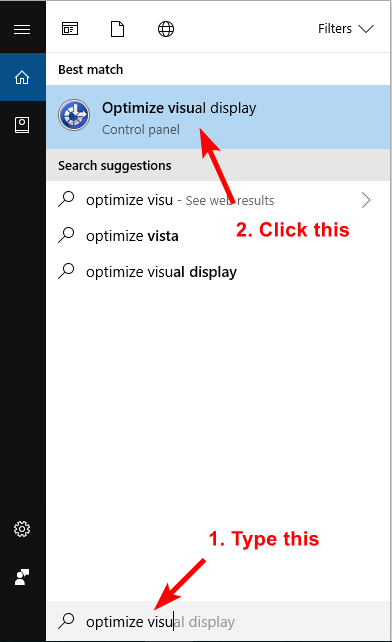
- Click the Start menu and type optimize visual and click Optimize visual display:
- Scroll down a little bit and tick the checkbox for Turn off all unnecessary animations (when possible). Then click Apply and OK to save the change:

Clear your temp files & other clutter
Over time, Windows saves a lot of unused files, which take up disk space and may slow things down a bit (especially if you’re really short on space). These files include the likes of temporary files, history, cookies, Autocomplete form history, index.dat, Recycle Bin, Recent Documents and Log files.
With CCleaner, you can remove all of these files in seconds (and you should do so once a month or so).
- First time use only: Download and install the free version of CCleaner.
- Click the Start menu, type ccleaner and select CCleaner from the list:
- Click Custom Clean, then Run Cleaner, then click Continue:
- When it’s finished cleaning, CCleaner will tell you how much space it cleared.


CCleaner also offers a registry cleaner, which attempts to remove redundant or unwanted items from the Windows registry. But it’s risky, so unless you know what you’re doing, don’t use it.
Run a virus scan
Computer viruses can slow your computer down and cause it to become unresponsive and unreliable.
Windows comes with inbuilt antivirus protection that you can use to scan for and remove viruses. It’s not quite as good as some of the paid solutions, like BitDefender, but for most people it’s sufficient.
To scan for viruses:
- Click Start, type virus and select Virus & threat protection:
- Click Quick scan:
- If the scan finds viruses, follow the on-screen prompts to remove them.


Run a malware scan
Malwarebytes is a free program that finds and kills various malware that’s found its way onto your computer. Malware, short for malicious (or malevolent) software, is software used or created by attackers to disrupt computer operation, gather sensitive information, or gain access to private computer systems. (From Wikipedia.)
To scan your computer for malware:
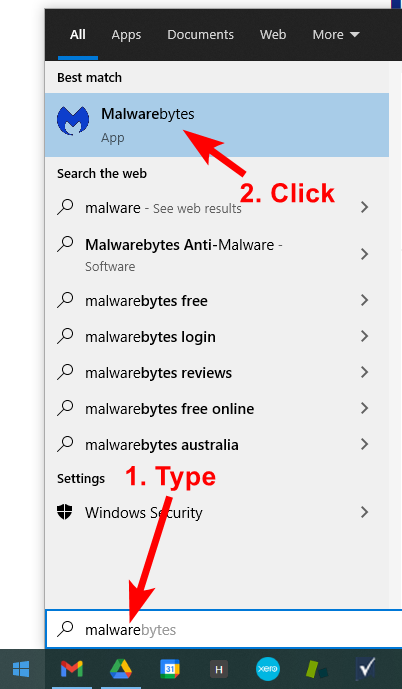
- First time use only: Download and install Malwarebytes.
- Click Start, type malware and click Malwarebytes:
- Click Scan:
- If the scan finds malware, follow the on-screen prompts to clean, quarantine or remove it.
Update your applications
You should always keep your applications up to date, because this will ensure you have all the latest bug fixes and security patches.
Your applications will all have different ways of updating. E.g. Some will update automatically, whereas others will require you to check for updates manually. You should find out how they all do it, and make sure you allow any auto updates, and that if you’re required to check for any manually, you do it each time you use the application.
Conclusion
That’s it! Congratulations, you’ve built and set up your first gaming PC. Now all you need to do is have some fun with it!
If you have any suggestions or questions, please add them to the Comments section below.
Happy gaming!


![[SOLVED] PS4 Black Screen Issue](https://www.supereasy.com/wp-content/uploads/2019/11/PlayStationstore.png "[SOLVED] PS4 Black Screen Issue")
![[Solved] How to Fix Corrupted Data on PS4](https://www.supereasy.com/wp-content/uploads/2020/08/ps4-2326616_1280-768x512.jpg "[Solved] How to Fix Corrupted Data on PS4")
")
")
")

 in 2024")
")