How to record the screen on iPhone [SOLVED]

14 Revisions
![How to record the screen on iPhone [SOLVED]](https://www.supereasy.com/wp-content/uploads/2018/10/internet-3113279-768x512.jpg "How to record the screen on iPhone [SOLVED]")
Don’t know how to record the screen on iPhone? You’ve come to the right place! It’s very easy! This article provides you with step-by-step instructions!
Don’t know how to record the screen on your iPhone? You’ve come to the right place! It’s very, very easy! After reading this article, you should be able to record your iPhone screen on your own.
Follow these steps
Step 1: Before we start
In iOS 11 or later, you can record the screen on your iPhone. If you’re not sure which iOS version you’re currently using, you need to check if the iOS version on your iPhone is iOS 11 or higher. Here is how to do it:
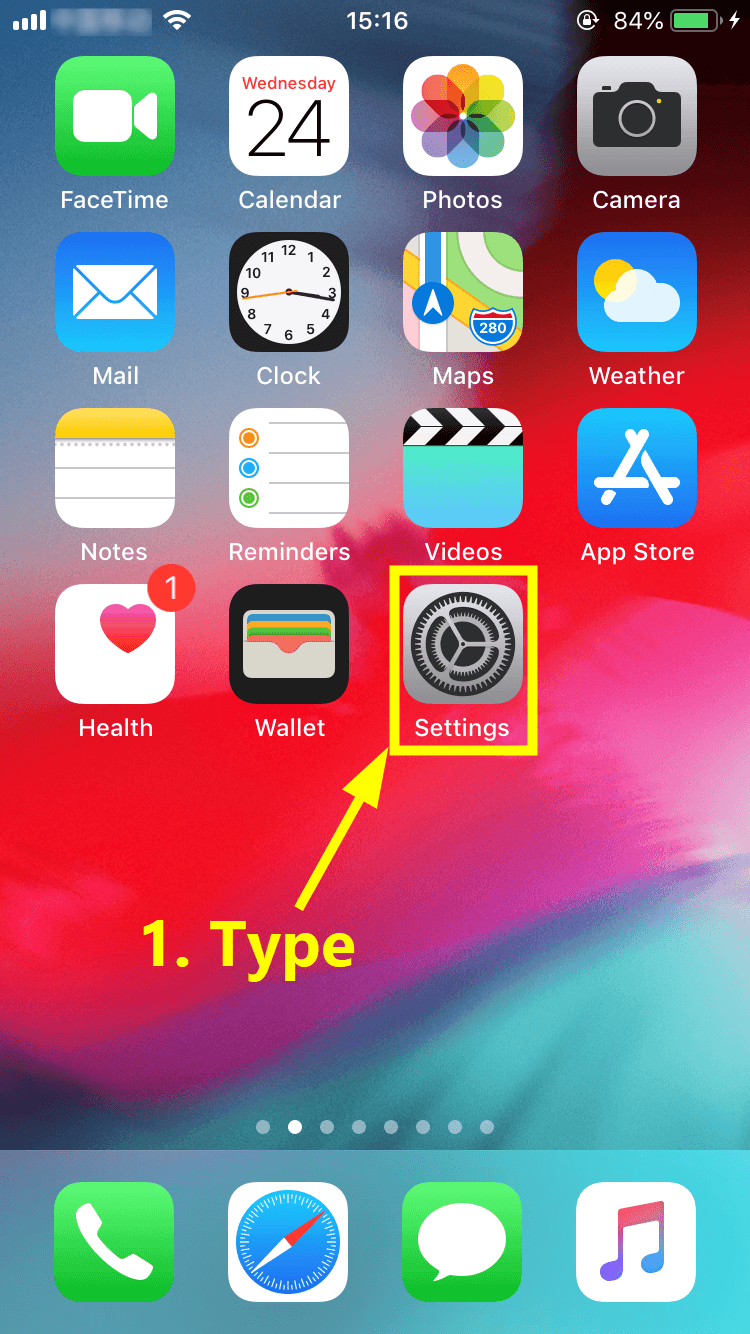
- Unlock your iPhone and return to Home Screen. Then tap the Settings icon.
- Go to General > Software Update.
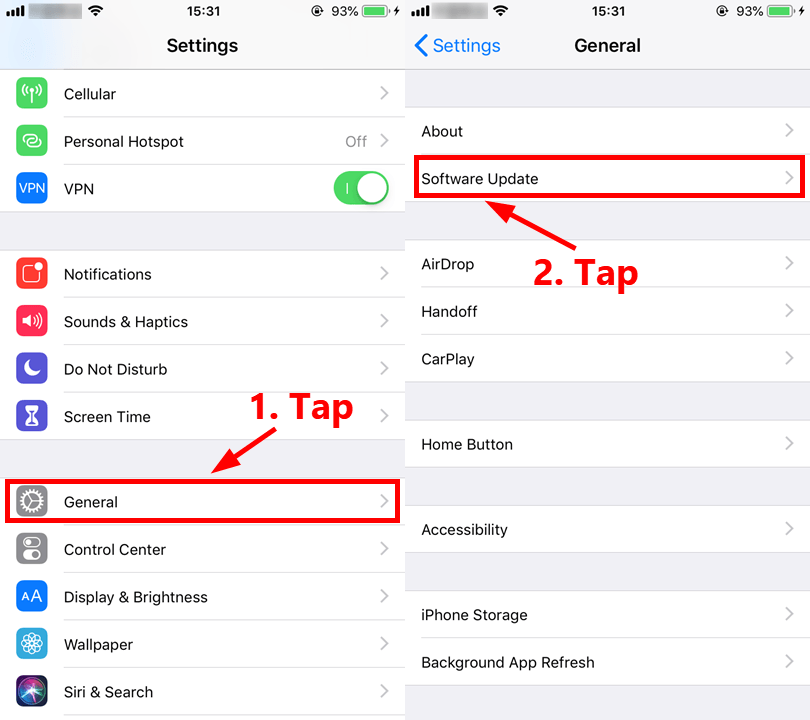
- If there the iOS version on your iPhone is under iOS 11, you may need to update your iOS first.
Step 2: Add Screen Recording to Control Center
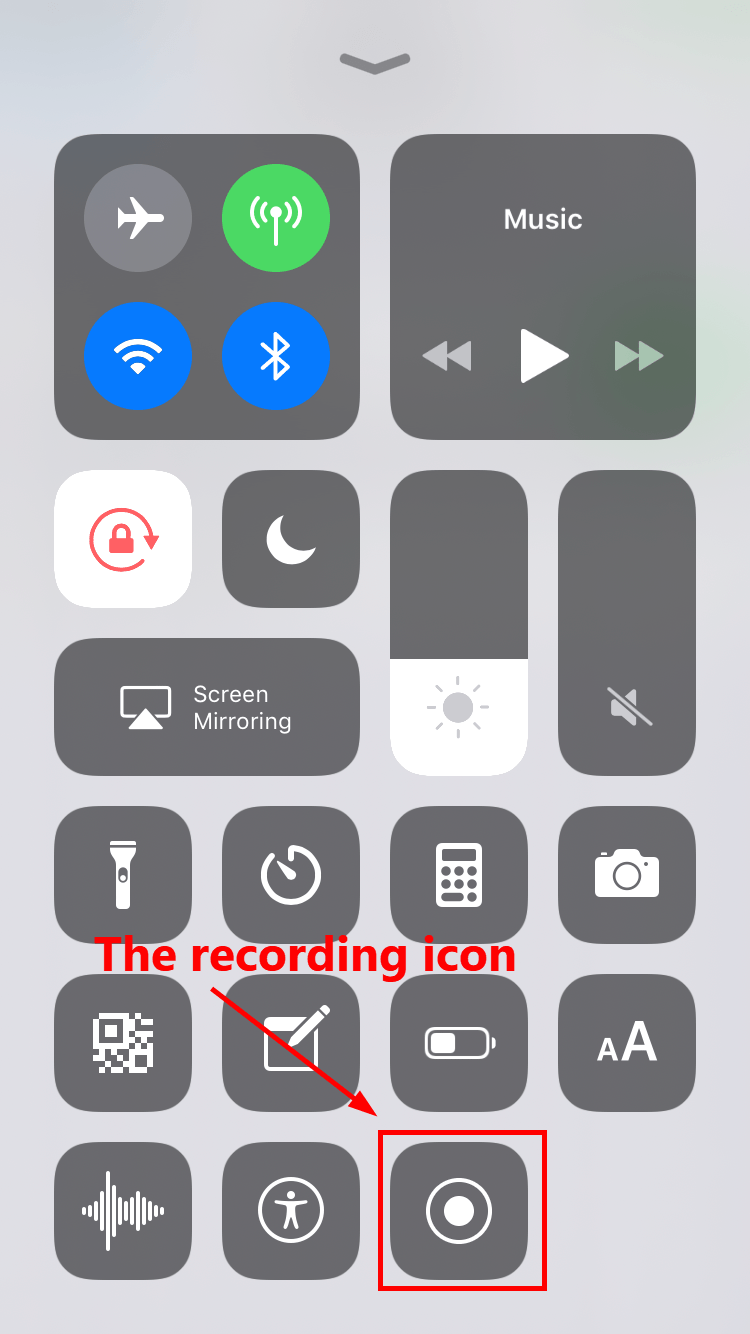
To record the screen on your iPhone, you need to add the Screen recording icon to your Control Center. Here is how to do it:
Note: Some apps may not allow you to record audio.
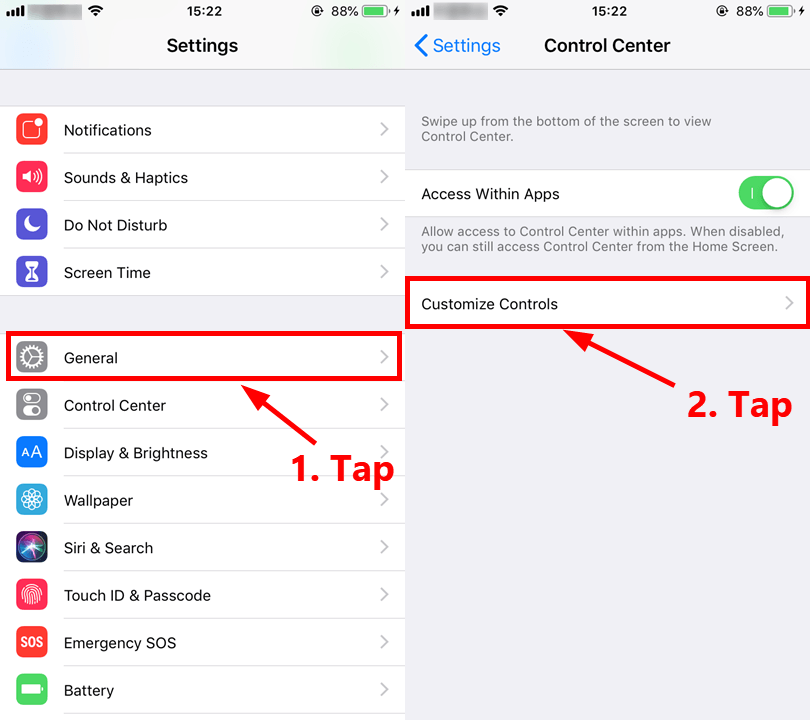
- Go to Settings > Control Center.
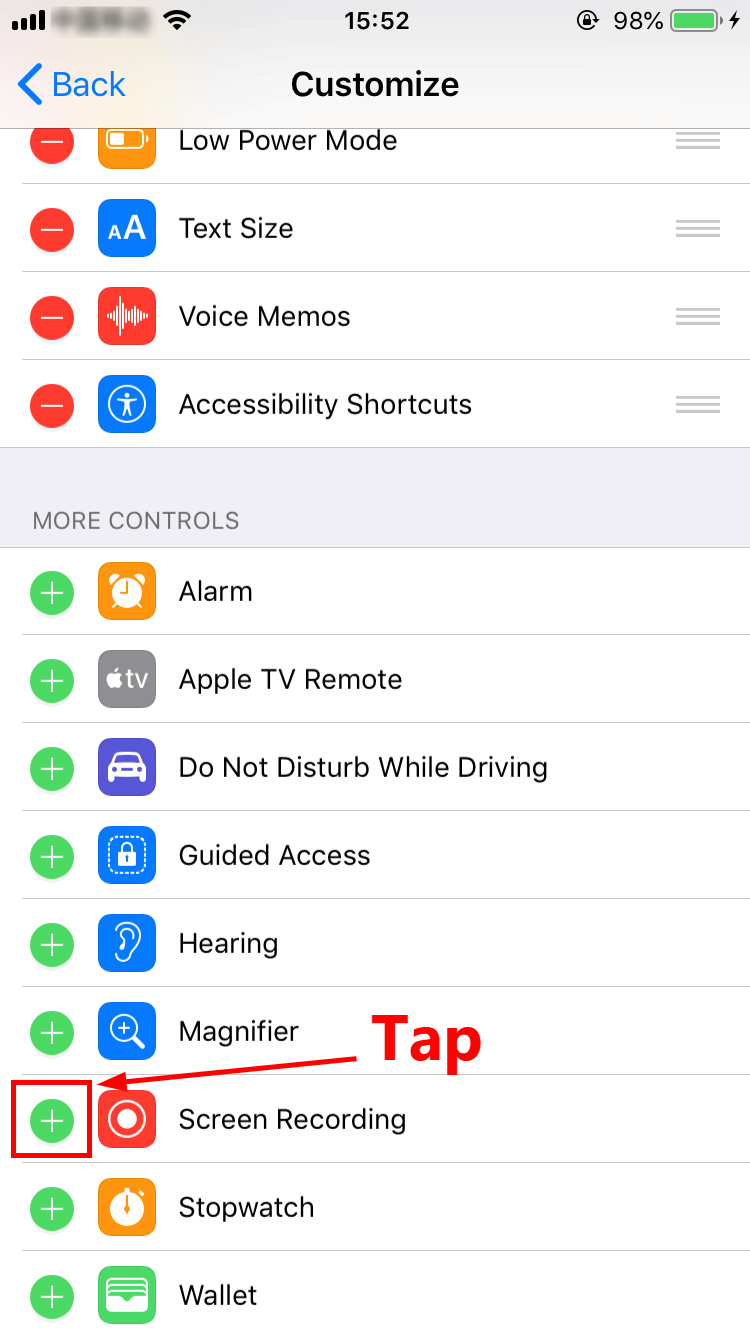
- Swipe down your screen and tap the add button next to Screen Recording to add it to Control Center.
Step 3: Start recording
- Unlock your iPhone if it is locked.
- If you’re using iPhone 8 / 8 Plus or earlier, swipe up from the bottom edge of any screen; for iPhone X or later, swipe down from the upper-right corner of the screen to access Control Center.
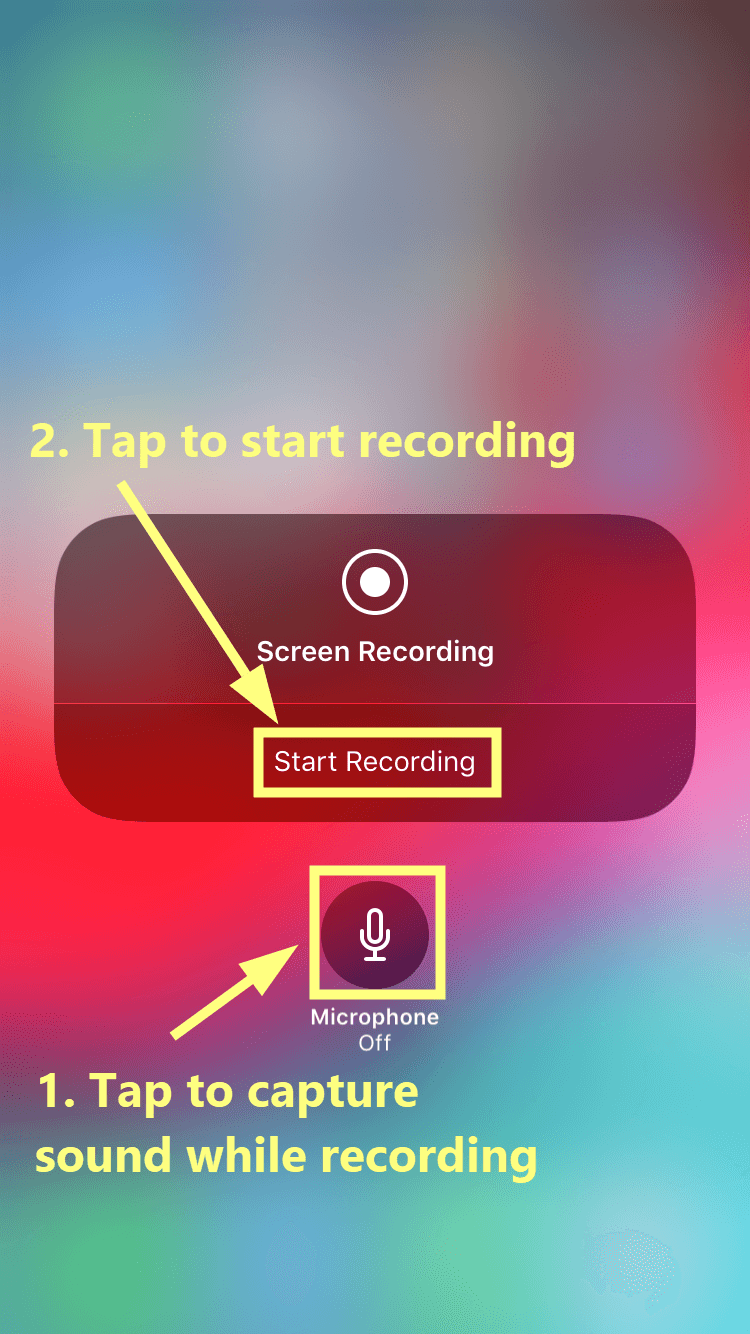
- Press deeply on the recording icon. If you want to capture sound while recording, then tap the microphone icon, if not, leave it alone. Tap Start Recording to begin recording your iPhone screen. Then wait for the three-second countdown. While recording, make sure your iPhone screen is on.
- If you want to stop recording, tap the red status bar at the top of your screen. Then tap Stop.
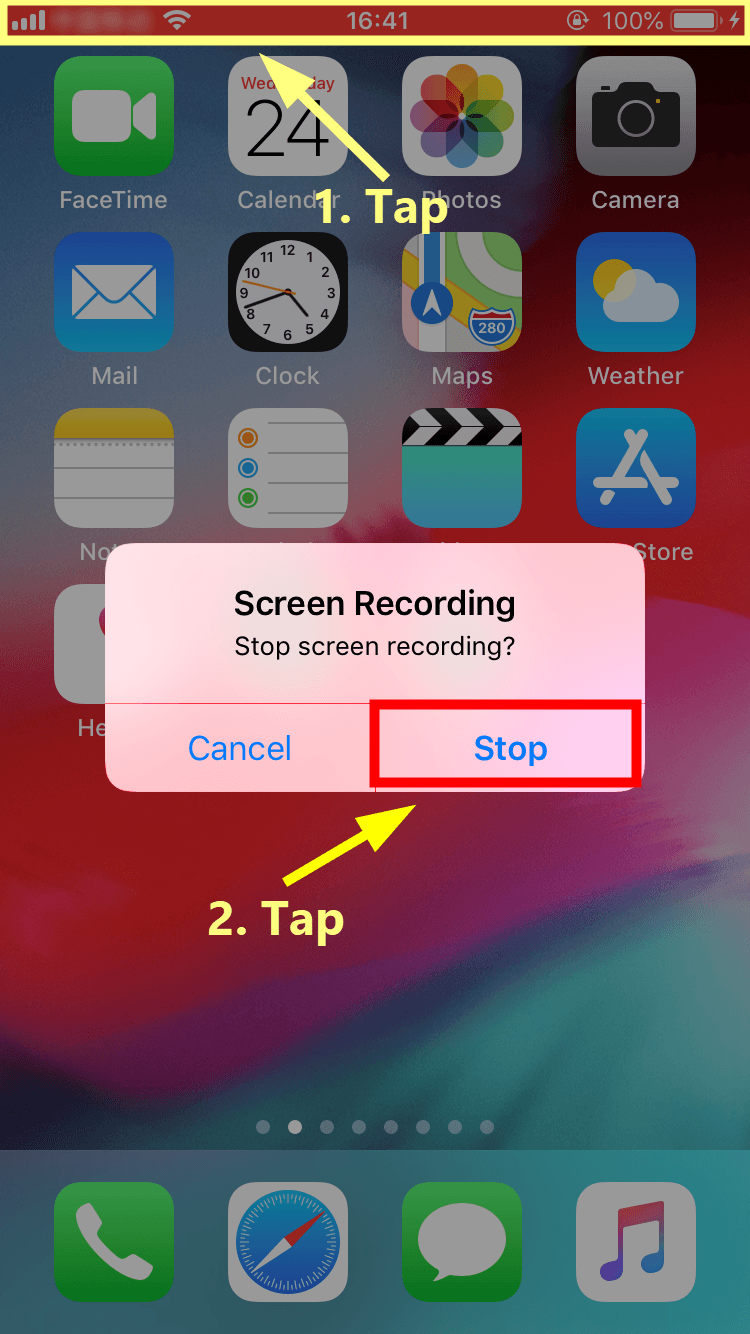
- This screen recording video will be automatically saved to the Photos app.
It’s pretty easy, isn’t it?
If you have any questions or suggestions, please leave your comment below.


![[Ultimate guide] iPad full keyboard access](https://www.supereasy.com/wp-content/uploads/2020/04/iPad-keyboard-768x510.jpg "[Ultimate guide] iPad full keyboard access")
![How to turn on AirDrop [with pictures]](https://www.supereasy.com/wp-content/uploads/2019/02/Snap115.jpg "How to turn on AirDrop [with pictures]")
![[SOLVED] MacBook Pro Won’t Turn On or Charge](https://www.supereasy.com/wp-content/uploads/2019/02/apple-1846281_1280-768x512.jpg "[SOLVED] MacBook Pro Won’t Turn On or Charge")


")
")
")

 in 2024")
")