How to partition a hard drive [Step by step]

39 Revisions
![How to partition a hard drive [Step by step]](https://www.supereasy.com/wp-content/uploads/2018/11/img_5c00a3dd79686.jpg "How to partition a hard drive [Step by step]")
If you want to create a decent sized partition on your hard drive, you can try these methods to do so, quickly and easily.
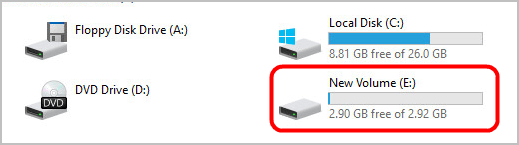
You want to create a decent sized partition on your hard drive but don’t know how? Don’t worry, you’ve come to the right place! This article shows you how to partition a hard drive on PC, quickly and easily!
Note: The screenshots below are taken on Windows 10, but the methods also apply to Windows 7 and 8.
Method 1: Use Disk Management
On PC, you can use the pre-installed tool Disk Management to partition your hard drive. To do so, you can follow these steps:
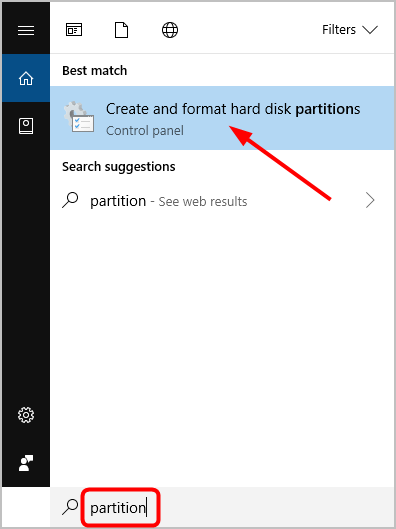
1) Type partition in the Windows search box, and select Create and format hard disk partitions.
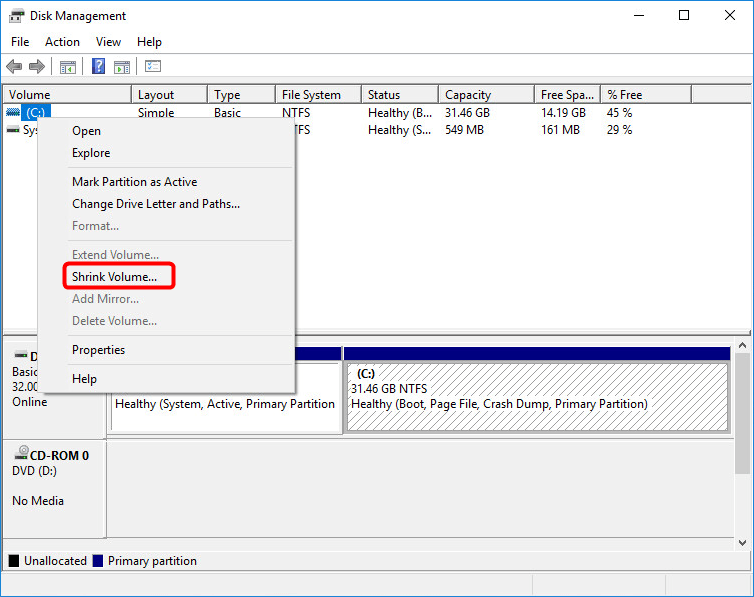
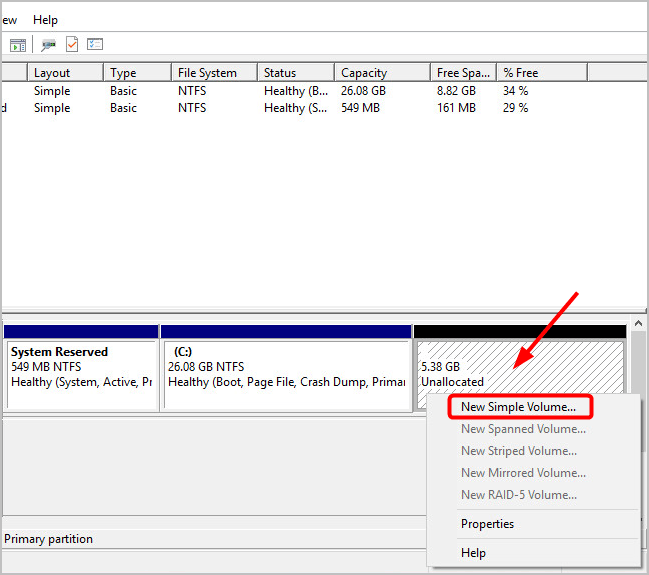
2) At Disk Management, right-click on the hard drive you want to partition, and select Shrink Volume…
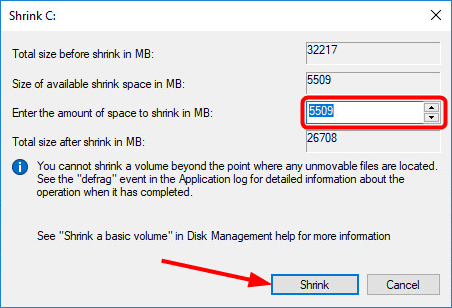
3) Windows will automatically calculate how much free space you can allocate to the new partition, and will ask you how much of it you want to use. If you want to use all the free space on the hard drive, click the Shrink button. If you want to customize the size of the space, type the size in the field next to Enter the amount of space to shrink in MB. (The number should be no bigger than the available space size.)
4) Right-click on the Unallocated section, and select New Simple Volume…
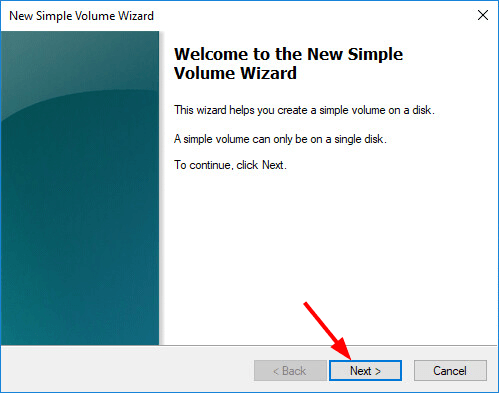
5) Click Next.
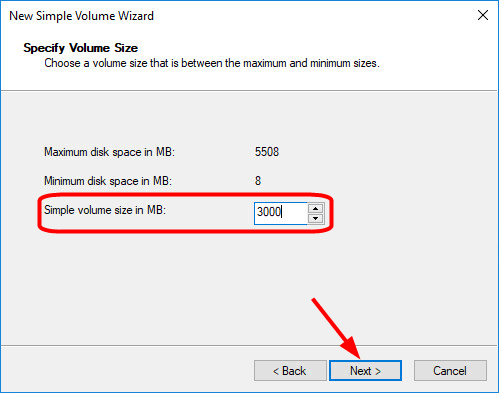
6) Enter a size that’s between the maximum and minimum size, and click Next.
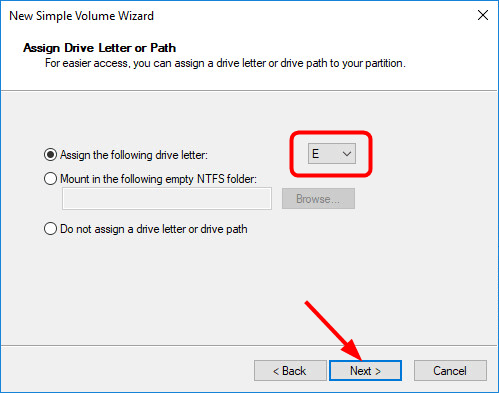
7) You can use the default drive letter, or select a drive letter from the drop-down menu, and click Next.
8) You can use the default settings and click Next.
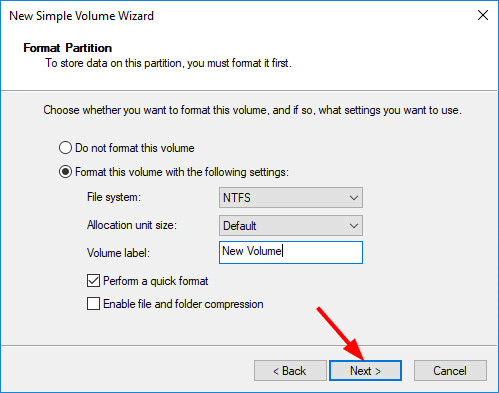
It’s recommended to select Format this volume with the following settings. (But if you want to keep your data on the hard drive, select Do not format this volume.) For File system, select NTFS. (The exFAT option is usually for portable devices. If you want to add a name to the new partition, you can type it in the field next to Volume label. Select Perform a quick format. Then, click Next.
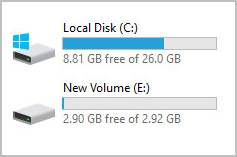
9) Click Finish. Then you can go to This PC in File Explorer (use the hot key Win+E to quickly access File Explorer ) to check for your new partition.
Note: If you are unable to make changes to partitions using Disk Management, you can try Method 2, below.
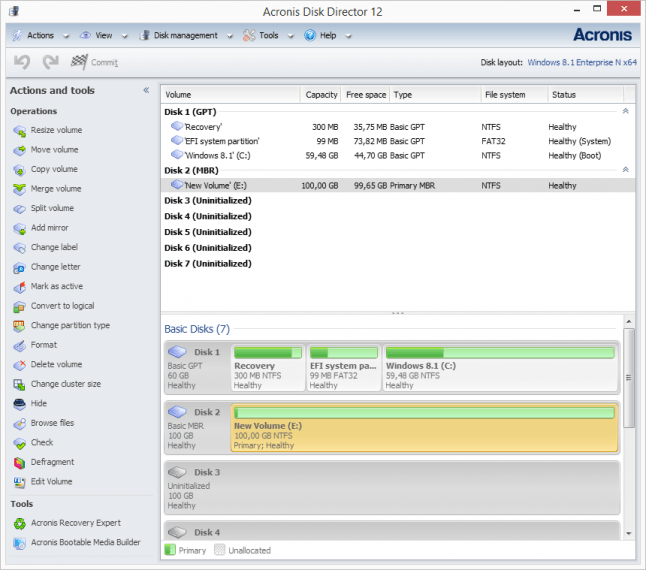
Method 2: Use Acronis Disk Director 12
Some third-party tools are also helpful in partitioning hard drives on PC. And there’re a few out there worth considering. If you don’t have time or patience, you can try Acronis Disk Director 12.
Acronis Disk Director 12 caters to the needs of everyone who needs a disk management tool. Whether you need to do a quick partition split without damaging your data or you are looking for a professional tool to boot your crashed machine and repair the disk, you can do it easily with Acronis Disk Director 12.
If you have any other suggestion, please feel free to leave a comment below.


![How to Format a USB on a Mac [SOLVED]](https://www.supereasy.com/wp-content/uploads/2018/12/Snap1-1.png "How to Format a USB on a Mac [SOLVED]")

")
")
")

 in 2024")
")