Fixed: Photoshop scratch disks are full

16 Revisions

If you encounter “scratch disks are full” error when you works on Photoshop, don’t panic. You can get the real fix in this guide…
If you regularly work in Adobe Photoshop on your Windows computer, probably you’ve encountered this problem: scratch disks are full. The full error messages varies from different cases. Here’re some of them:

Could not initialize Photoshop because the scratch disks are full.
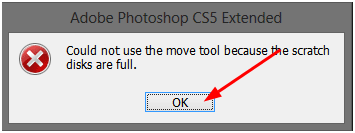
Could not use the move tool because the scratch disks are full.
Could not complete the command because the scratch disks are full.
…
Whichever the error message you get, don’t panic, you’ll learn the real fixes in this guide. Read on to find out how…
What is a scratch disk?
First things first, you may be curious about what the scratch disk is. Here’s a simple introduction to help you gain a general sense of scratch disk:
Photoshop requires a working space called virtual memory or cache memory when you’re working in it. When there’s not enough RAM on your computer, Photoshop would use your hard drives as temporary space, and these hard drives are called “scratch disk”. If there is only one hard drive on your computer, the scratch disk is the system drive. If you’re working with large images or layers on Photoshop, Photoshop would then create a mountain of temp files. As a result, when both your RAM and scratch disk become full of temp files, you get the error: scratch disk are full.
3 fixes for scratch disks are full:
Note: You may probably fix your problem through the first fix . But in the long term, we recommend you perform all the fixes as you can work in Photoshop properly.
Fix 1: Delete your temp files of Photoshop
The scratch disks are full error probably happens when your scratch disk become full of the temp files. Once the error pops up, simply delete your temp files of Photoshop to make room for new job. And don’t worry to delete these temp files, it’s safe.
Here’s how:
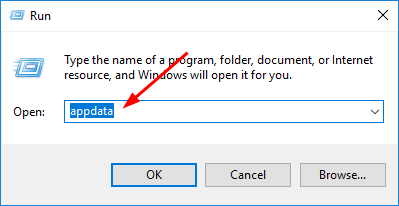
1) On your keyboard, hold down the Windows logo key and press the R key to bring up the Run box.
2) Type appdata and press Enter.
3) On the open window, go to Local > Temp.
4) Find and highlight all the files start with ~PST or Photoshop temp.
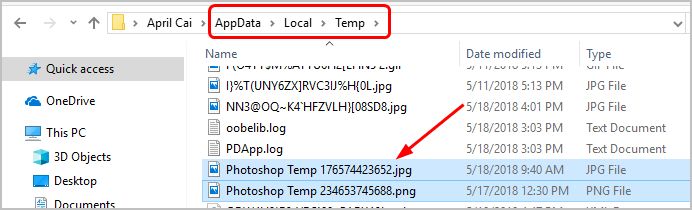
5) On your keyboard, hold down the Shift key, then press the Del key to delete all the Photoshop temp files.
6) On your Photoshop interface, click OK on the “scratch disks are full” error message window and restart Photoshop and edit your picture to see if it works fine.
Fix 2: Clean up your scratch disks
Sometimes you might get the same scratch disks are full error not too long after you deleting the temp files. In case of that, you can go on to clean up your scratch disk.
First things first, you need to find out which drive is the scratch disk for the Photoshop on your computer. It’s easy to figure out:
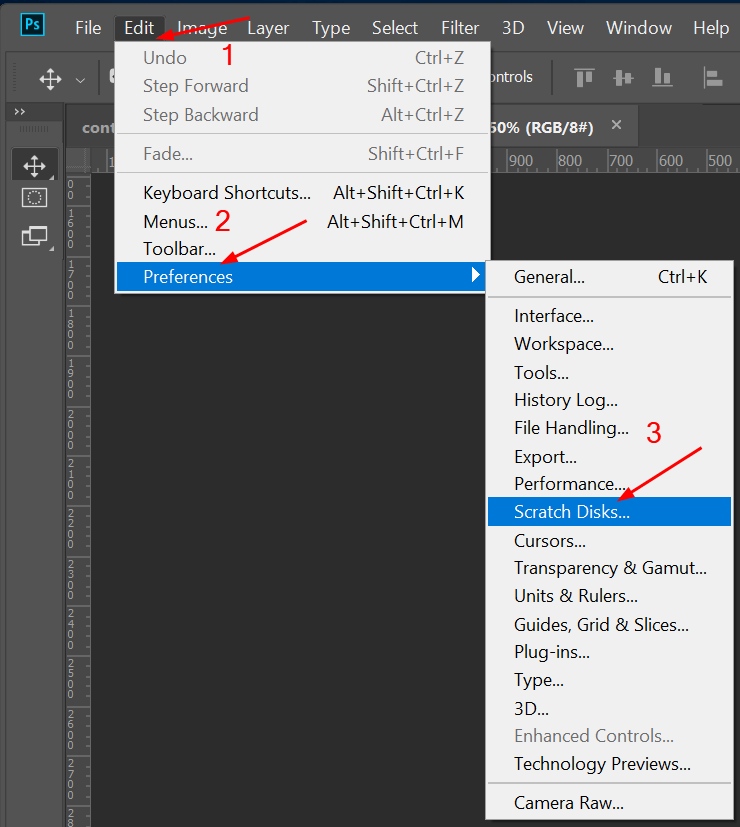
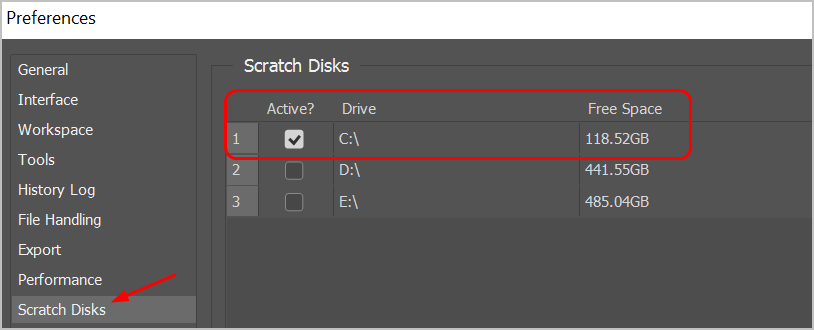
If you can access the Photoshop interface properly, click Edit (for Mac users, click Photoshop) > Preferences > Scratch Disks. Then you’ll see which is your Photoshop scratch disk.
If you can’t open Photoshop on your computer, follow these steps instead:
Run Photoshop, as soon as Photoshop starts, on your keyboard, press the Ctrl and Alt keys at the same time to bring up the Scratch Disk Preference window.
Note: If you use Mac, press the Command and Option keys instead.
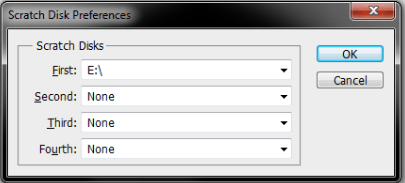
Make sure your scratch disk have at least 40 GB free space. If it doesn’t, move to your scratch disk and remove your unwanted files.
Fix 3: Change your scratch disk allocation
If you want to keep Photoshop run fast on your computer, you can change its scratch disk allocation. Make sure do not select your system drive, a network or removable drive as the scratch disk.
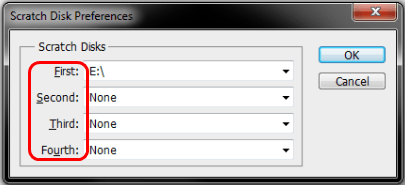
Follow to open the Scratch Disk Preference window: Run Photoshop, as soon as Photoshop starts, on your keyboard, press the Ctrl and Alt keys at the same time. If you use Mac, press the Command and Option keys instead.
Then you can set a drive with much more free space as the scratch disk, and also, you can set a second, third or fourth scratch disk more.

![[Fixed] Not enough quota is available to process this command](https://www.supereasy.com/wp-content/uploads/2018/10/Snap30.jpg "[Fixed] Not enough quota is available to process this command")
![[Solved] Bootrec Fixboot Access Denied](https://www.supereasy.com/wp-content/uploads/2018/08/bootrec_fixboot_access_denied.png "[Solved] Bootrec Fixboot Access Denied")

![[SOLVED] iTunes Error 4013 When Restoring/Upgrading iPhone/iPad](https://www.supereasy.com/wp-content/uploads/2018/09/Snap26.jpg "[SOLVED] iTunes Error 4013 When Restoring/Upgrading iPhone/iPad")

")
")
")

 in 2024")
")