How to install fonts in Windows 10 | quickly & easily!

21 Revisions

Want to install or manage fonts in Windows 10? If you don’t know how, don’t worry! You’ve come to the right place. After reading this article, you’ll learn how to install fonts in Windows 10 quickly and easily!
How to install fonts in Windows 10
Windows 10 allows you to add new fonts either from Microsoft Store or from online sources. In Windows 10 Settings, you can also download supplemental fonts for other languages.
To add new fonts from Microsoft Store:
If you’d like to add new fonts from Microsoft Store, follow the steps below:
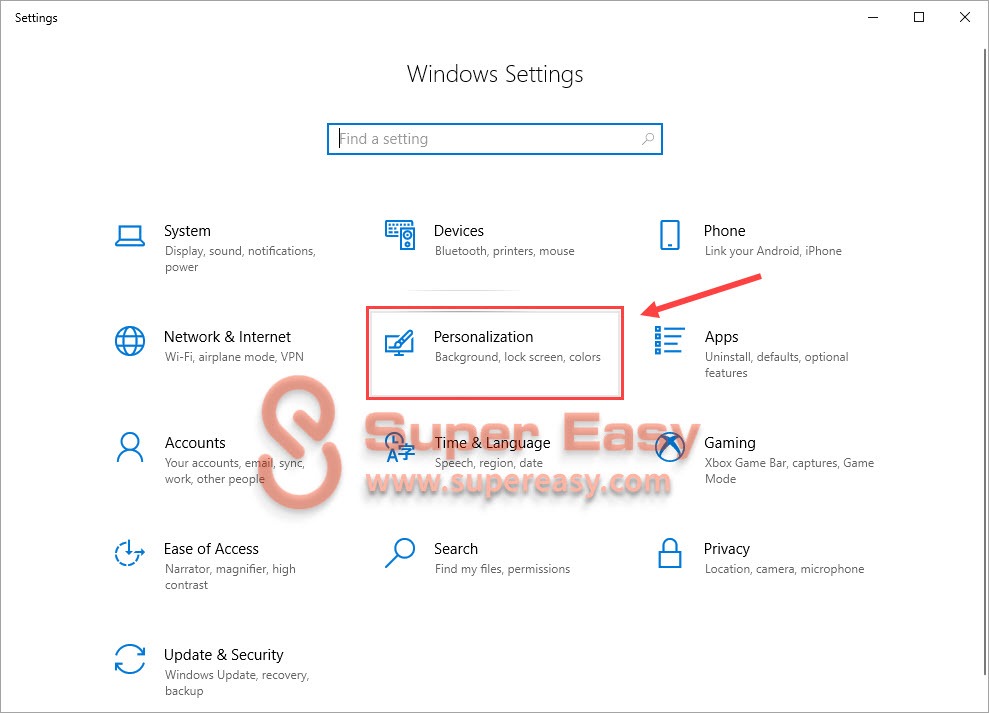
- On your keyboard, press the Windows logo key and I at the same time to open Windows Settings. Select Personalization.
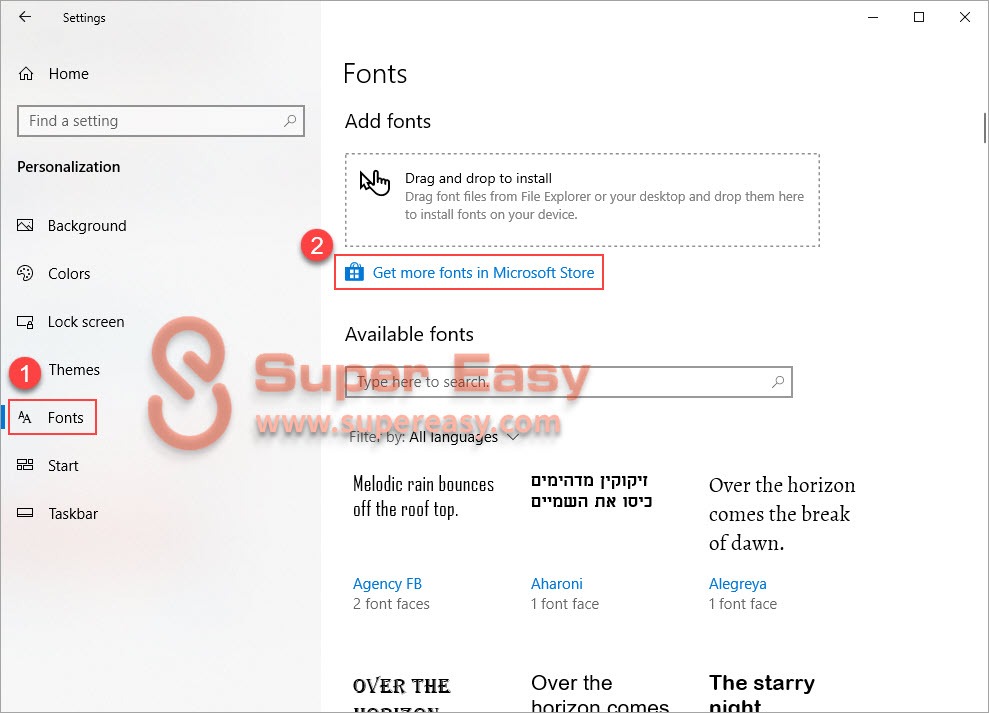
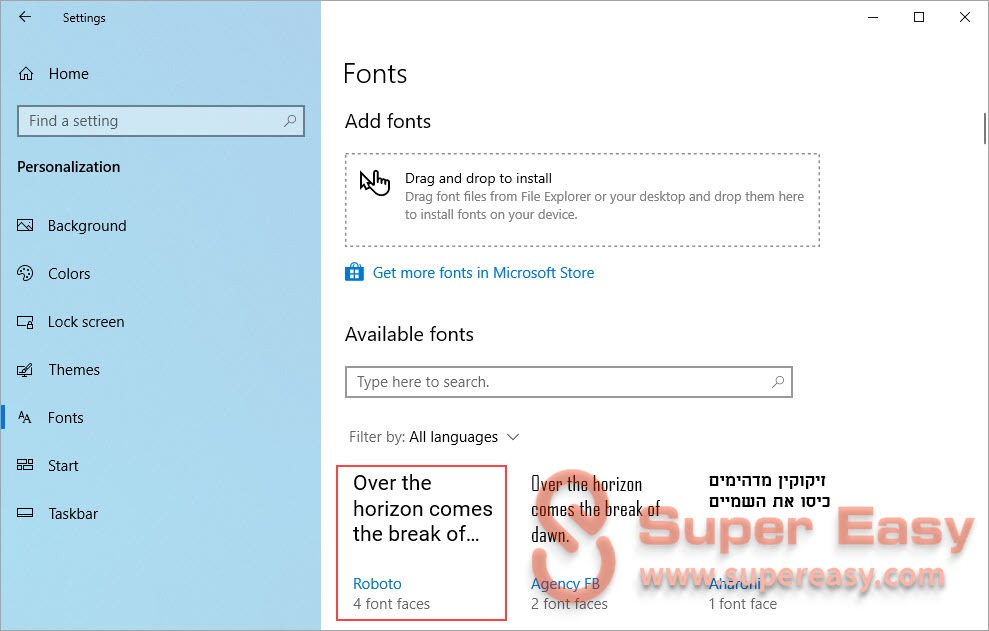
- Click Fonts on the left panel, then click Get more fonts in Microsoft Store.
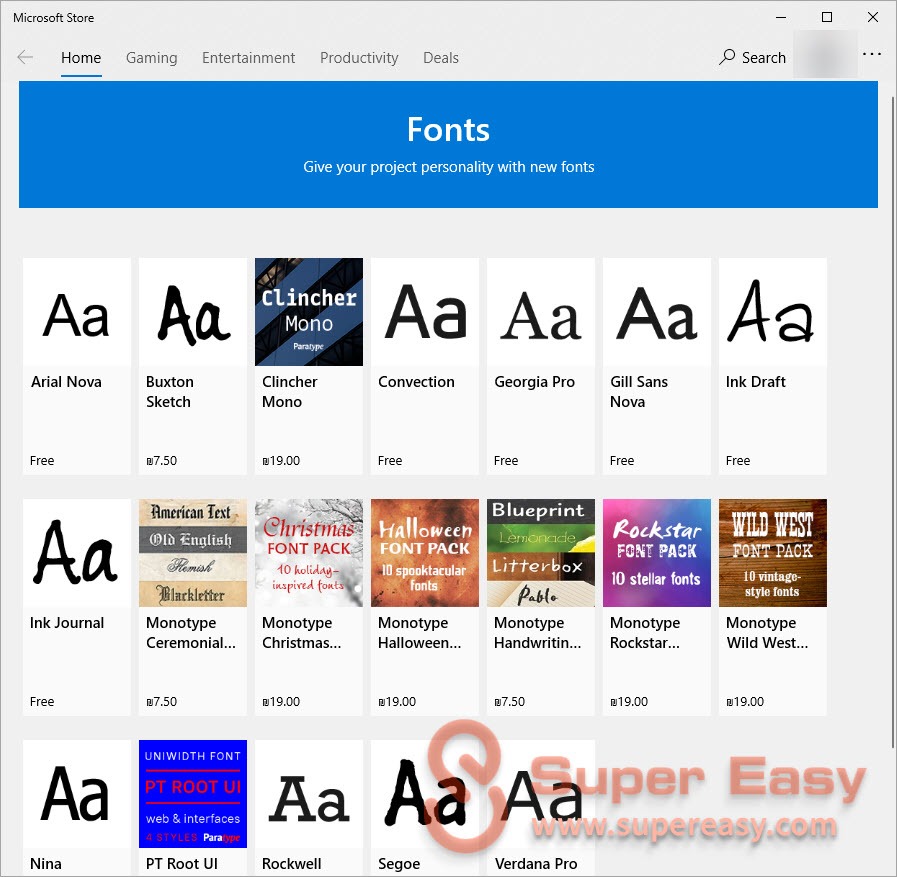
- Select the font you want to add, and then click Get or Buy. The font will be automatically installed.
That’s it! It’s pretty easy, right?
If you didn’t find the font you want on Microsoft Store, read on and try adding new fonts from an online source.
To add new fonts from online sources:
Windows 10 also allows you to add new fonts by manually installing font files downloaded from online sources, such as Google Fonts, 1001fonts.com, etc.
After you downloaded the font file, follow the steps below to install it:
- If the file you downloaded is a .zip or .rar file, extract the files first.
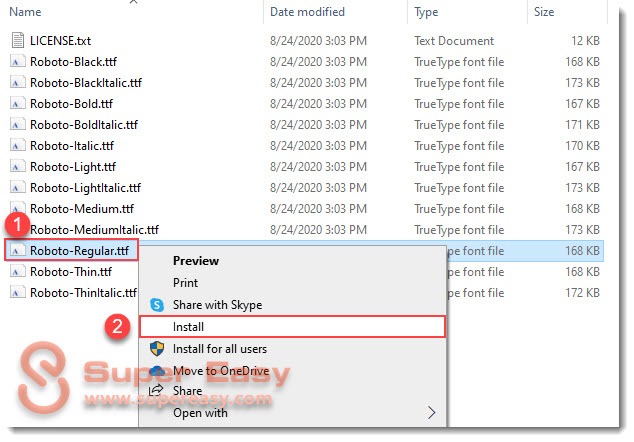
- Right-click the font file, and then select Install.
- After you installed the new font file, go to Windows Settings > Personalization > Fonts to check if the new font is there. Normally, the new font will appear under Available fonts section.
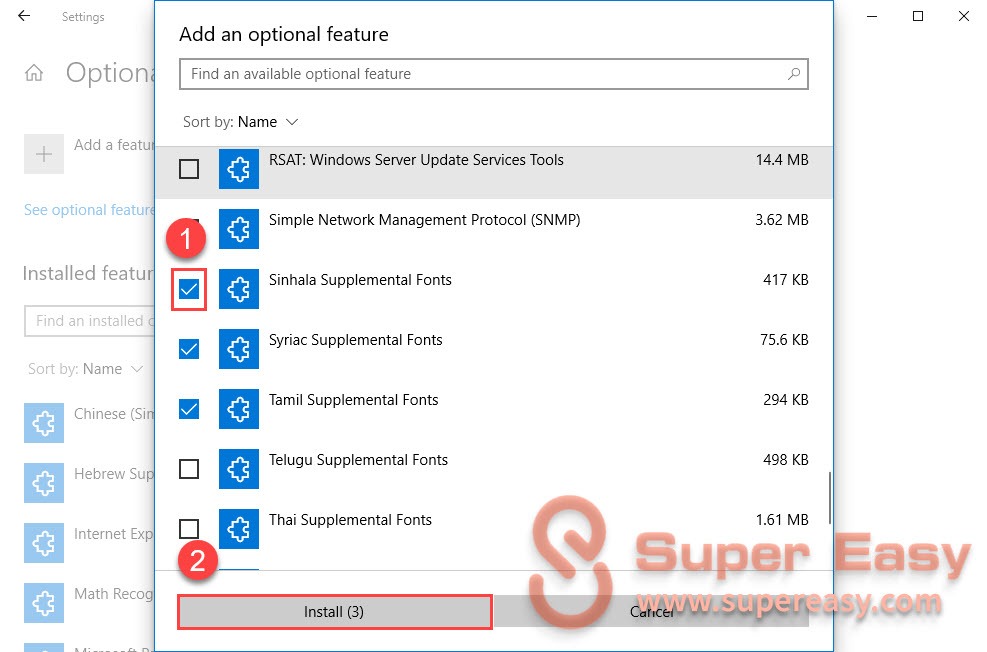
To download supplemental fonts for other languages in Windows 10:
If you need to download supplemental fonts for other languages in Windows 10, follow the instructions below:
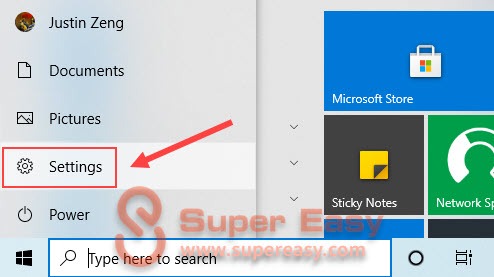
- On your keyboard, press the Windows logo key and select Settings to open Windows Settings.
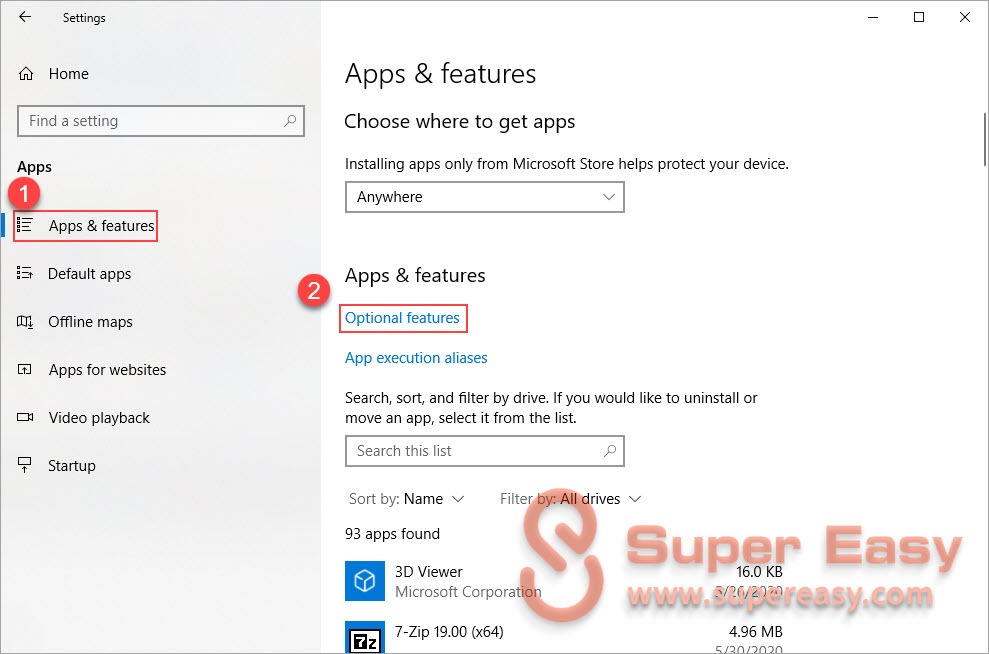
- Go to Apps > Apps & features, then click Optional features.
- Click Add a feature.
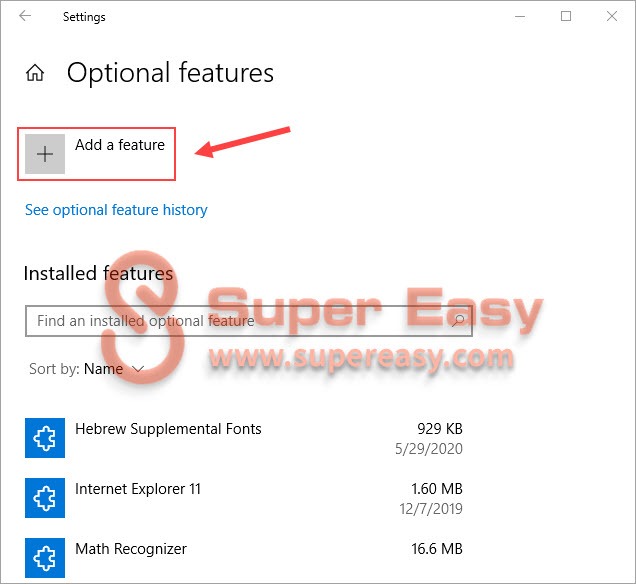
- Select the supplemental fonts you need, then click Install to start installing the supplemental font.
Want to uninstall a font?
Although it’s quite easy to remove a font from Windows 10, we don’t recommend uninstalling fonts, because many fonts are necessary for a proper display of your applications.
If you’ve installed a font and you really don’t want it anymore, you can follow the instructions below to uninstall it:
- Go to Windows Settings > Personalization > Fonts, Under Available fonts section, click the font you want to uninstall.
- Click Uninstall to remove it.
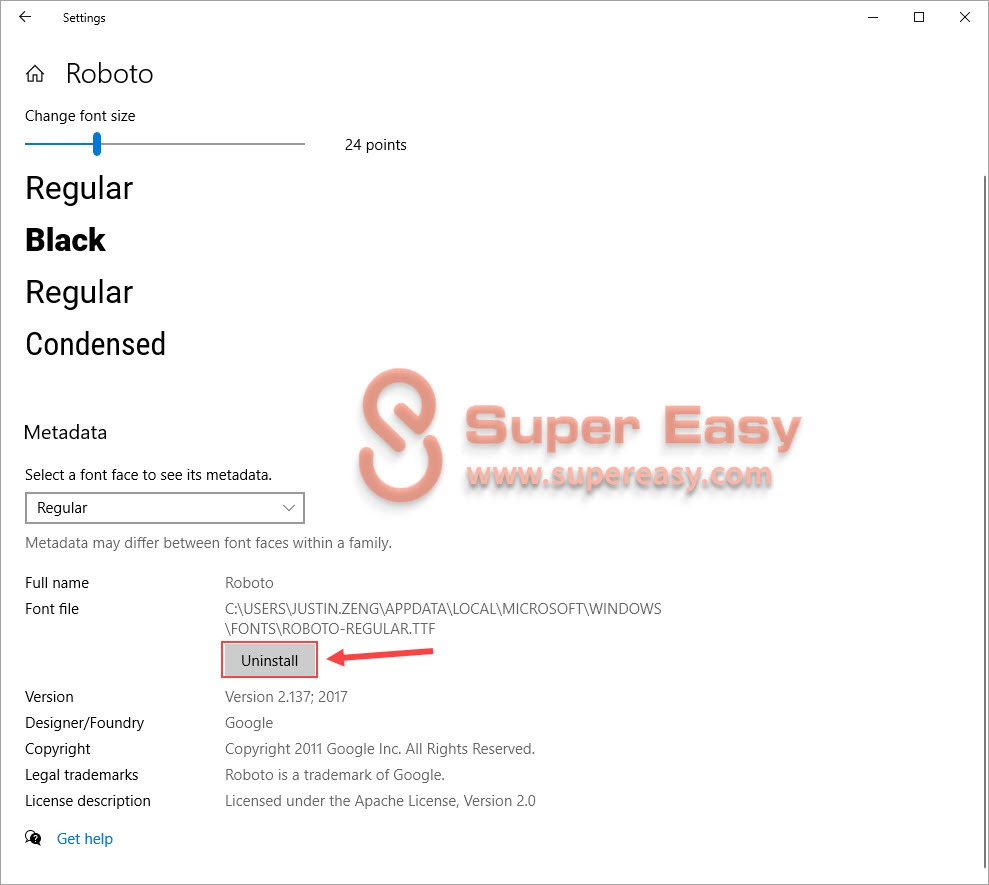
Now you’ve uninstalled this font.
How to restore your default fonts in Windows 10
If your application suffers from font display issues after you used a new font in Windows 10, don’t worry. To resolve such font display issues, you just need to reset your fonts to the default state in Windows 10. Here is how to do it:
- On your keyboard, press the Windows logo key and R at the same time to invoke the Run dialog. Type
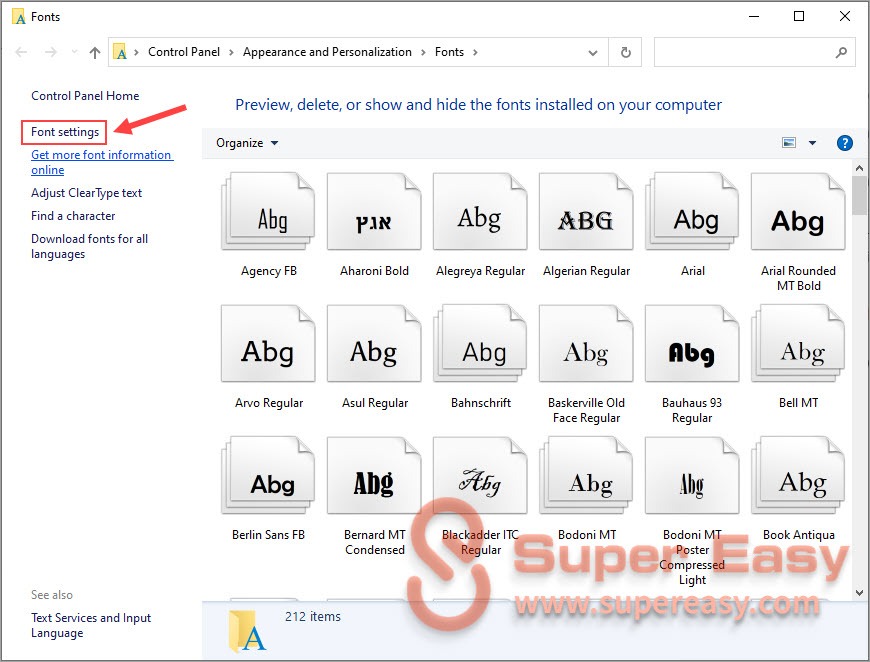
control fontsand press Enter. The Fonts window in Control Panel will pop up.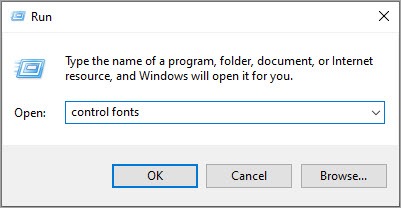
- Click Font settings on the left panel.
- Click Restore dedault font settings to restore your default fonts in Windows 10.
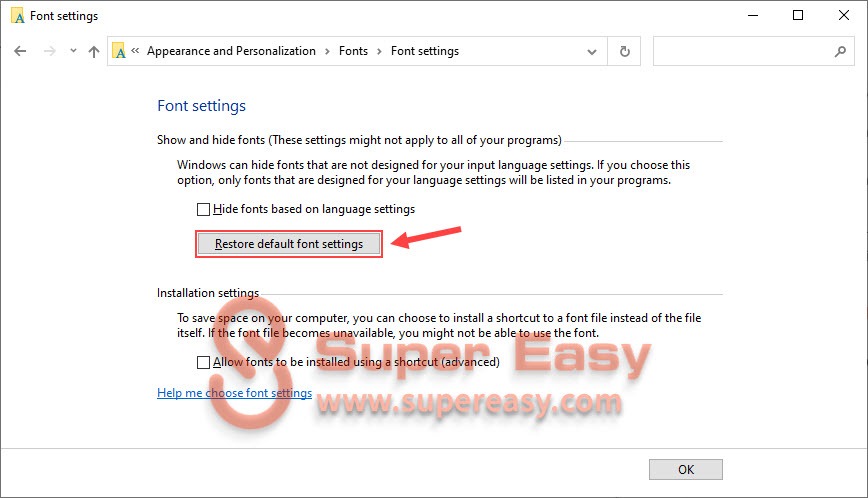
Now you’ve restored default font settings in Windows 10.
Hopefully, after reading this article, you’ve learnt how to install and manage fonts in Windows 10. If you have any questions or suggestions on this topic, feel free to leave us a comment below. Thanks for reading!


![[SOLVED] How to disable BitLocker on Windows 10](https://www.supereasy.com/wp-content/uploads/2020/09/How-to-disable-BitLocker-1-768x188.jpg "[SOLVED] How to disable BitLocker on Windows 10")


")
")
")

 in 2024")
")