Memory Test For Windows 10 [SOLVED]

30 Revisions
![Memory Test For Windows 10 [SOLVED]](https://www.supereasy.com/wp-content/uploads/2018/11/img_5bf3b0bb01c77.png "Memory Test For Windows 10 [SOLVED]")
If your computer has been plagued by frequent freezing, hangs, slowdowns or even blue screen of death on your computer recently, the first thing you want to check is the memory – since it’s one of the common culprits of all these.
How to run Windows Memory Diagnostic
- On your keyboard, press the Windows logo key and R. Then type mdsched.exe and press Enter.

- Make sure you’ve saved and closed all the work on your computer and click Restart now and check for problems (recommended) if you want Windows to do a diagnostic test NOW.
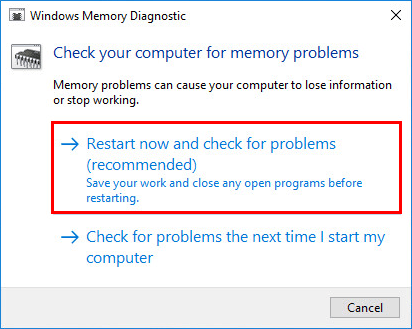
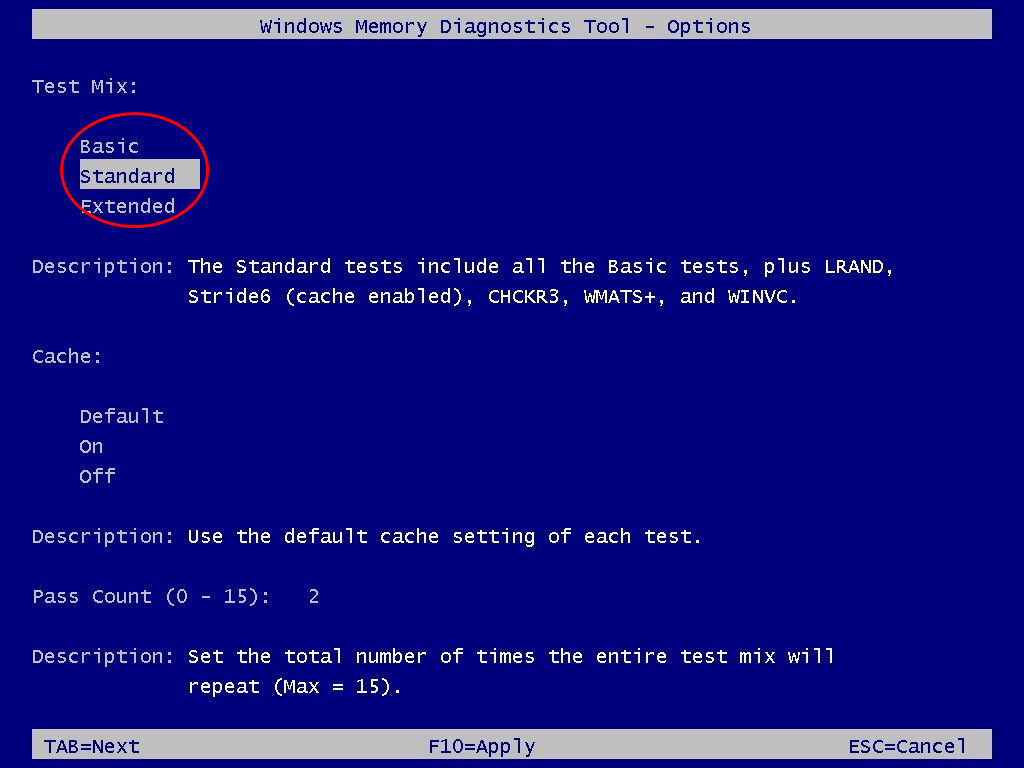
- By default, Windows 10 will boot into the Standard test mode. Just wait until the process finishes unless you want to switch from the Standard test mode to Basic or Extended*.
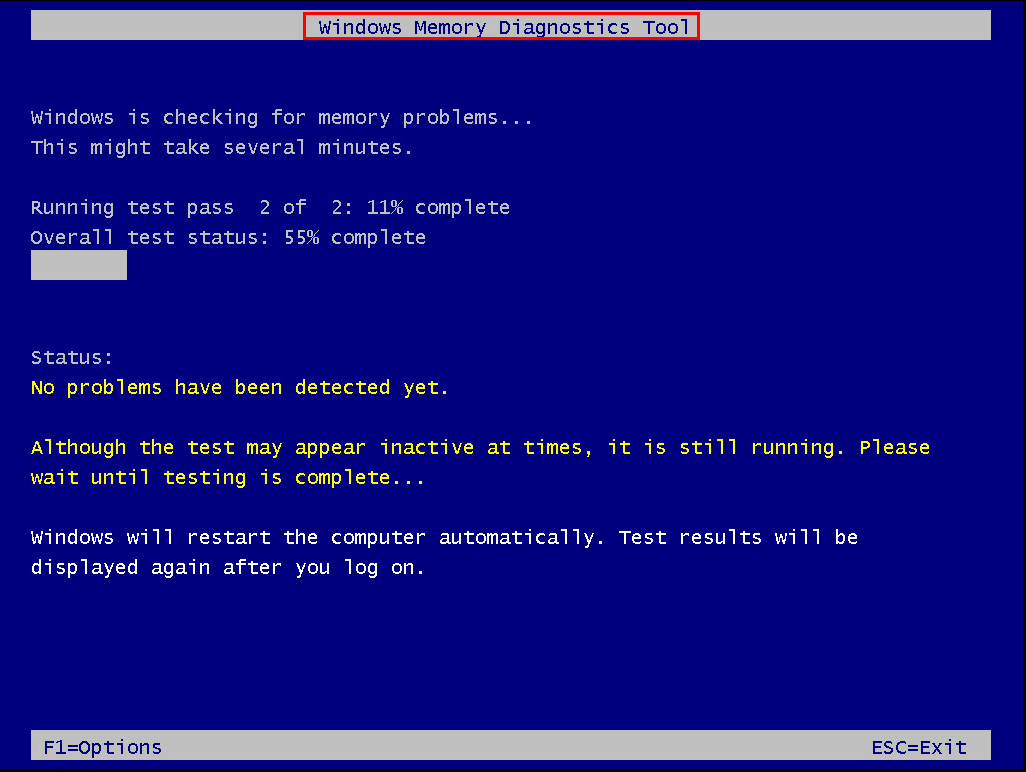
*: To switch to a different test mode, press F1 to enter the test modes menu. Then press the arrow keys to navigate through the 3 modes and the F10 key to start the memory test. Note the Extended test mode usually takes over 8 hours, make sure to have more than enough time set aside if you take this approach.
How to check the memory test results
Your computer will restart as soon as the diagnostic test finishes. So you need to check Event Viewer to find out whether you have a failing/faulty RAM module.
To do so:
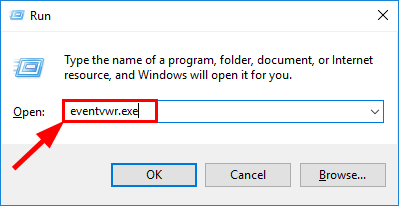
- On your keyboard, press the Windows logo key and R at the same time. Then type eventvwr.exe and press Enter.
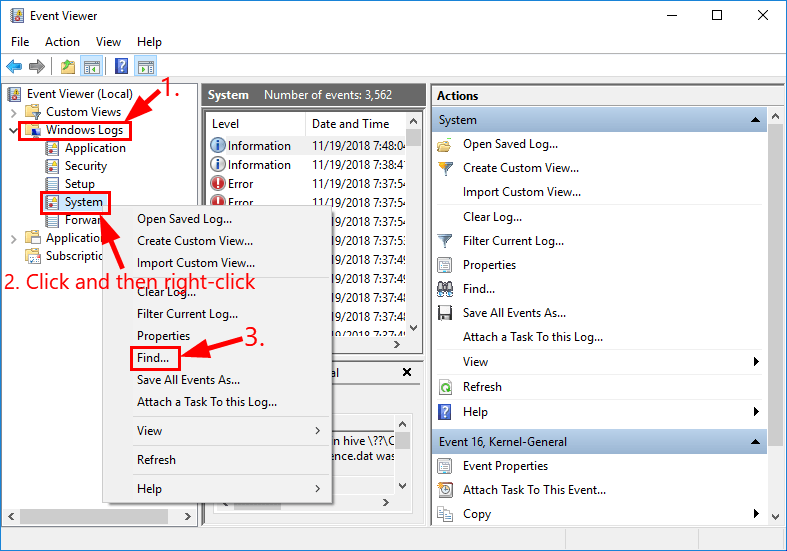
- Double-click on Windows Logs to expand, then click and then right-click on System and select Find….
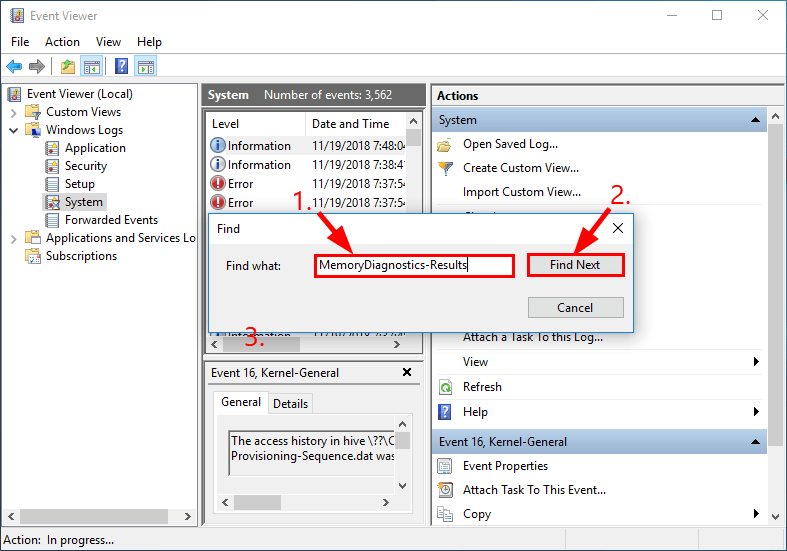
- Type MemoryDiagnostics-Results and click Find Next. Then close the Find window.
- Double-click on the selected event and check the results:
- If it reads The Windows Memory Diagnostic tested the computer’s memory and detected no errors, then you can exclude bad memory as the root of the problem.
- If it detects errors, then you might have to run memory tests on EACH memory stick (by removing the rest) and check Event Viewer until you pin down the offending one. Replace it and you should be able to fix the problem.


")

")
")
")

 in 2024")
")