How to stop Skype from starting automatically

22 Revisions

Skype usually starts automatically when your computer turns on. If you don’t need the App every time you boot the PC, follow the instructions below to see how to prevent Skype from starting automatically.
Option 1 – Disable Skype from the Startup tab
- Stop Skype from starting automatically on a Windows 10 PC
- Stop Skype from starting automatically on a Windows 7/8 PC
Stop Skype from starting automatically on a Windows 10 PC
If you’re on Windows 10, follow the instructions to prevent Skype from running at startup:
- On your keyboard, press the Ctrl, Shift, and Esc keys at the same time to open Task Manager.
- Click the Startup tab.

- Right-click Skype and select Disable.
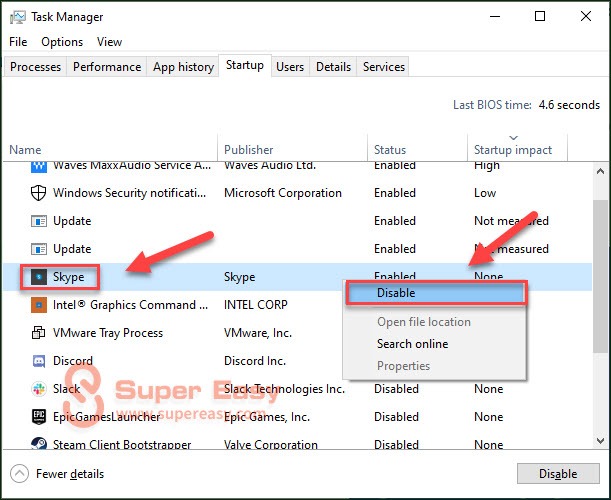
- Restart your computer to check if Skype starts automatically.
Stop Skype from starting automatically on a Windows 7/8 PC
If you’re on Windows 7 or 8, here’s how to disable Skype from auto-startups:
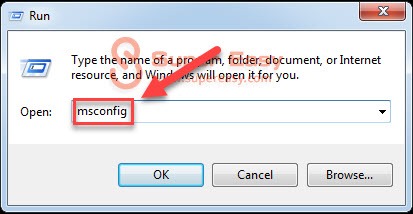
- On your keyboard, press the Windows logo key and R at the same time.
- Type msconfig and press Enter,
- Click the Startup tab.
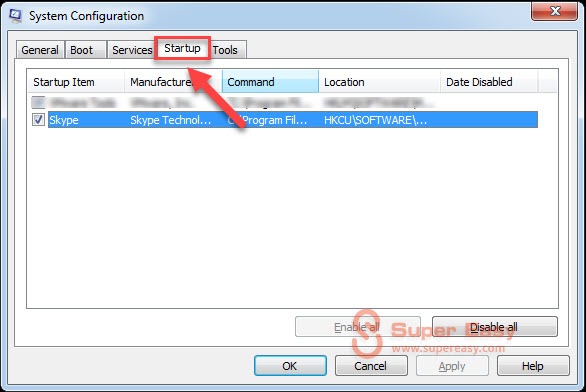
- Uncheck Skype and click Apply then OK.

- Click Restart.
Option 2 – Turn off Skype background app functionality
If you’re using the new Microsoft Skype for Windows 10 (Skype UWP), you’re not likely to find it on the Startup tab. Skype UWP runs automatically when your PC boots if you don’t sign out your account before closing your computer.
If you don’t want to log out Skype each time you turn off the computer, you can turn off the background app functionality for the app. Here’s how to do it:
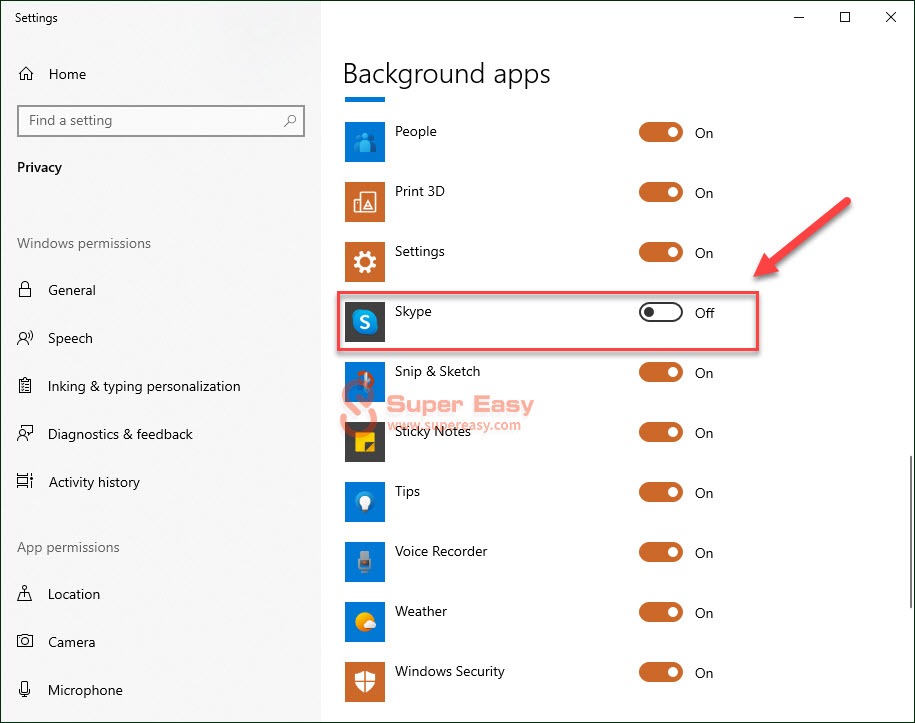
- On your keyboard, press the Windows logo key and type background apps, then select Background apps.
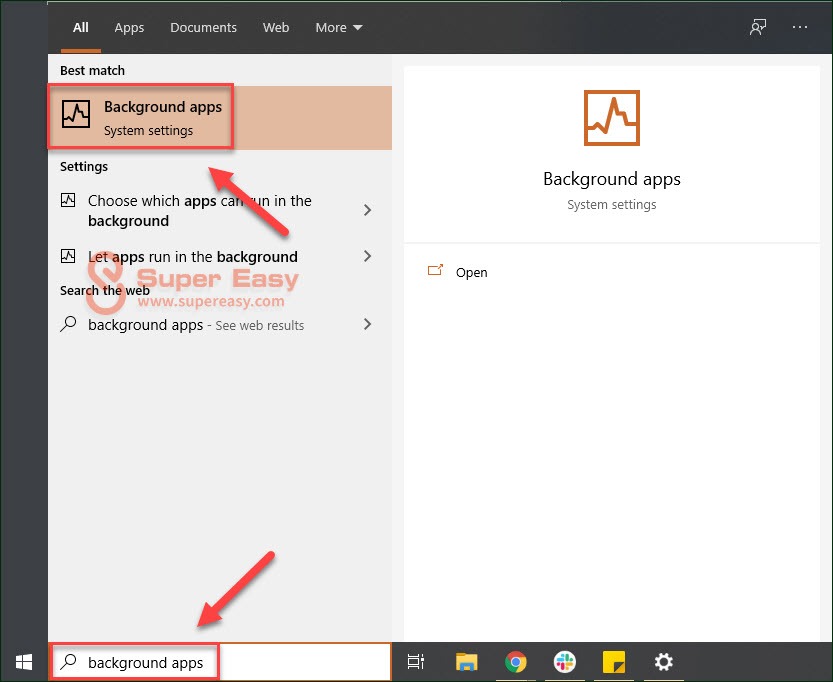
- Toggle off the button next to Skype.
- Restart your computer to see if Skype is disabled from auto-startups.
Hopefully, this post helped. If you have any questions or suggestions, please feel free to leave a comment below.


![How to Install Kodi on Amazon Fire Stick [2021 Easy Guide]](https://www.supereasy.com/wp-content/uploads/2018/08/Snap20-768x346.jpg "How to Install Kodi on Amazon Fire Stick [2021 Easy Guide]")
![How to uninstall programs in Mac [SOLVED]](https://www.supereasy.com/wp-content/uploads/2018/11/photo-1483203257148-66ee23170d09-768x512.jpg "How to uninstall programs in Mac [SOLVED]")


")
")
")

 in 2024")
")