Word: Spell Checker Not Working [Solved]

37 Revisions
![Word: Spell Checker Not Working [Solved]](https://www.supereasy.com/wp-content/uploads/2018/08/Snap10.png "Word: Spell Checker Not Working [Solved]")
Spell checker not working in Word? The easiest solution is to reset the configuration in Word. Try these tips to solve the problem.
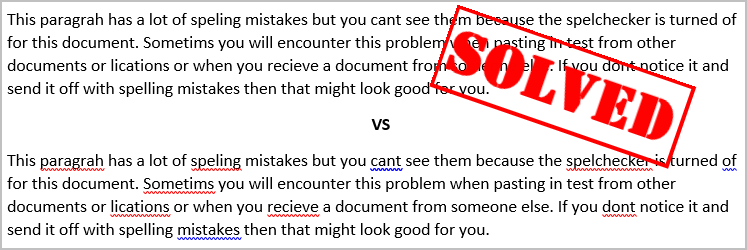
Sometimes when you paste text into Microsoft Word from other documents or locations, or when you receive a document from someone else, you don’t get red lines underneath misspelled words as you’re supposed to. Don’t worry, you’re not the only one experiencing this. The easiest fix is to reset the configuration in Word.
Try the following tips:
- Verify the proofing options of the Word Options dialog box
- Verify the Language dialog box
- Enter Microsoft Word Safe Mode
- Rename the Proofing Tools folder in Windows Registry
Note: Tips provided in this article apply to Microsoft Word 2010 and later versions.
1. Verify the proofing options of the Word Options dialog box
1) Click the File tab, and select Options.
2) In the left pane, select Proofing.
3) Under When correcting spelling and grammar in Word, verify Check spelling as you type and Mark grammar errors as you type are checked.
4) Scroll to the bottom area called Exceptions for: and make sure its checkbox is clear.
5) Click OK.
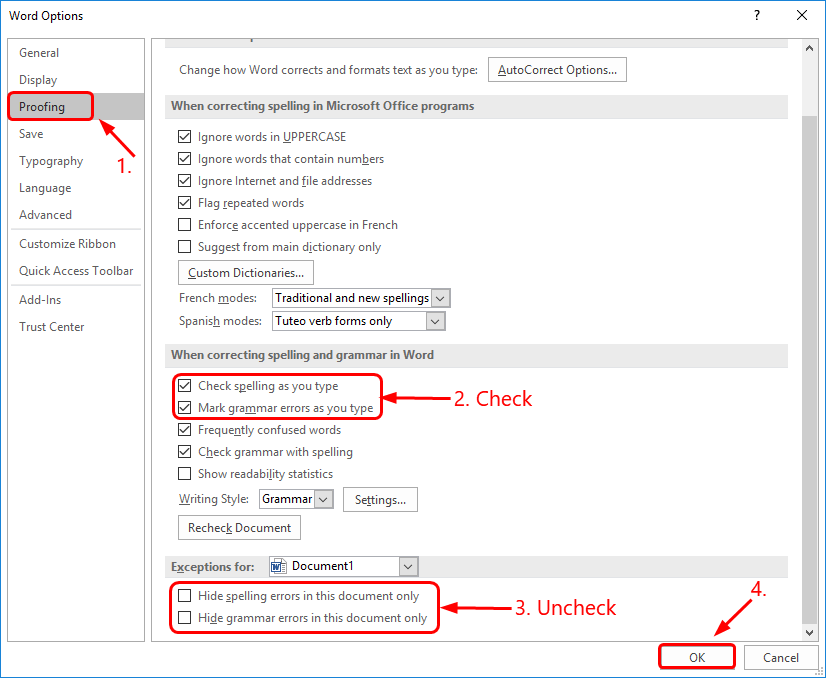
6) Recheck your document.
If the problem persists, continue with the following methods.
2. Verify the Language dialog box
1) Open the document in question, press the Ctrl+A keys on your keyboard to select the entire text.
2) Click the Review tab, select Language < Set Proofing Language…

3) In the Language dialog, make sure the correct language is selected, and Do not check spelling or grammar is unchecked.

4) Click OK.
5) Recheck your document.
If the problem continues, you can try the following steps.
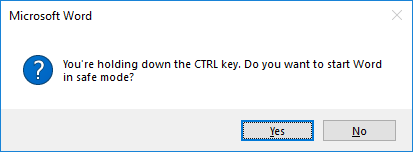
3. Enter Microsoft Word Safe Mode
Note: Your problem might be caused by a combination of factors such as another Word add-in. You can verify this by checking whether spell-check works in “safe mode”. Safe Mode is a reduced functionality state where Microsoft Word loads without add-ins.
1) Hold down the Ctrl key and double click the icon of or select the menu option for Word.
2) Click Yes when the Safe Mode dialog appears.
3) Open the document in question.
4) Press the F7 key to run spell check.
If it doesn’t work, read on and there’s another method for you to try.
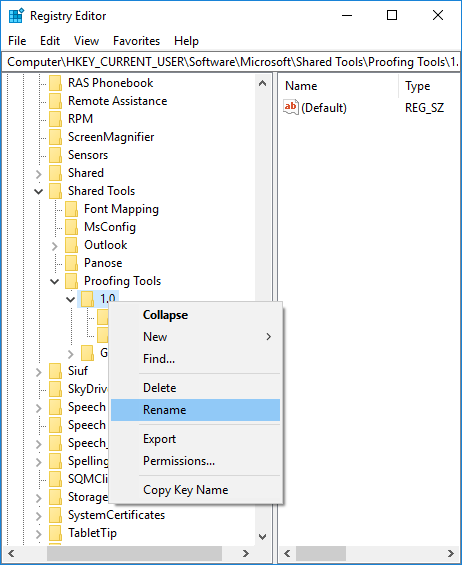
4. Rename the Proofing Tools folder in Windows Registry
1) Save your document and close Word.
2) On your keyboard, press the Windows logo key and R key at the same time to invoke the Run box.
3) Type regedit and click OK.

4) In the left pane, navigate to the following entries: HKEY_CURRENT_USER | Software | Microsoft | Shared Tools | Proofing Tools.
5) Right-click on the folder named 1.0 and select Rename.
6) Rename the folder to 1PRV.0.
7) Close the Registry Editor window.
8) Restart word and recheck your document.
If these solutions don’t resolve your spell check not working problem in Word, you can go to the Microsoft website: The spelling and grammar checker isn’t working as expected.
Leave a comment below to share your results with others once you’ve tried the tips. Any other suggestions concerning the topic are also welcome.

![Recover Unsaved Word Document [With Pictures]](https://www.supereasy.com/wp-content/uploads/2018/05/img_5b04dd8b04481.png "Recover Unsaved Word Document [With Pictures]")

![[SOLVED] FaceTime Not Working on iPhone/iPad/iPad touch](https://www.supereasy.com/wp-content/uploads/2019/04/image-250.png "[SOLVED] FaceTime Not Working on iPhone/iPad/iPad touch")

![[SOLVED] How to Delete Facebook Page](https://www.supereasy.com/wp-content/uploads/2019/02/web-design-1953128_1280-768x614.jpg "[SOLVED] How to Delete Facebook Page")
")
")
")

 in 2024")
")