SOLVED: Windows was unable to complete the format

18 Revisions

Can’t format your drive? Don’t panic. In this guide, you’ll learn how to solve the error: Windows was unable to complete the format.
When you try to format your USB flash drive or SD card on your Windows computer, you may probably have this error: Windows was unable to complete the format. This is a very common problem that so many other Window users encounter it just like you do.
But there’s no need to panic. We’re about to show you how to fix this problem and teach you how to format your USB flash drive or SD card successfully.
In this guide, you’ll learn:
- Why does Windows was unable to complete the format occur?
- How can I format the USB flash drive or SD card successfully?
Why does Windows was unable to complete the format occur?
Any of the following occurs, you couldn’t format your device then, and this will bring up the error: Windows was unable to complete the format.
- Your USB drive is infected by Virus, like it has been connected to a computer infected by a virus.
- There’s any sector of your USB drive damaged.
- Your USB drive is write-protected.
- Your USB drive is physically damaged.
- …
Whatever the reason try the methods below to format your USB drive:
How can I format the USB flash drive or SD card successfully?
Here’re the top three ways you can try to format your USB drive when you fail to format it in the general way.
Option 1: Format your device in Disk Management
Option 2: Format your device by diskpart command-line utility
Option 3: Format your device by a third-party tool (NO data loss)
Option 1: Format your device in Disk Management
Note: This option will delete any data on your removable drive.
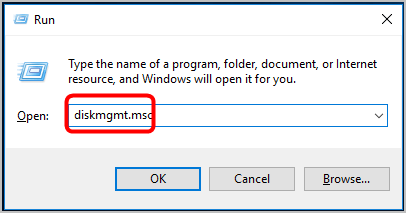
1) On your keyboard, hold down the Windows logo key ![]() and press the R key to bring up the Run box.
and press the R key to bring up the Run box.
2) Type diskmgmt.msc and press Enter.
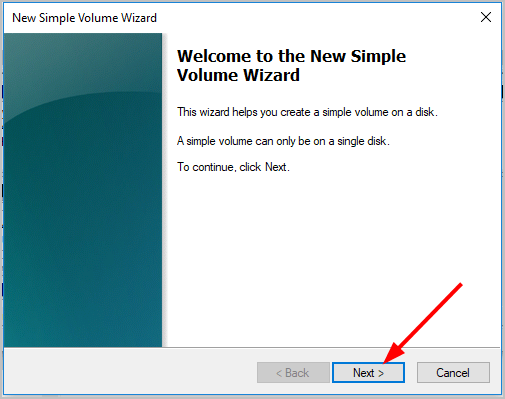
3) Right-click on your removable drive in the box below and select New Simple Volume…

4) Click Next to follow the New Simple Volume wizard.]
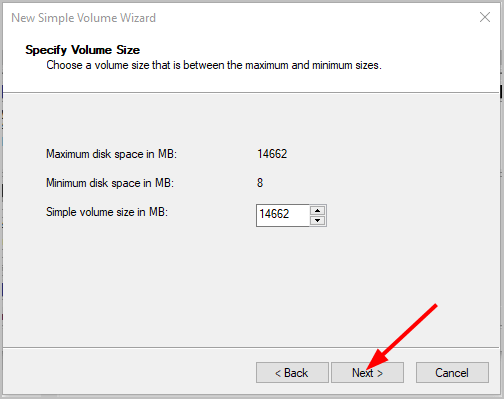
5) Enter a number you want to set for the new volume size between the maximum and minimum ones, and click Next.
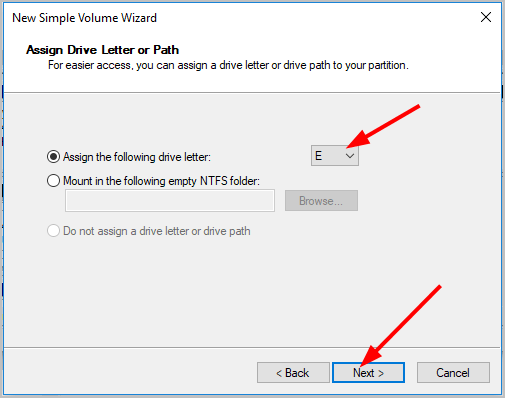
6) Assign your drive letter then click Next.
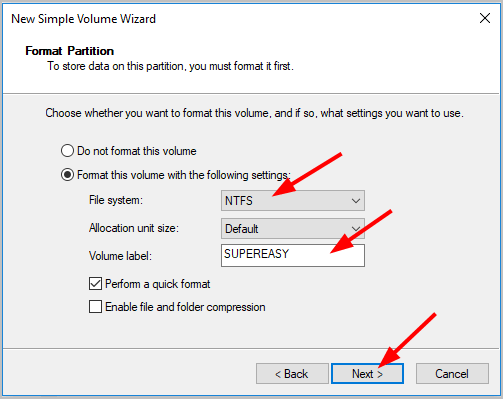
7) Set File System to NTFS and name your drive in the Volume label, then click Next.
8) Click Finish.

Now your disk is successfully formatted and you can transfer files onto it.
Option 2: Format your device by diskpart command-line utility (NO data loss)
Note: This option will delete any data on your removable drive.
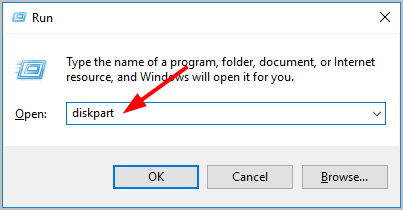
1) On your keyboard, hold down the Windows logo key ![]() and press the R key to bring up the Run box.
and press the R key to bring up the Run box.
2) Type diskpart and press Enter.
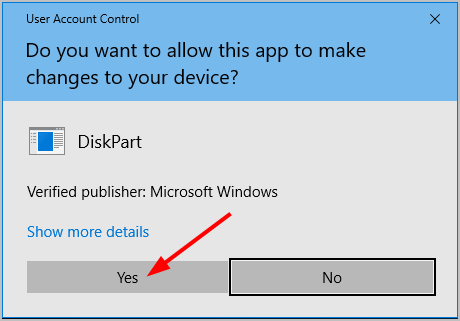
3) Click Yes when prompted by User Account Control.
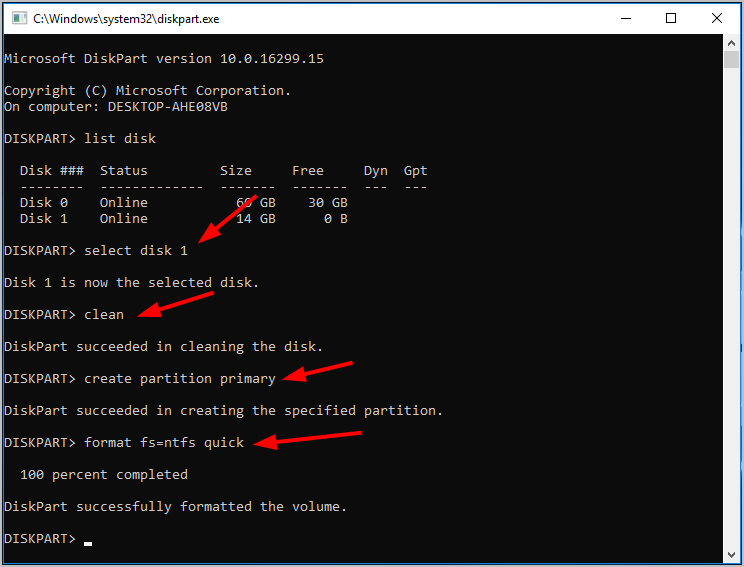
4) Type the following command one by one and press Enter after each.
- list disk
- disk volume (like here I type select disk 1 as my removable drive is disk 1)
- clean
- create partition primary
- format fs=ntfs quick
Now your disk is successfully formatted and you can transfer files onto it.
Option 3: Format your device by a third-party tool (NO data loss)
If you can’t access the drive you want to format, and there’s something important you want to keep before formatting, use a third-party tool to format your drive. There’re many third party tools you can find on the Internet to help you format your drive at the meantime, keep you files on the drive. Make sure to choose a well-known and experienced one in case of any unexpected damage to your file or drive.


![macOS could not be installed on your computer [SOLVED]](https://www.supereasy.com/wp-content/uploads/2018/08/pexels-photo-129205-768x513.jpeg "macOS could not be installed on your computer [SOLVED]")


")
")
")
")

 in 2024")
")