Install One Nation on Kodi

5 Revisions
One Nation Build Portal is one of the most popular builds available on the Kodi. One Nation offers options to build based on device requirements. It’s a small but useful tool that enhances your user experience.
Follow the below tutorial to install One Nation step by step.
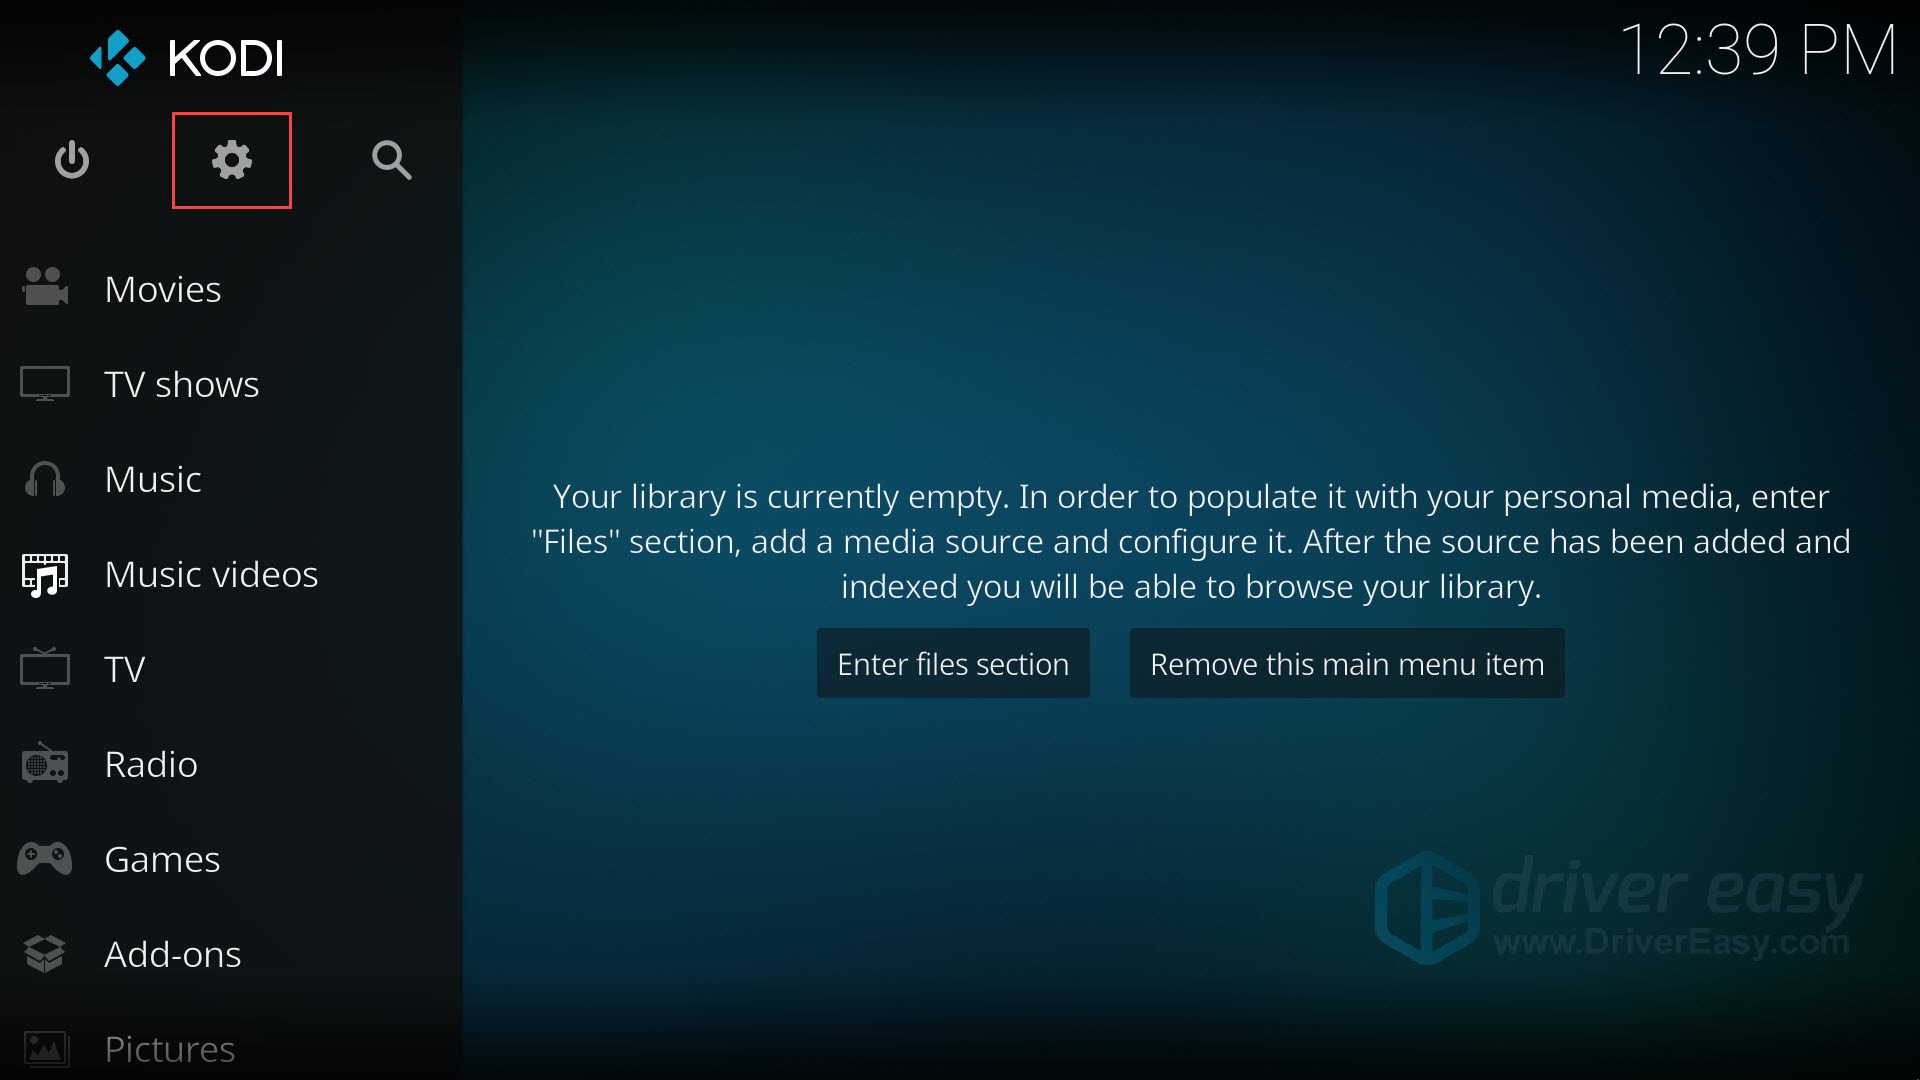
- Launch Kodi and click the Settings icon.
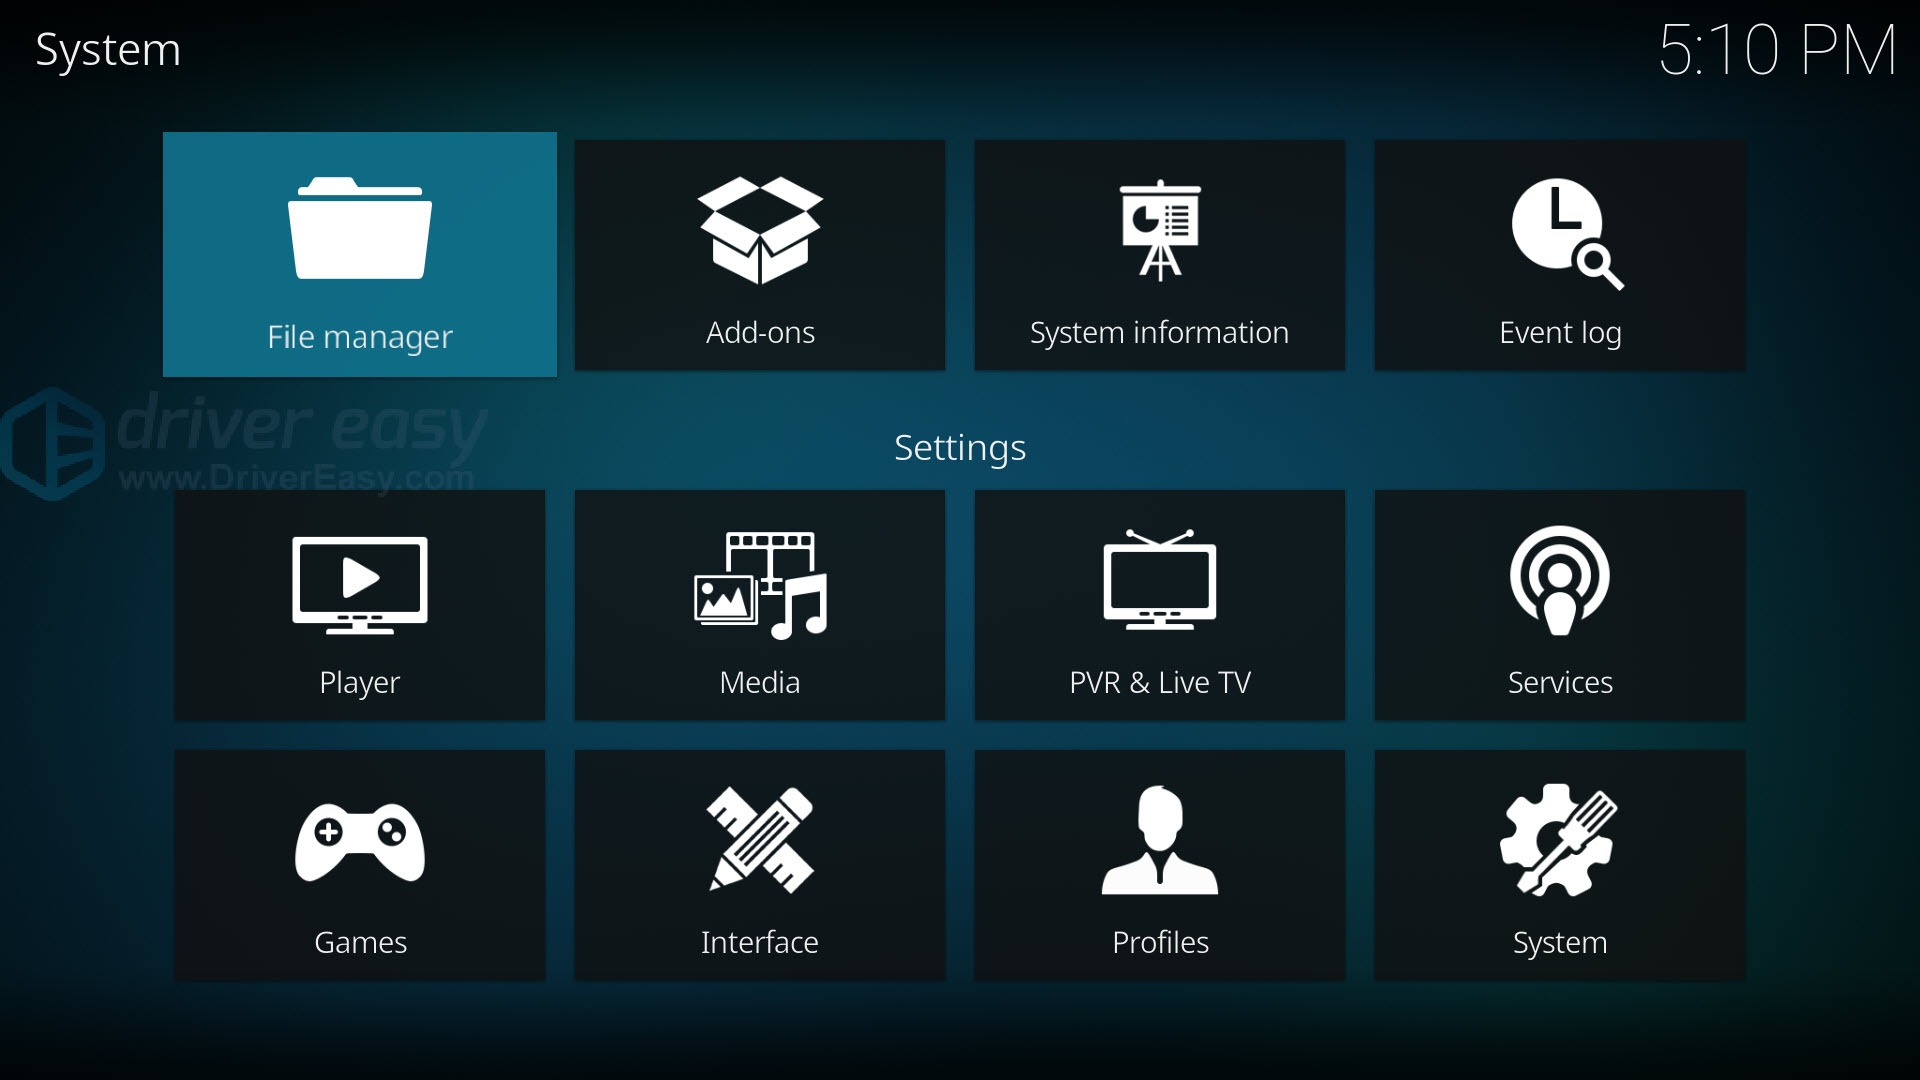
- Choose File manager.
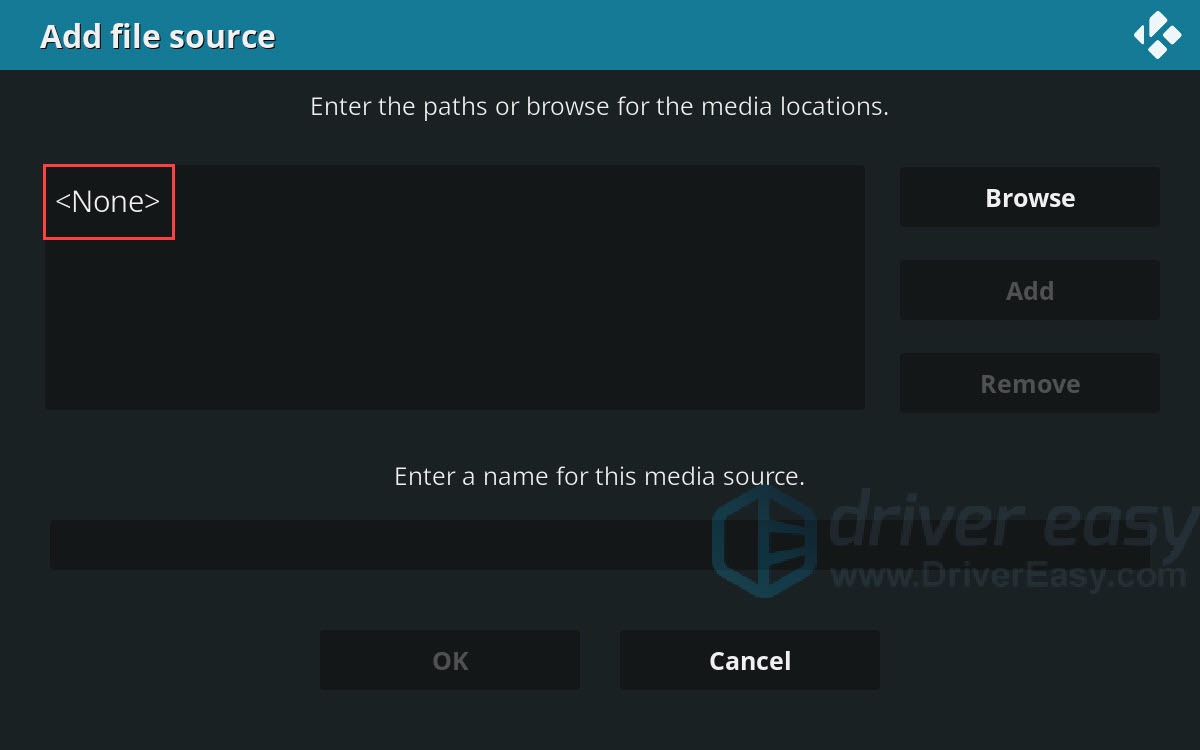
- Click Add source.

- Click <None>.
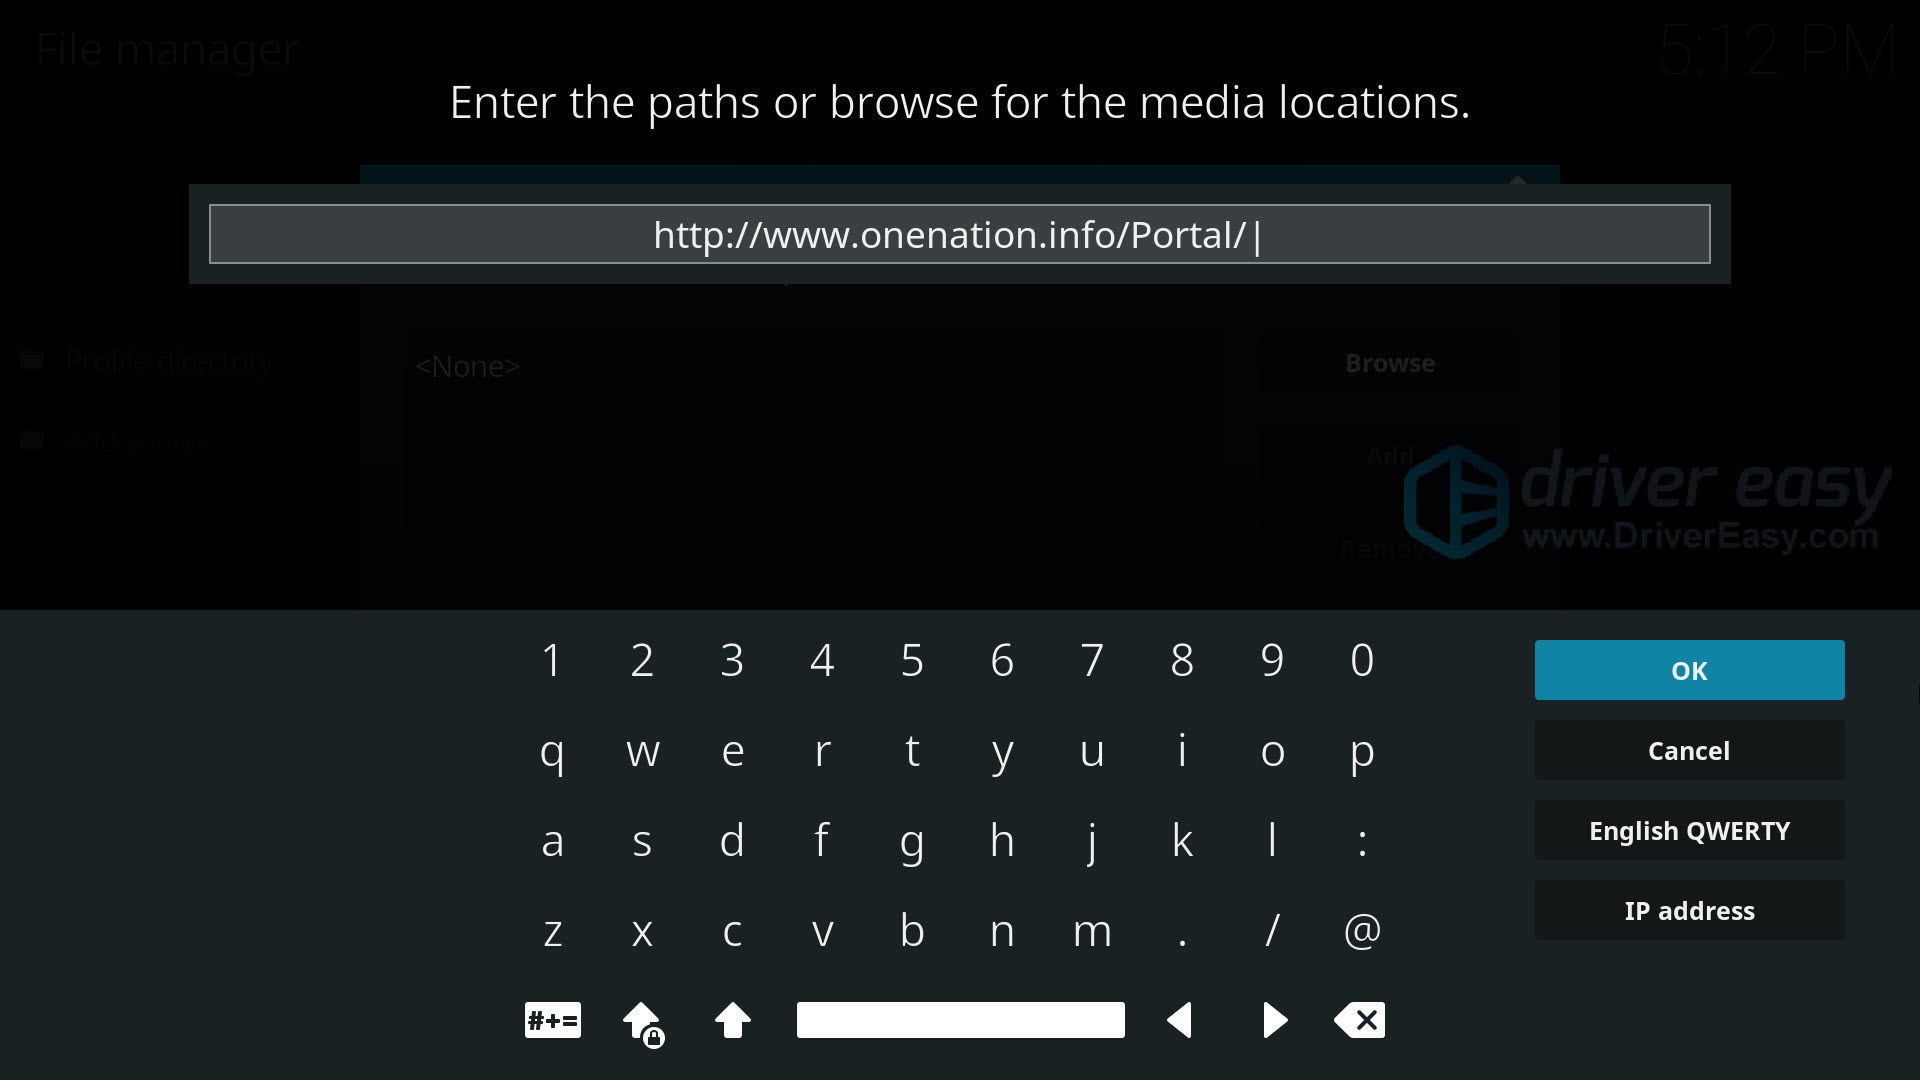
- Type the “http://www.onenation.info/Portal/” URL and click OK.
- Name this media source and click OK.
Note: remember the name, you’ll use it later.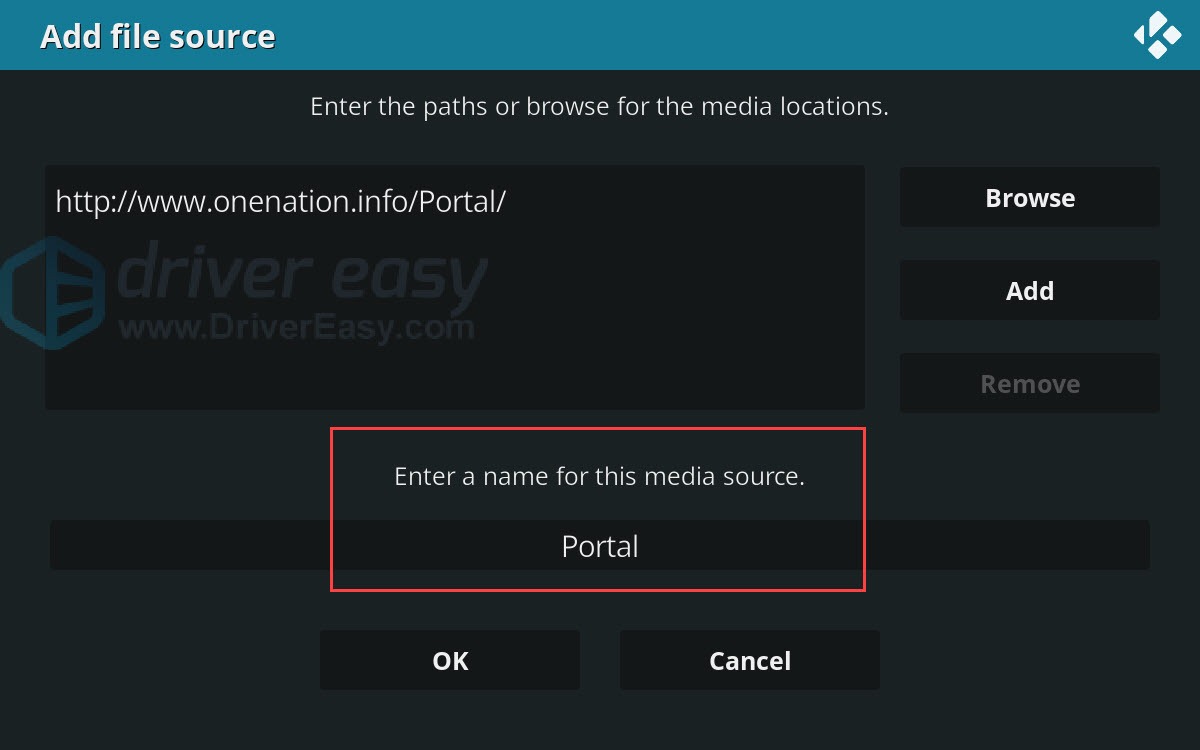
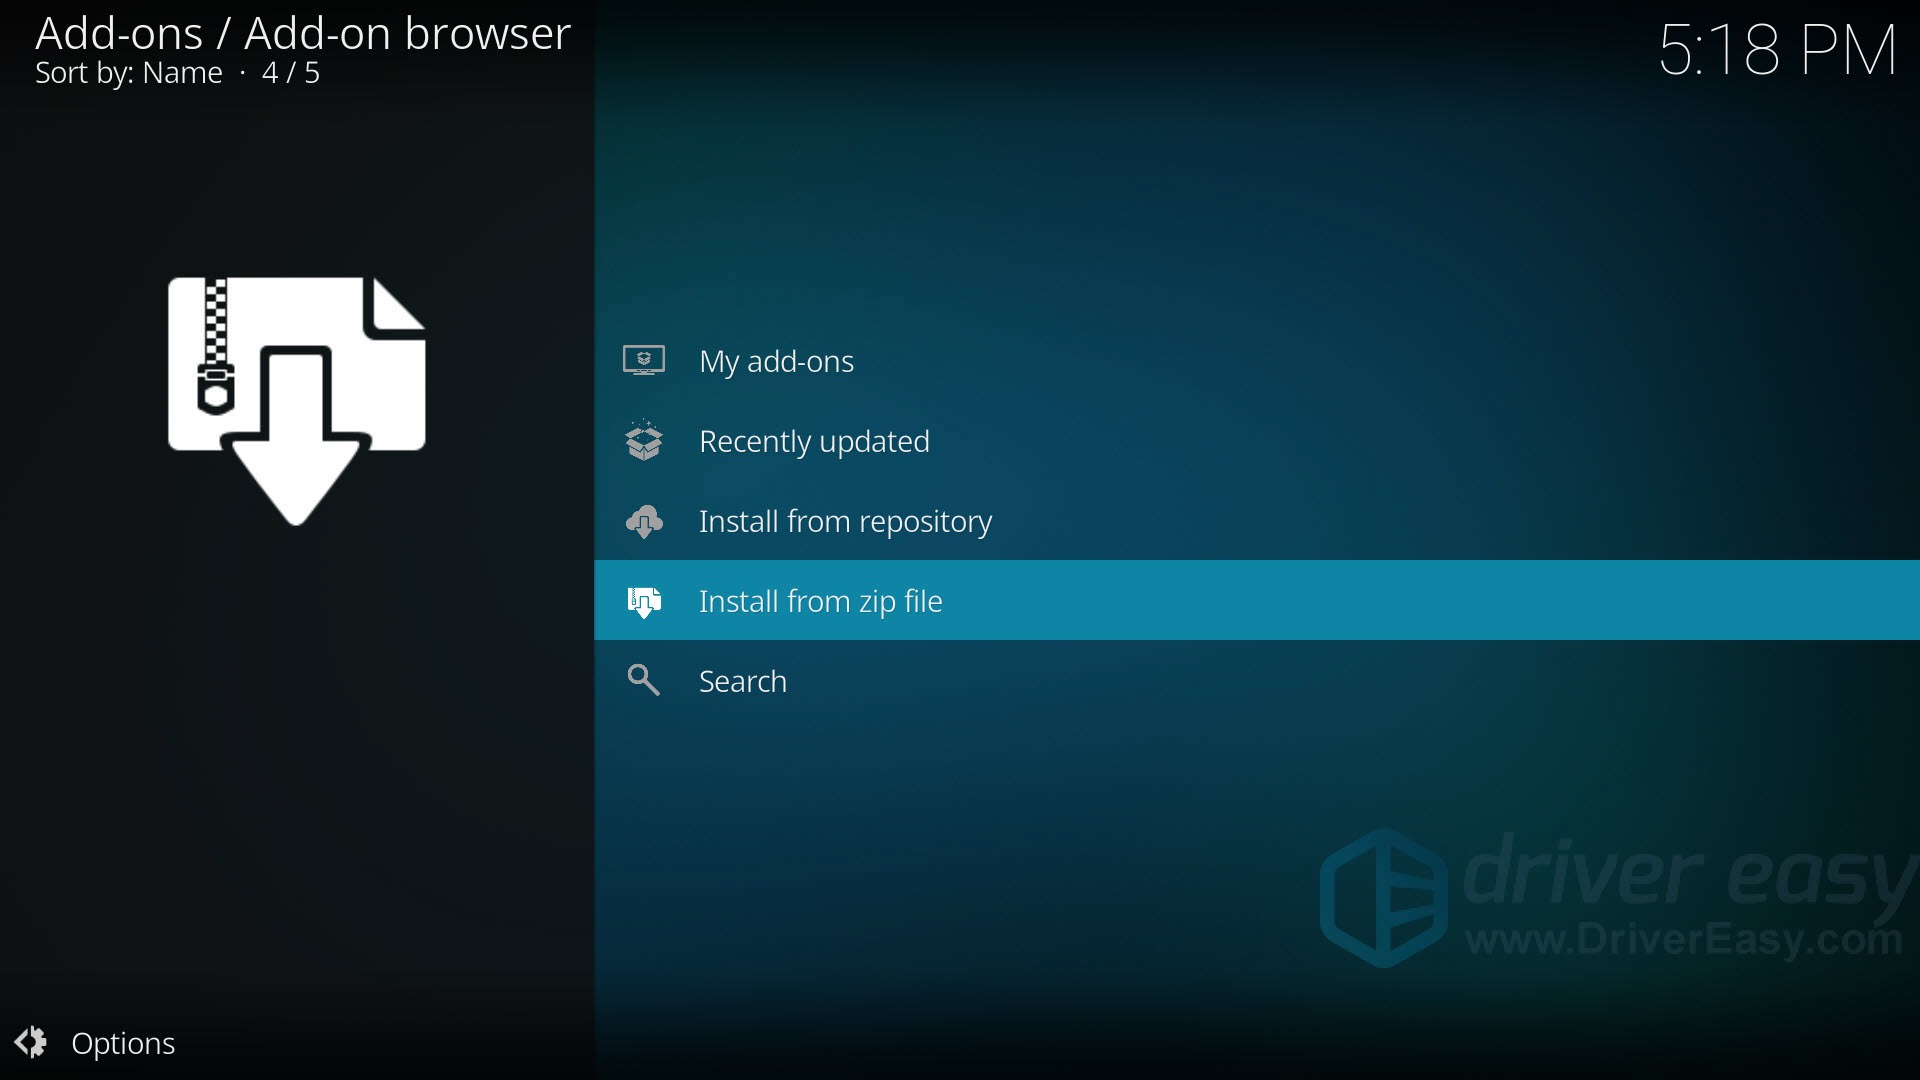
- Back to the Kodi home screen and click Add-ons.

- Click the small “open box” icon.

- Click Install from zip file.
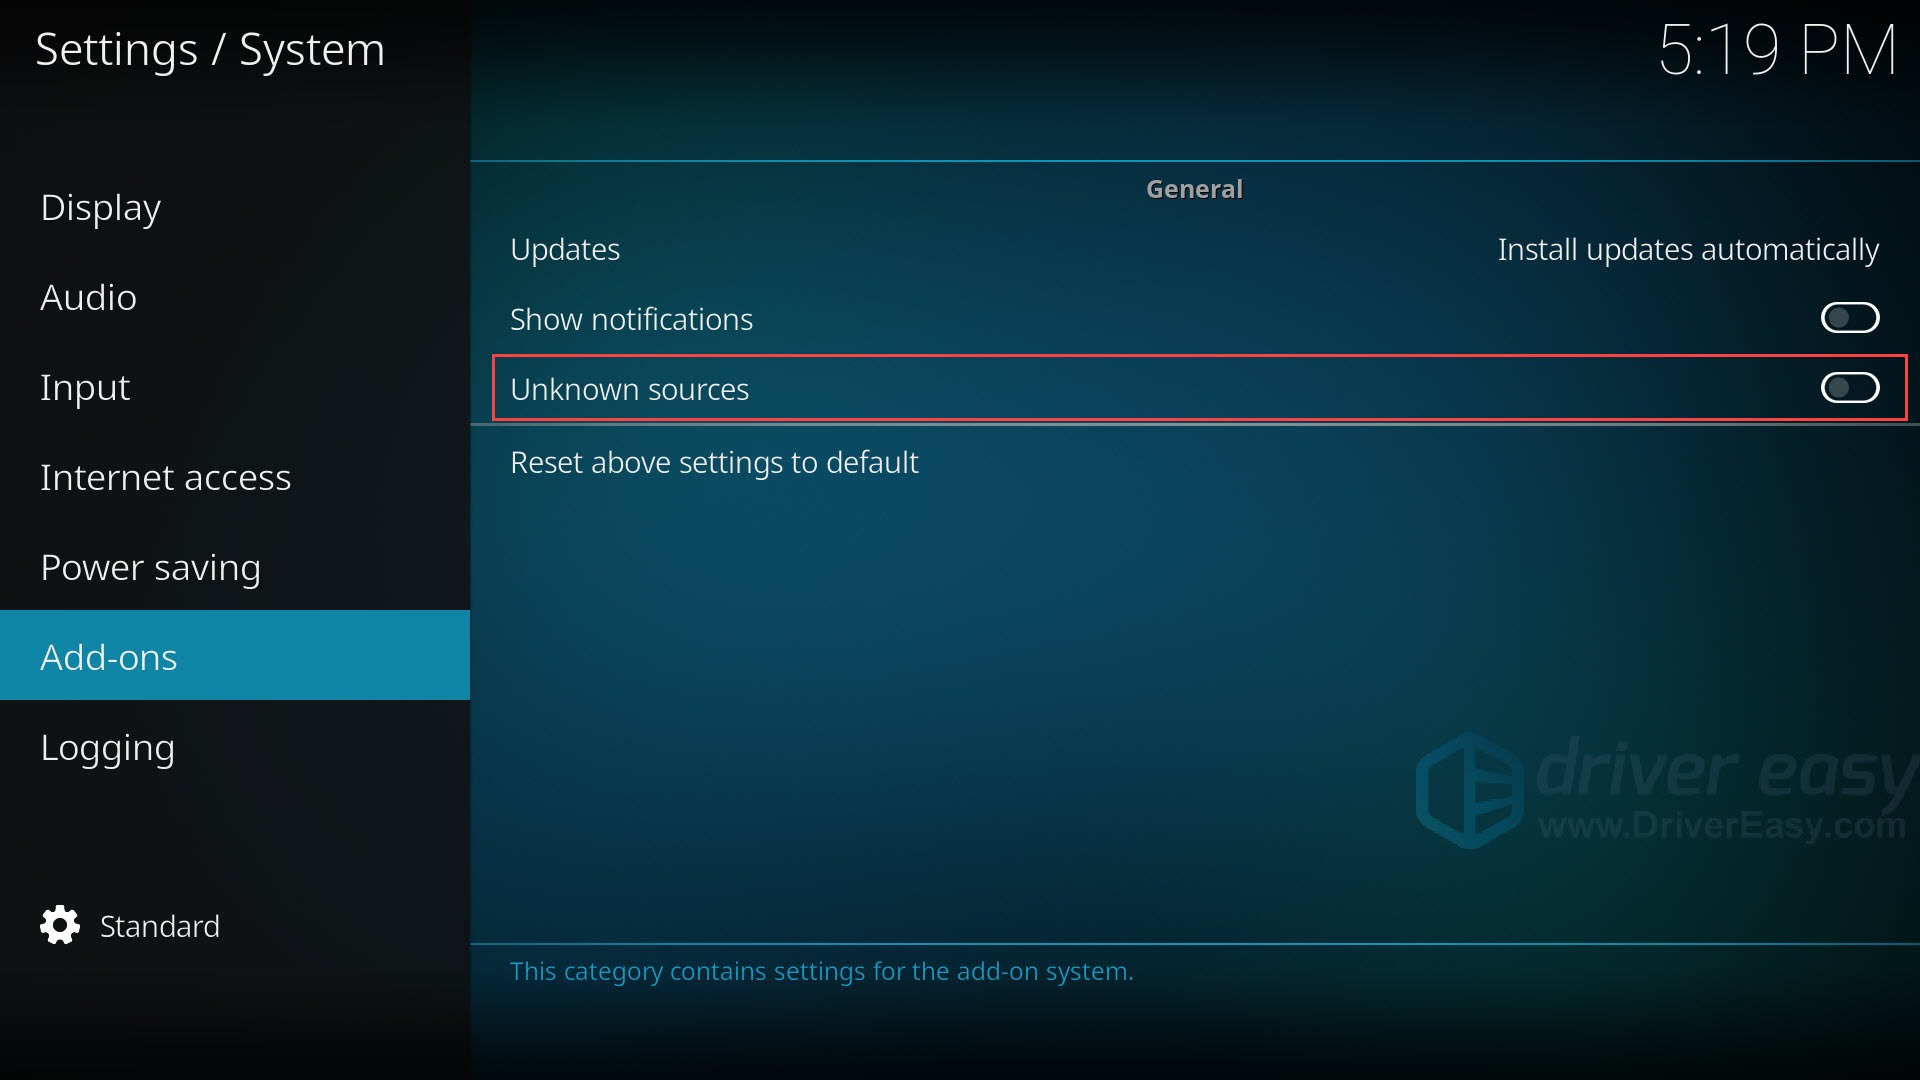
- Click Settings in the pop-up window. This will prompt you to allow unknown sources.

- Turn on the button next to Unknown sources. There will be a Warning window pop-up, click Yes and move to the next step.
- Back to the Install from zip file page. Click Install from zip file and then select the file you named in step 6.
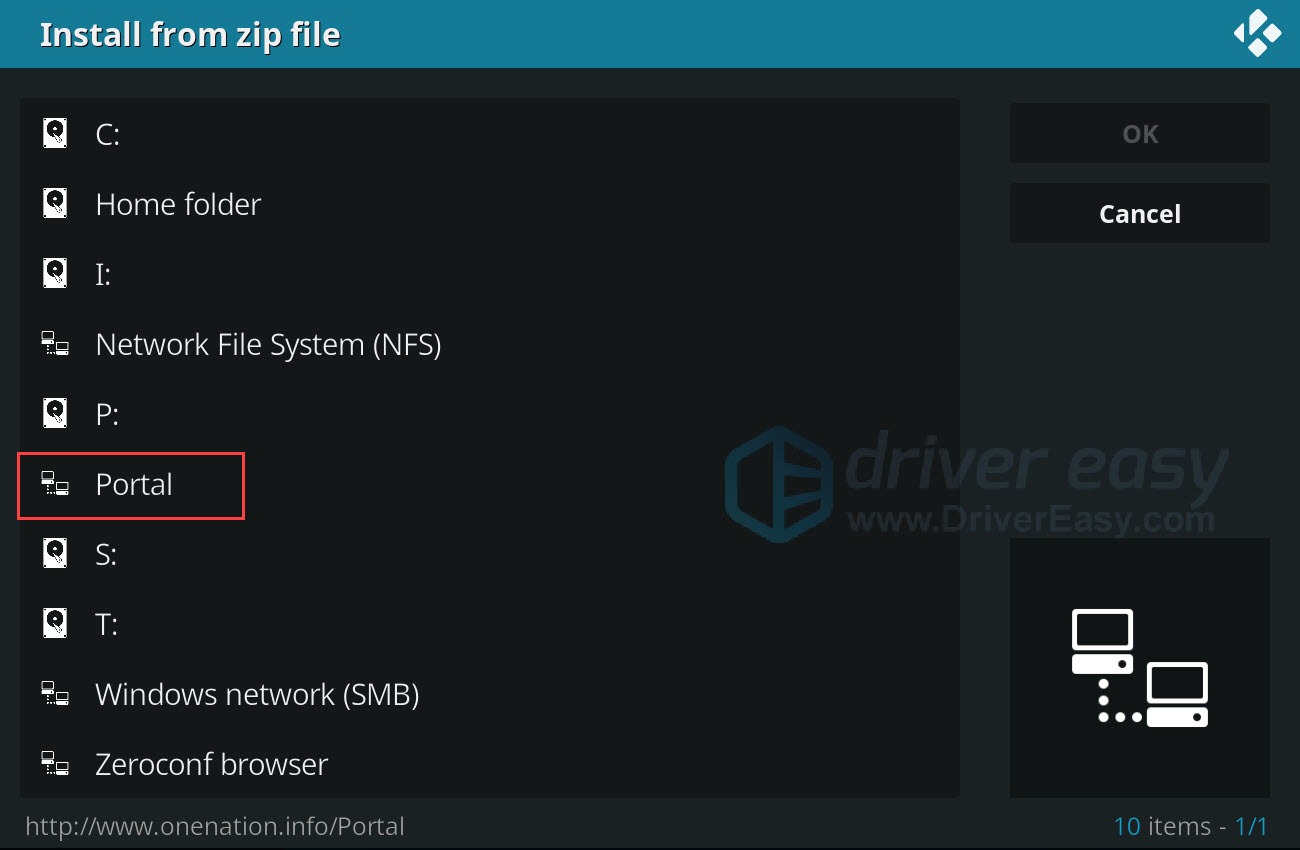
- Click the zip file. (The name of the file may be different from yours.)
Then wait for One Nation Portal installed message to appear. The message should appear at the upper right of the screen.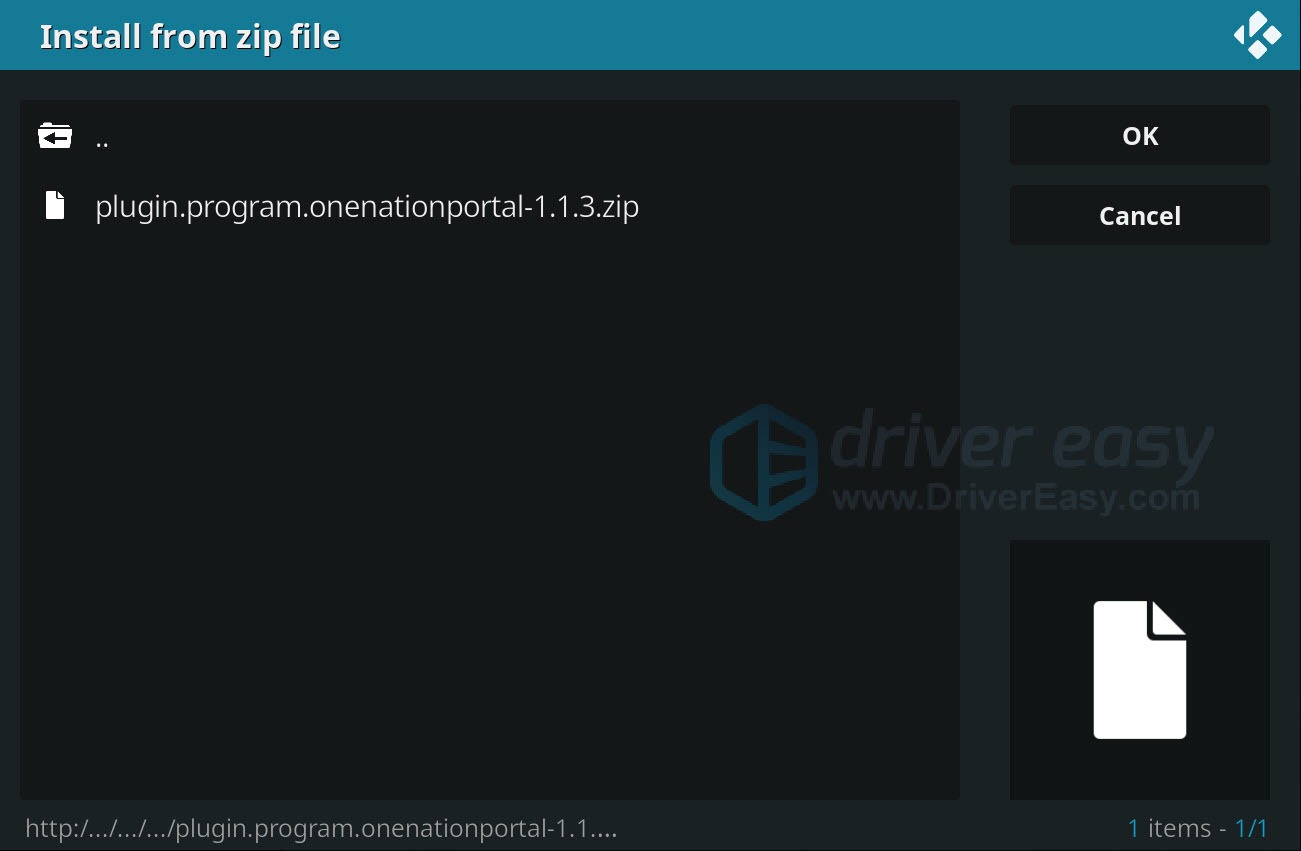
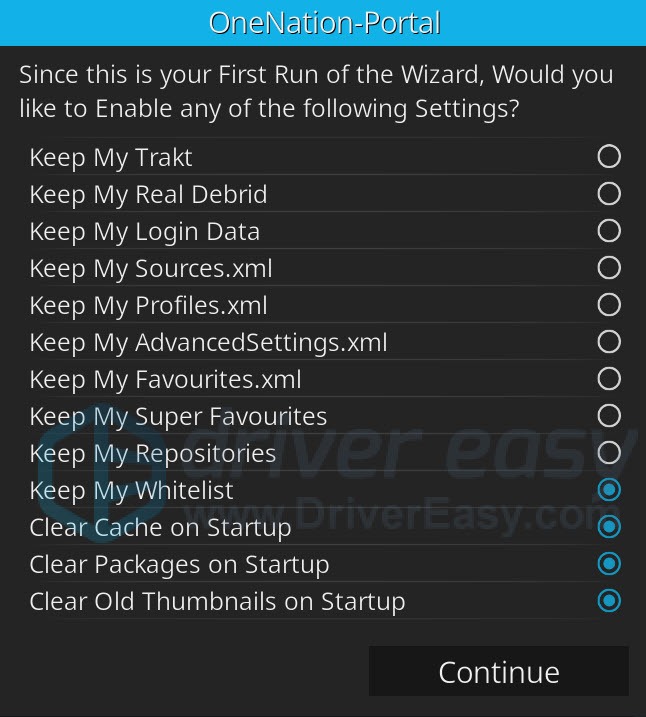
- You’ll see the below window. Enable the settings you like and click Continue.
- Click Build Menu.

- Wait till the installation finished.
- Back to Kodi home screen, select Add-ons, you’ll see One Nation Portal.
Images in this article have been authorized by www.drivereasy.com.
That’s all! You can run it now! If you have any questions, please leave comments below and we’ll try our best to help.


![How to Install Kodi on Amazon Fire Stick [2021 Easy Guide]](https://www.supereasy.com/wp-content/uploads/2018/08/Snap20-768x346.jpg "How to Install Kodi on Amazon Fire Stick [2021 Easy Guide]")
")
")
")

 in 2024")
")