How to Unblur a Photo – Easy Steps for Beginners

8 Revisions

When you’re taking photos but got a blurred shot, you can always take another one. But in some cases, you don’t get this chance. For example, a stranger helped take a family photo, but you found the shot was blurry afterwards. The good news is there are some easy ways to make a blurry picture clear. Below, we’ll show you how to unblur a image.
How to unblur a photo
There are two options to unblur a photo. One option is to unblur the photo online. Another option is to unblur the photo with a third-party photo editor. Both options can allow you to unblur photos freely.
Option 1: Unblur a photo online
There are many online services and apps available for you to unblur a photo. If you don’t want to install third-party software on your computer, you can use the online services. If you don’t know what online services you can use, we recommend trying Fotor.
Fotor is a great online service that allows you to edit photos easily. You can use it to unblur your photos with a few clicks. It has the paid version and the free version. To unblur photos, you can just use the free version.
To unblur a photo with Fotor, you can follow these steps:
1) Go to Fotor photo edit page.
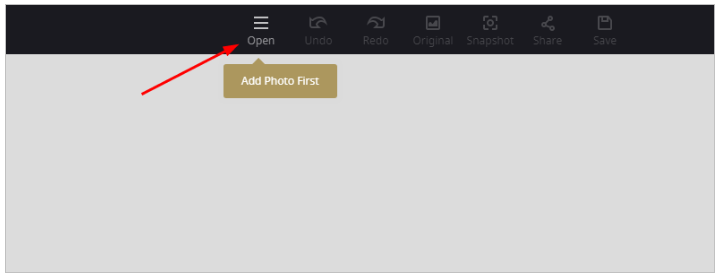
2) Click Open in the top menu to add the photo you want to unblur.
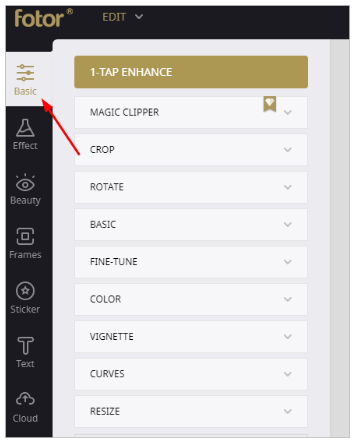
3) Once the photo is added, click Basic in the left panel.
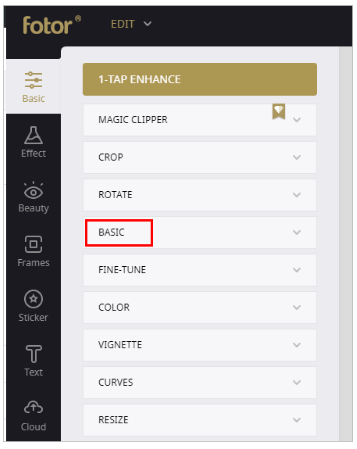
4) Expand BASIC in the pop-up menu.
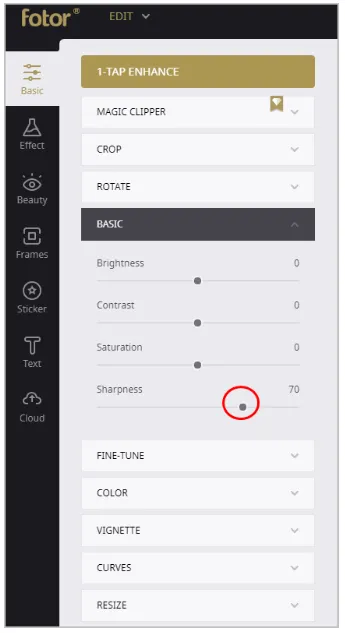
5) Under Sharpness, move the dot from left to right to adjust the sharpness. When you move the dot to the right, you’ll see the photo become clearer. Just adjust the sharpness to the level you want.
Option 2: Unblur a photo with a photo editor
Another option for you to unblur a photo is using a third-party photo editor. A photo editor is expected to have more functions than online services. If you edit photos a lot, we recommend you use a third-party photo editor. If you’re not sure what photo editor you can trust, try Movavi Photo Editor.
Movavi Photo Editor has a user-friendly interface that allows you to edit photos quickly. You also can use it to unblur photos with a few clicks. One of the amazing features that Movavi Photo Editor has is Before/After feature, which allows you to compare the fixed picture with the original picture directly. So you can tell if the revision makes the picture better. It has the trial version and the paid version. To unblur a photo, you can just use the trial version.

Movavi coupons and deals
To unblur a photo with Movavi Photo Editor, you can follow these steps:
1) Download and install Movavi Photo Editor. (Both Windows and Mac versions are available.)
2) Launch Movavi Photo Editor.
3) Click File in the top menu bar and select Open to open the blurry picture you want to fix. Or you can just drag and drop the blurry picture to the software.

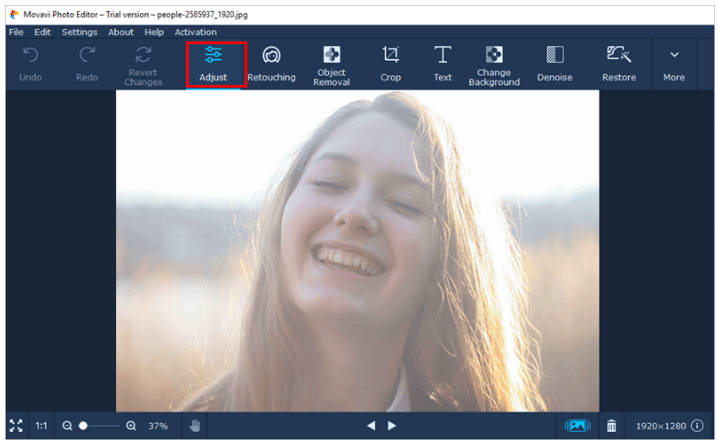
4) Click Adjust in the tools bar.
5) In the right pane, move the slide in the Sharpness to adjust the sharpness. When you move the slide to the right, you’ll see the picture become clearer. Just adjust the sharpness to the level you want.
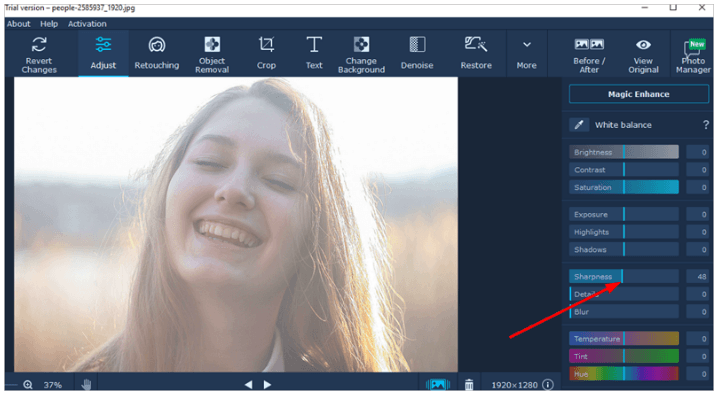
6) You can use the Before/After feature to compare the fixed picture with the original picture.
Hopefully you find the above tips helpful about unblur a photo. If you have any questions, ideas or suggestions, feel free to leave a comment below.
Credits: Icons made by Freepik from www.flaticon.com

![[2019 Tips] Touch Up Photos | 3 Tools Recommended](https://www.supereasy.com/wp-content/uploads/2019/07/2019-07-15_15-53-41-768x510.png "[2019 Tips] Touch Up Photos | 3 Tools Recommended")
![How to copy photos from iPhone to PC [SOLVED]](https://www.supereasy.com/wp-content/uploads/2018/11/phone-690134-768x512.jpg "How to copy photos from iPhone to PC [SOLVED]")


![How to transfer photos from iPhone to iPhone [Easily]](https://www.supereasy.com/wp-content/uploads/2018/11/iphone-2203712-768x512.jpg "How to transfer photos from iPhone to iPhone [Easily]")
")
")
")

 in 2024")
")