How to screenshot on a Chromebook

21 Revisions

I switched from a Windows laptop to a Chromebook in 2015. And in March of 2019, I retired my Windows desktop in favor of a Chromebox.
I’ve never looked back.
And I’m not a ‘lite’ user. I’m a copywriter and technical writer, and I make my devices earn their keep. ChromeOS is better in almost every respect. Faster, more reliable, longer-lasting, more secure, cheaper, less setup required, and zero maintenance required…
But there’s one area that ChromeOS is still lagging in: screenshots.
Not standard full-screen and selected area (region) screenshots. They’re easy. I’m talking about annotated screenshots.
But there’s a solution, and it’s a good one. Read on to find out what it is.
- Full-screen screenshot
- Full-screen screenshot with a normal keyboard plugged in
- Full-screen screenshot on a ChromeOS tablet
- Selected area (region) screenshot
- Selected area (region) screenshot with a normal keyboard plugged in
- Annotated screenshot
- Other advanced screenshots
- Accessing your Chromebook screenshots later
How to take a full-screen screenshot on a Chromebook
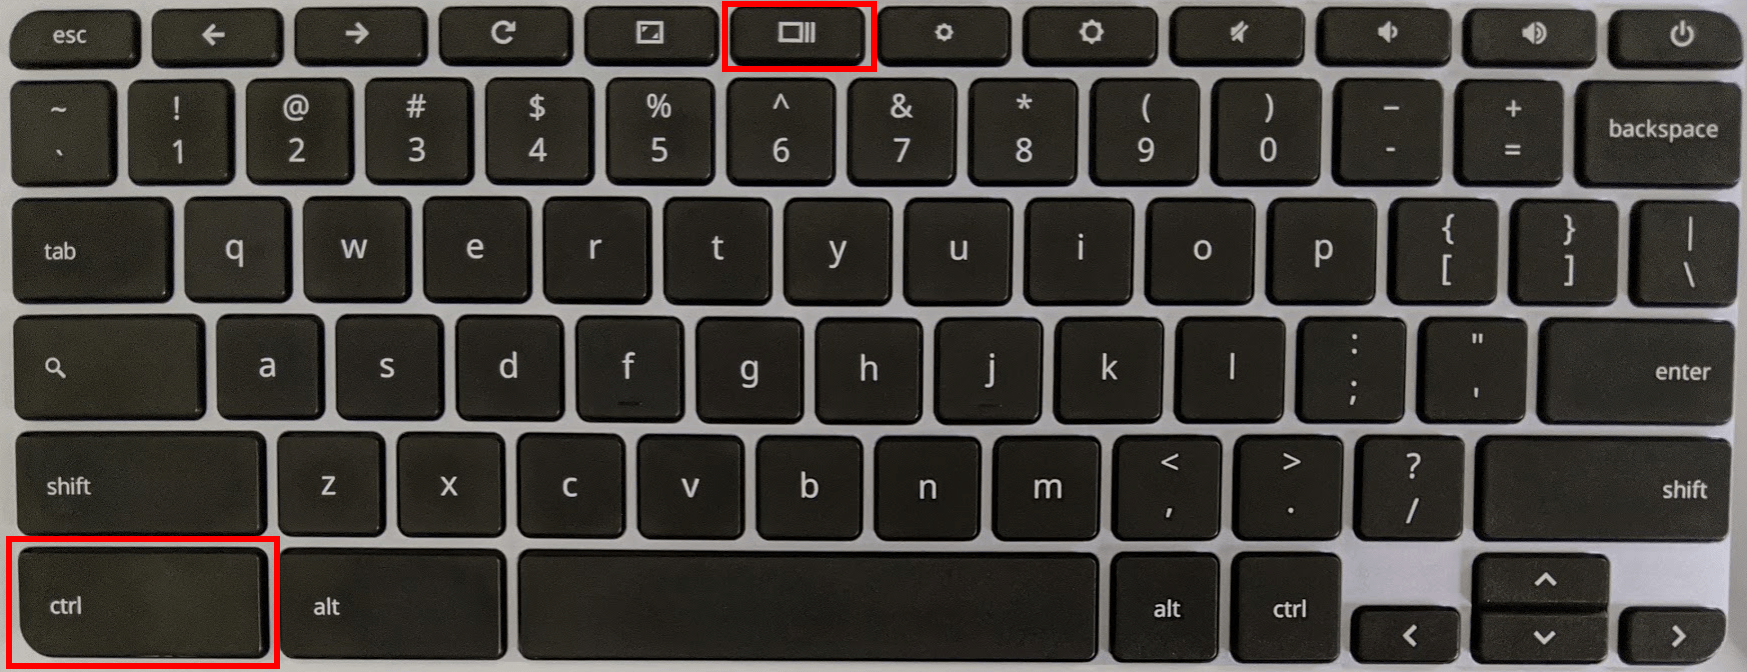
- Press Ctrl + Show windows on your keyboard:
That’s it!
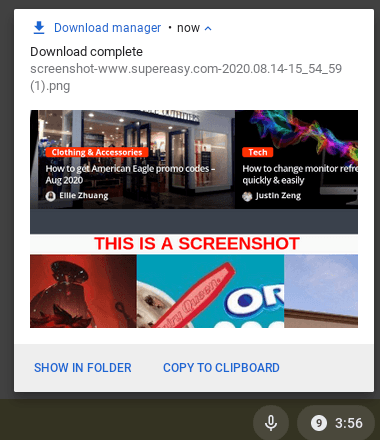
You’ll see a notification that your screenshot has been taken, and a prompt to copy it to your clipboard. If you want to paste the screenshot elsewhere (e.g. in an email or Slack thread), just click COPY TO CLIPBOARD: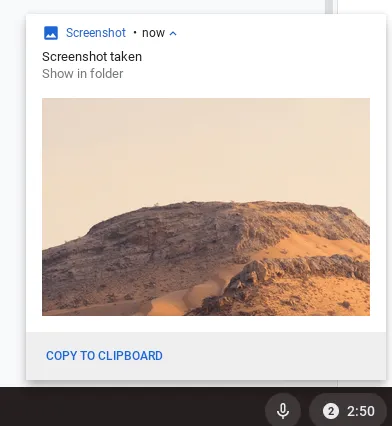
How to take a full-screen screenshot on a Chromebook or Chromebox with a normal keyboard plugged in
If you have a normal keyboard plugged into your Chromebook (or you’re using a Chromebox), press Ctrl + F5.
Again, you’ll see a notification that your screenshot has been taken, and a prompt to copy it to your clipboard. If you want to paste the screenshot elsewhere (e.g. in an email or Slack thread), just click COPY TO CLIPBOARD.
How to take a full-screen screenshot on a ChromeOS tablet
If you’re using a Chrome OS tablet / convertible Chromebook in tablet mode, just press the power button and the volume down button at the same time.
How to take a selected area (region) screenshot on a Chromebook
For a selected area screenshot:
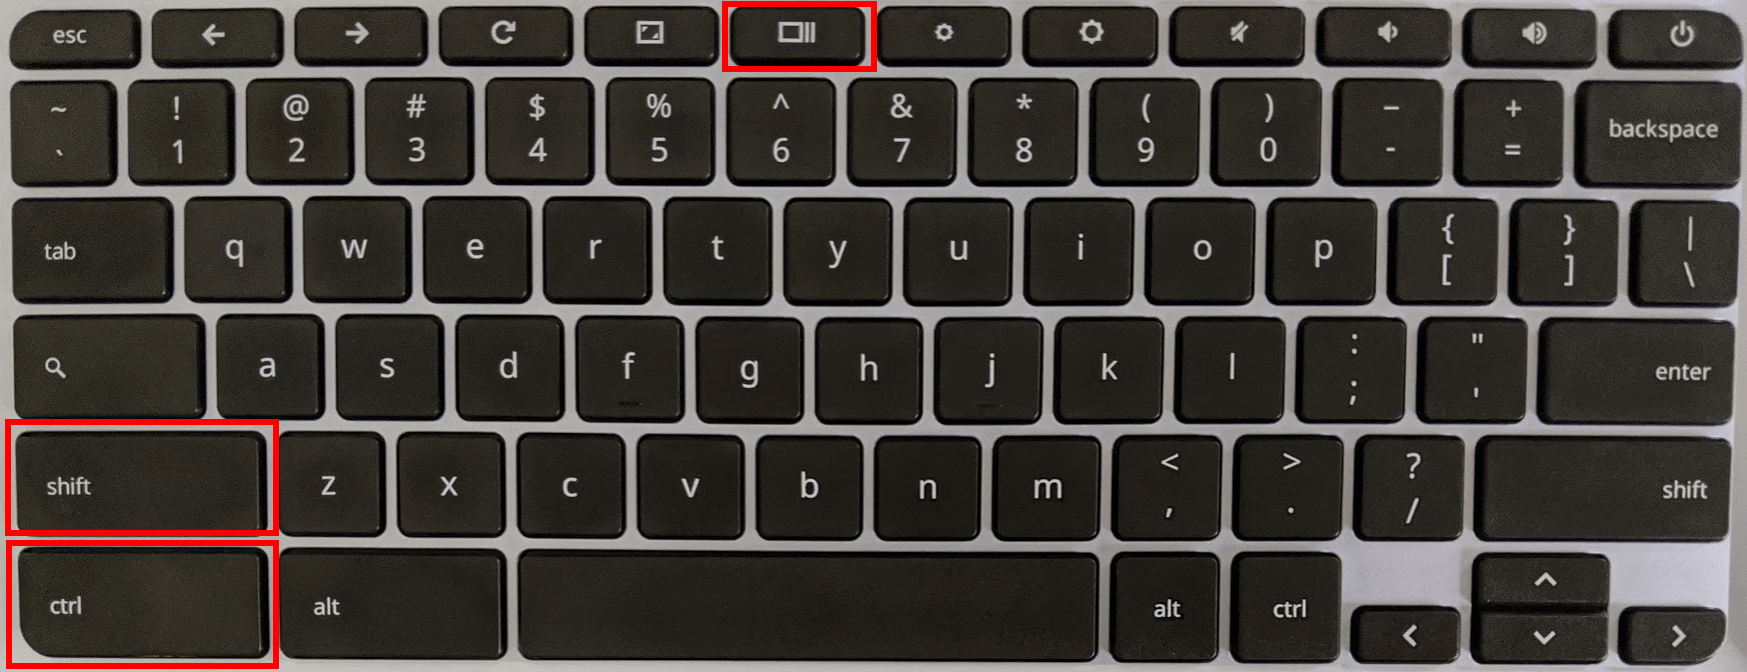
- Press Ctrl + Shift + Show windows.
- Click and drag with your mouse to select the area you want to capture. (If using your track pad, click and hold with one finger while moving another finger to select the area.)
- Release your mouse button. (If using your track pad, lift the first finger.)
Again, you’ll see a notification that your screenshot has been taken, and a prompt to copy it to your clipboard. If you want to paste the screenshot elsewhere (e.g. in an email or Slack thread), just click COPY TO CLIPBOARD.
How to take a selected area (region) screenshot on a Chromebook or Chromebox with a normal keyboard plugged in
If you’re using a normal keyboard with your Chromebook or Chromebox, here’s how to take a selected area screenshot:
- Press Ctrl + Shift + F5.
- Click and drag with your mouse to select the area you want to capture. (If using your track pad, click and hold with one finger while moving another finger to select the area.)
- Release your mouse button. (If using your track pad, lift the first finger.)
Again, you’ll see a notification that your screenshot has been taken, and a prompt to copy it to your clipboard. If you want to paste the screenshot elsewhere (e.g. in an email or Slack thread), just click COPY TO CLIPBOARD.
How to take an annotated screenshot on a Chromebook
To take an annotated screenshot on your Chromebook or Chromebox, you need to use a Chrome extension.
The best one is Nimbus. It’s free and very powerful.
To take screenshots with Nimbus, you first have to install the Chrome extension.
To install Nimbus (you only need to do this once):
- Go to https://chrome.google.com/webstore/detail/nimbus-screenshot-screen/bpconcjcammlapcogcnnelfmaeghhagj.
- Click Add to Chrome.
- When asked to confirm, click Add extension. The extension’s tool will appear at the top right of your browser window.

Now you’re ready to take and annotate screenshots.
To take and annotate a selected area (region) screenshot with Nimbus:
- Click the Nimbus tool in your extensions toolbar:
- Click Selected area:

- Click and drag with your mouse to select the area you want to capture. (If using your trackpad, click and hold with one finger while moving another finger to select the area.)
- You’ll then see 3 options:
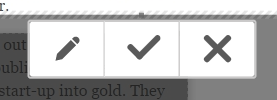
Click the pencil to open the editor so you can add annotations. - Use the tools across the top of the editor to add arrows, text, rectangles, blurred regions, etc., or to crop the screenshot:

- When you’ve finished your annotation, click Done.
- Click Save as Image:

- Click Save (if you’re happy with the default download location, or browse to choose another).
- You’ll see a notification that your screenshot has been taken, and a prompt to copy it to your clipboard. If you want to paste the screenshot elsewhere (e.g. in an email or Slack thread), just click COPY TO CLIPBOARD:
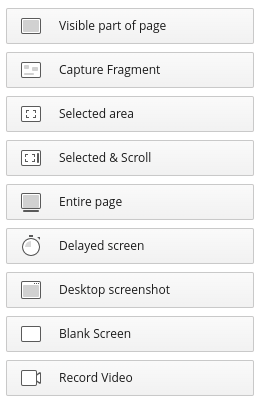
Other screenshots you can take with Nimbus
You can take lots of other types of screenshots with Nimbus too:
Using keyboard shortcuts to take screenshots with Nimbus
To assign keyboard shortcuts:
- Click the Nimbus tool in your extensions toolbar:
- Click the settings cog:

- Scroll down to the hotkey settings and set as required:

Nimbus screenshot limitations
There are a couple of limitations with Nimbus:
- You can only take screenshots within a browser (e.g. you can’t take a screenshot of your desktop wallpaper or your settings window).
- You can’t include your browser’s title bar and address field in a screenshot.
Accessing your Chromebook screenshots later
When you take a regular full-screen or selected area screenshot on your Chromebook, it will always save to your Downloads folder.
Nimbus screenshots save wherever you choose, but the default is your Downloads folder.
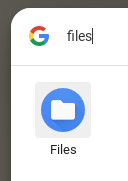
You can access your downloads using the Files app:
- Click the round button at the bottom left of your screen:

- Type Files.
- Click the Files app:
- Navigate to My files > Downloads:
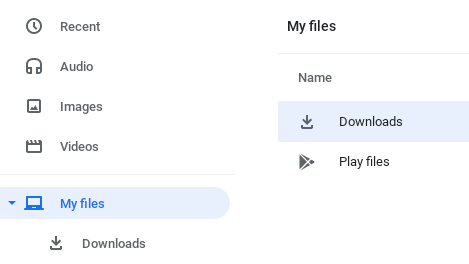
You should now be able to see all your screenshots.
Conclusion
As you can see, taking normal full-screen and selected area screenshots is just as easy on a Chromebook as it is on Windows. And while taking annotated screenshots isn’t quite as simple as using a tool like Snagit or ShareX, it’s definitely doable, and it’s by no means difficult.
Please comment below if you have any suggestions you’d like to see added to this article.


![How to screenshot on iPhone [with pictures]](https://www.supereasy.com/wp-content/uploads/2018/09/screenshot-on-iPhone-768x1150.jpg "How to screenshot on iPhone [with pictures]")
![How to screenshot on Mac [Solved]](https://www.supereasy.com/wp-content/uploads/2018/09/img_5baf1781c71fc-768x629.png "How to screenshot on Mac [Solved]")

")
")
")

 in 2024")
")