How To Make A Roblox Shirt

63 Revisions

Roblox allows players to freely customize clothing items – which is great, otherwise, all the characters would look the same. However, to upload your creation to Roblox, you need to purchase the Premium membership and send your work for evaluation first. If you’d like to make a custom shirt design for Roblox, read our guide.
How to make a Roblox T-shirt
The easiest design for clothing is T-shirt, it’s uploaded for free and only needs an image that is applied to the front of an avatar’s torso. We recommend beginners to start with a T-shirt.
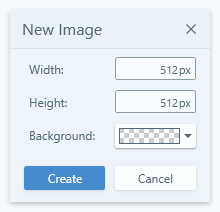
Please note, the image you’ve designed for the T-shirt will only be seen on your avatar’s front. The ideal image size is 512×512 pixels.
I use Snagit to create designs.
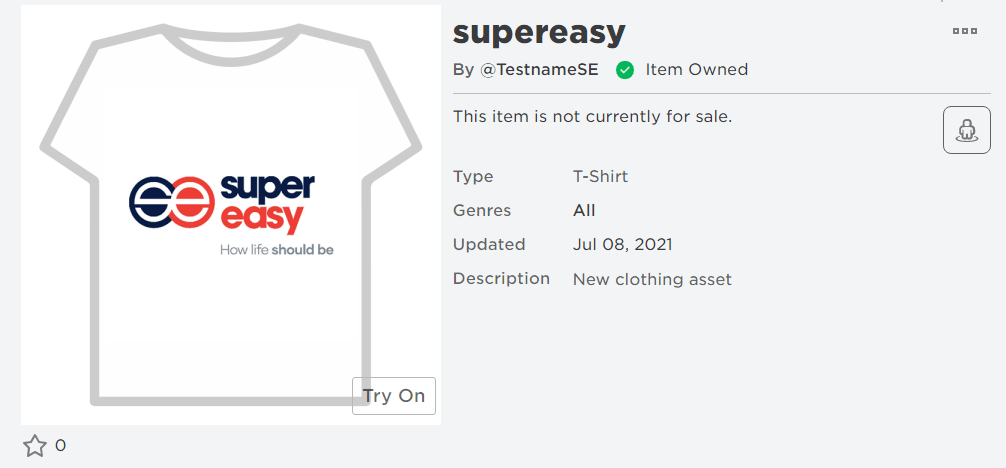
Once you’ve created a satisfying image, save it and upload it to Roblox.
After uploaded the T-shirt, it takes about 20 minutes for it to be approved by Roblox.
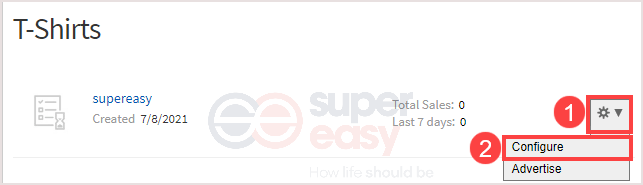
You can change its name, genres and add a description by clicking the gear button to the right of the item and click Configure.
If you have a membership and want to sell your T-shirt, on the configure page, select Sales and turn on the Item for Sale button.
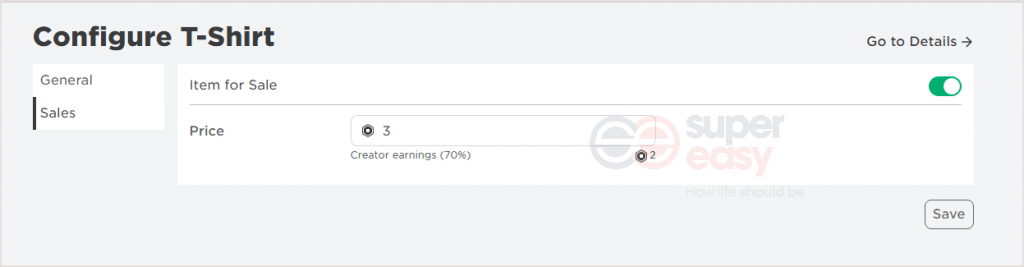
Then you’re able to set the price and sell your T-shirt.
How to make a Roblox shirt
You’ll need a membership and 10 Rubox to upload your shirt. If you’re ready, read on to find how.
Step 1: Download a shirt template
The first thing to do is to download the clothing templates to draw your own art on top. There’s no T-shirt template, Roblox only provides templates for shirts and pants.
- Log in Roblox account.
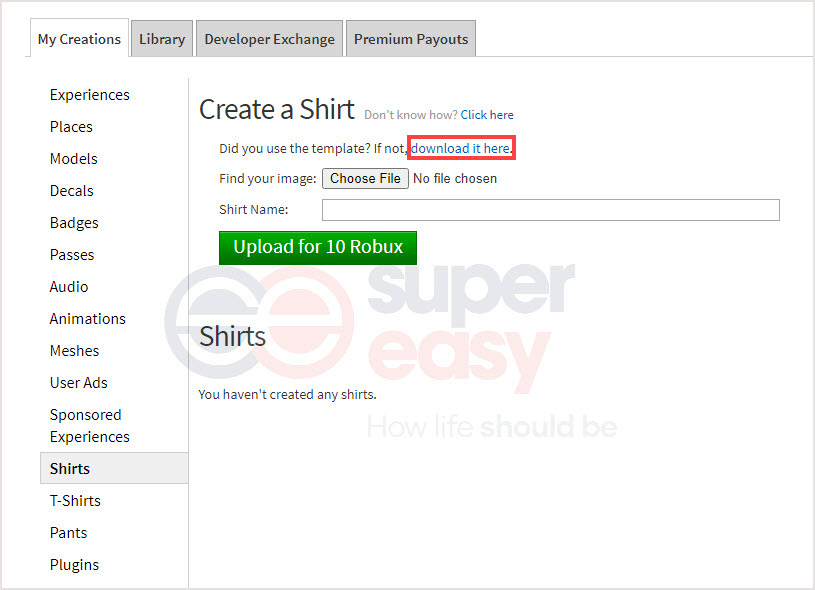
- Click Create in the top menu and then click Shirts.

- Click download it here.
- Right-click the image in the pop-up window and choose Save image as…

- You’ve downloaded the shirt template. Use the same way to download pants if needed.
Step 2: Create a image for clothes
You can use whatever image editor to design an image for your T-shirt in Roblox. Here I’m going to use Snagit.
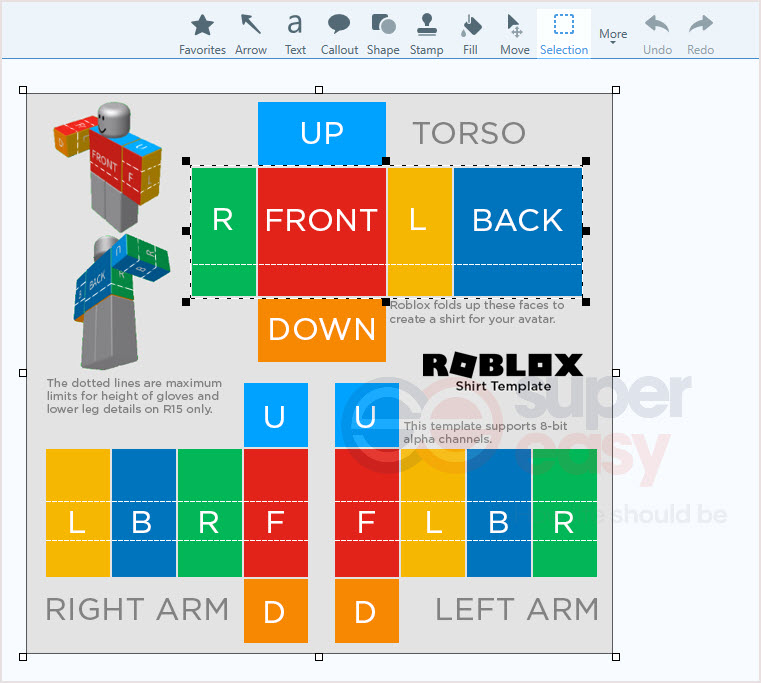
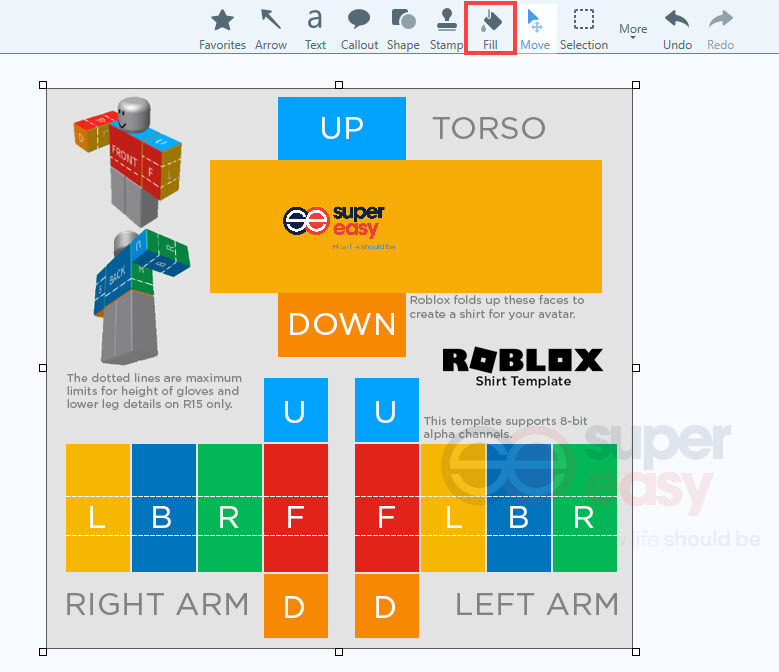
- In Snagit, click File > Open and choose the template.
- Choose Section and drag the section according to the outlines.
- Press Delete on your keyboard. The part you’ve selected would be deleted.
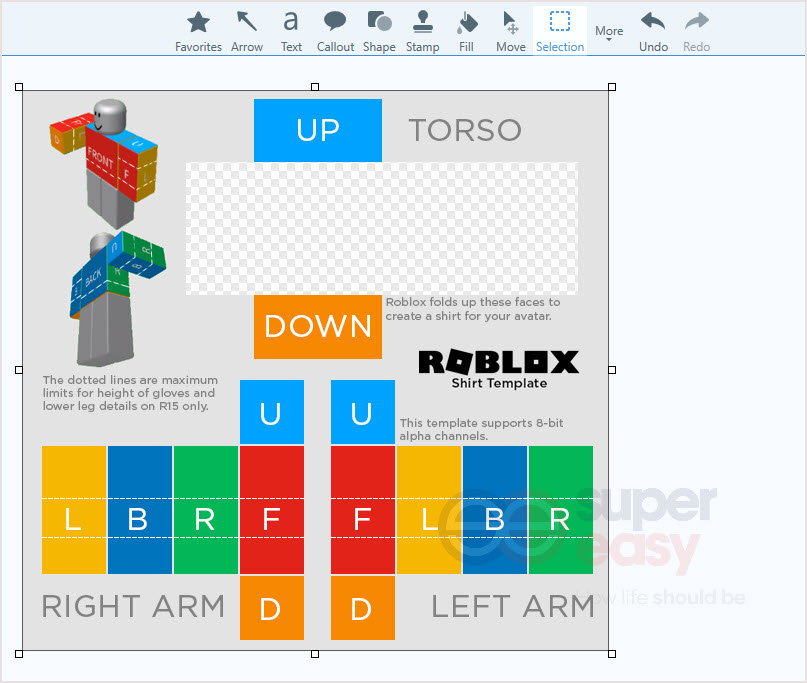
- Choose Fill to flood-fill the color in the area and then put a image in the front area.
- Use Section again to delete all the templates in the picture and fill in with the color you want.
Note: You don’t need to follow the exact size of the template, you can overdrag the section and it’s fine.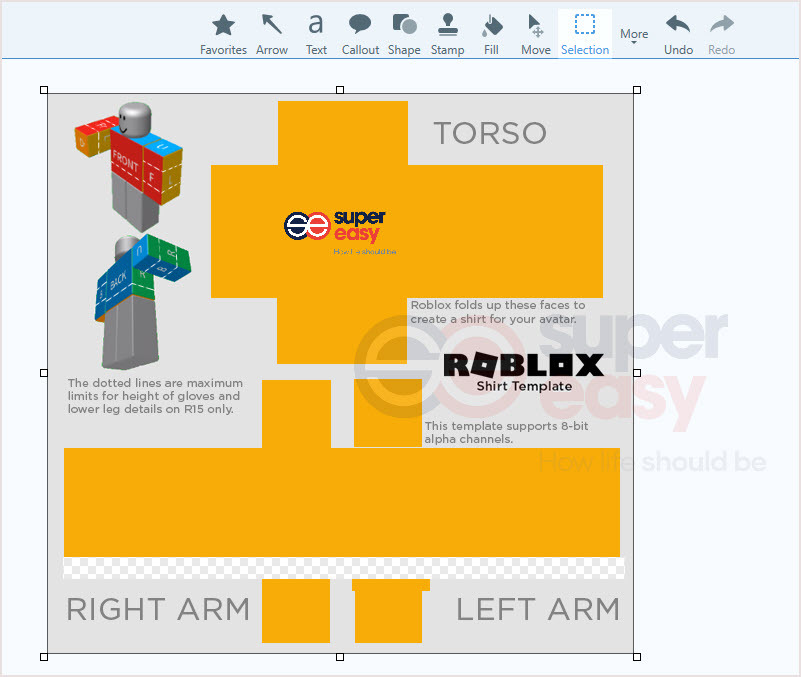
- Save the image, and you’re ready to upload your creation to Roblox.
Step 3: Test before you upload
If you want to check how your shirt looks like in Torso, you can use Roblox Studio to test without paying a fee.
- Launch Roblox Studio and open your place.
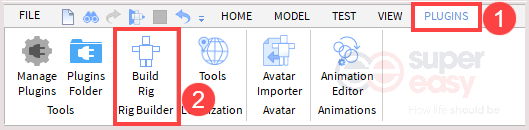
- Click Plugin on the top menu bar and click Build Rig.
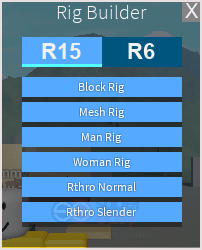
- Choose a rig type from the popup menu. You’ll see an avatar named Dummy in your workplace. I choose the Block Rig.
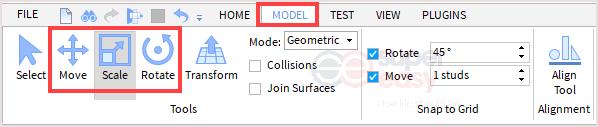
- Click MODEL and you can use Move, Scale and Rotate to adjust your Dummy size and direction.
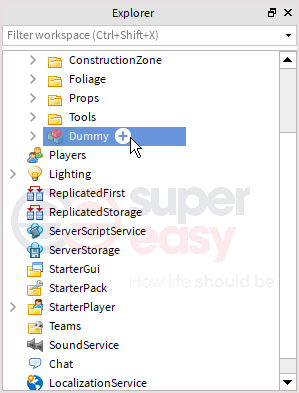
- In the Explorer window which is located on the right side, find Dummy and hover over it, click the + button. Insert either a Shirt, Pants or ShirtGraphic (T-Shirt) object according to your clothing type.
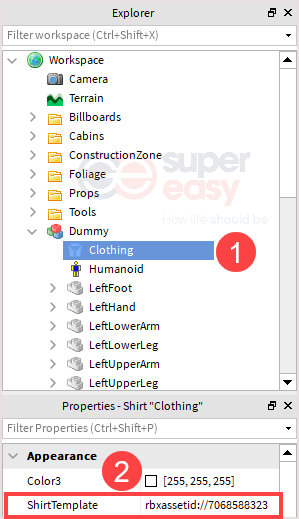
- Locate and select the new Clothing or Shirt Graphic (T-shirt) object inside the dummy.
- The Properties window is under the Explorer window, click inside the property’s row.
- Click Add image and select the image you uploaded to Roblox.
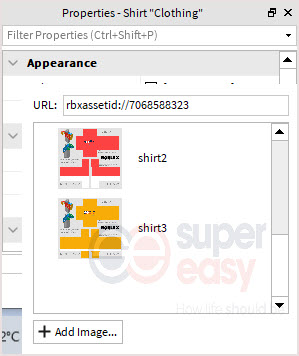
- You should see how the design looks.
Step 4: Upload to Roblox
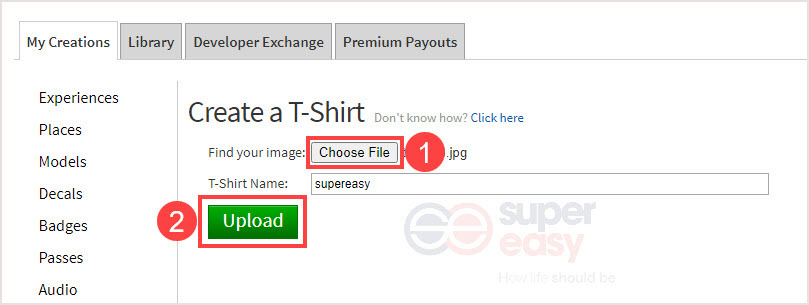
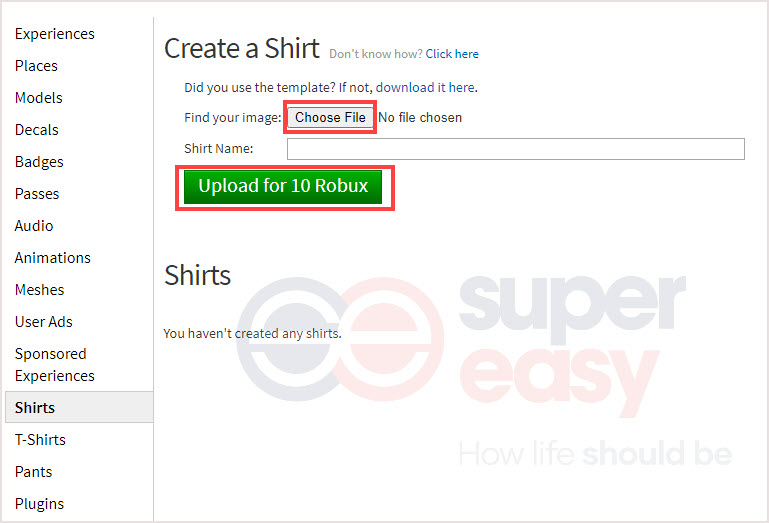
- Go to the Create page.
- Click on either Shirts, Pants, or T-Shirts in the left column, depending on your design.
- Click Choose File and select your file to upload.
- Type in a name for your item.
- Click the Upload for 10 Robux button. Once approved by Roblox, the item will show up as one of your creations and can be applied to your avatar or offered for sale to other Roblox players.
Conclusion:
That’s all about how to make Roblox clothing, you can make a T-shirt and shirt by following our guides, it also works for Roblox pants.
You can sell the clothes if you have a membership and you may earn some Robux back. Give it a try and have fun!
![[New] Roblox Among Us Zombies Codes List](https://www.supereasy.com/wp-content/uploads/2021/02/2021-02-24_19-10-32.jpg "[New] Roblox Among Us Zombies Codes List")
![[NEW] Roblox Project: One Piece All Secret Codes April 2024](https://www.supereasy.com/wp-content/uploads/2020/12/project-one-piece-featured.jpg "[NEW] Roblox Project: One Piece All Secret Codes April 2024")


![[New] Superhero Tower Defense Codes for Gold April 2024](https://www.supereasy.com/wp-content/uploads/2020/12/std-featured.jpg "[New] Superhero Tower Defense Codes for Gold April 2024")
![[NEW] Roblox Zombie Madness Codes – Jan 2024](https://www.supereasy.com/wp-content/uploads/2021/03/Zombie-Madness.png "[NEW] Roblox Zombie Madness Codes – Jan 2024")
")
")
")

 in 2024")
")