How to backup photos on iPhone. Easily!

74 Revisions

Photos on your iPhone are filling up your phone’s storage space? Try these tips to back up photos on your iPhone.
Thousands of photos on your iPhone are filling up your phone’s storage space, and you’re considering backing them up somewhere else? Or better, you prefer photos to back up silently without you having to manually do it every time?
We have just the answer. In this article, we are going to show you five ways to set up photo auto-syncing for your iPhone, so that you never have to worry about storage or risks of losing memories. Check them out…
5 options to back up iPhone photos
Here are five ways to help you sync up your iPhone photos. Just choose the way you prefer:
- Back up iPhone photos with iTunes
- Back up iPhone photos with iCloud
- Back up iPhone photos to Google Photos
- Back up iPhone photos to your computer, using Dropbox
- Back up iPhone photos to a NAS
Option 1: Back up iPhone photos with iTunes
If you want to back up photos on your iPhone to your Mac or PC, as computers usually have much more storage space than phones, the most handy backup tool is iTunes.
Note: Make sure iTunes is installed on your computer.
- Open iTunes and use the USB cable to connect your iPhone to your computer.
- If prompted to provide information about your iPhone passcode or to Trust This Computer, follow the onscreen steps.
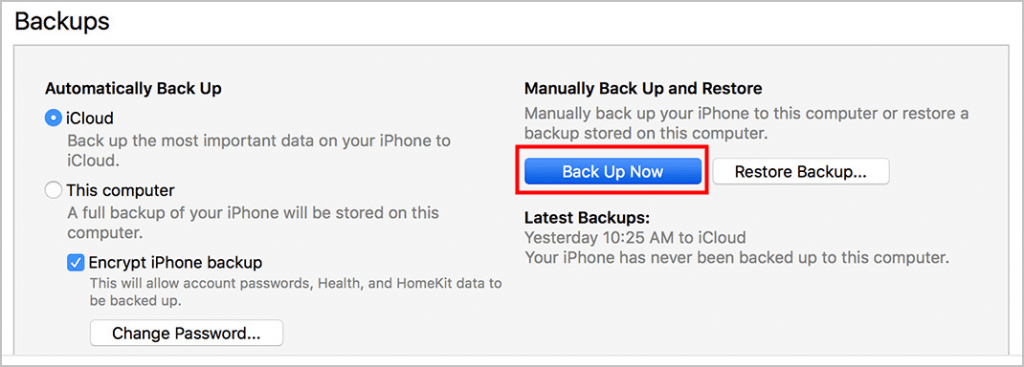
- In iTunes, under DEVICES, right-click on your iPhone and select Backup.
- If you wish to encrypt your backup, select the box called alled Encrypt [device] backup and create a memorable password. Otherwise, click Back Up Now.
Option 2: Back up iPhone photos with iCloud

Another handy tool you can use to back up photos on your iPhone is iCloud.
Note: Make sure your iPhone is connected to a Wi-Fi network.
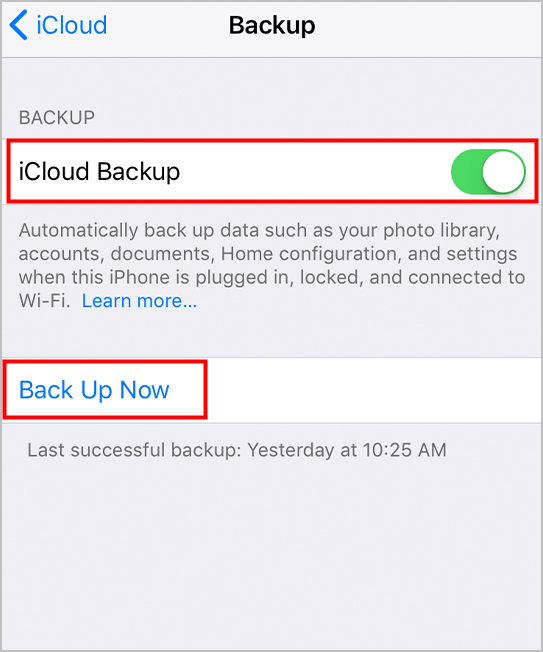
- On your iPhone, go to Settings, tap your name > iCloud.
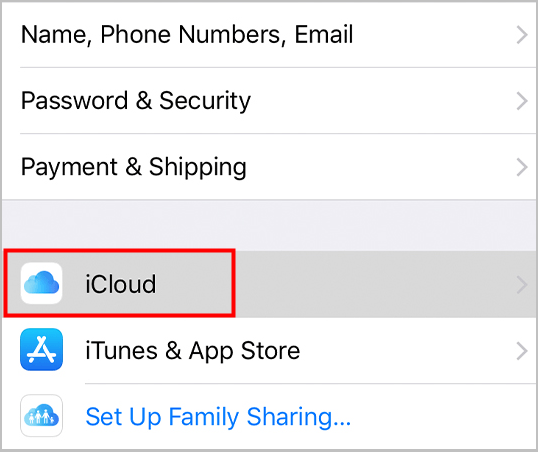
- Toggle on the iCloud Backup button, and tap Back Up Now.
Note: When you sign in to iCloud, you get 5GB of iCloud storage for free. You may need more with so many photos and files on your iPhone, then you can either pay for an upgrade to get the storage capacity you need or use other applications with more or unlimited storage space.
Option 3: Back up iPhone photos to Google Photos
Google Photos is Google’s free solution for automatically backing up all your photos and videos. And it’s not just for Android phones; it works on iPhone too.
When you have the Google Photos app installed, you can take a photo or shoot some video, and it will be automatically uploaded to Google’s cloud. You can back up all your photos and videos, entirely free (you get unlimited storage space). Then you can see them from any device with the Google Photos app installed, and also at https://photos.google.com.
Here’s how to do it:
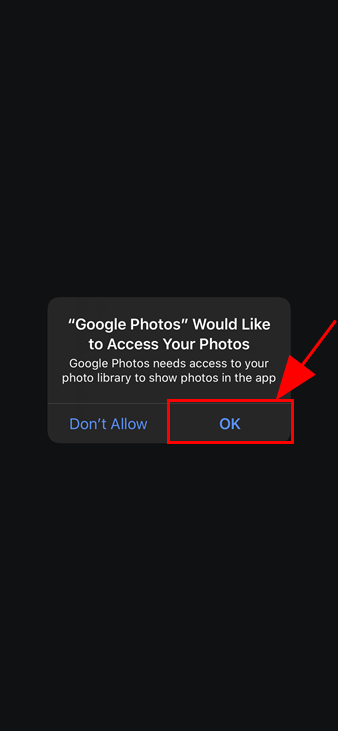
- From the App Store, install Google Photos.
- Open the app, and when you’re asked for permission for the app to access your photos, tap OK.
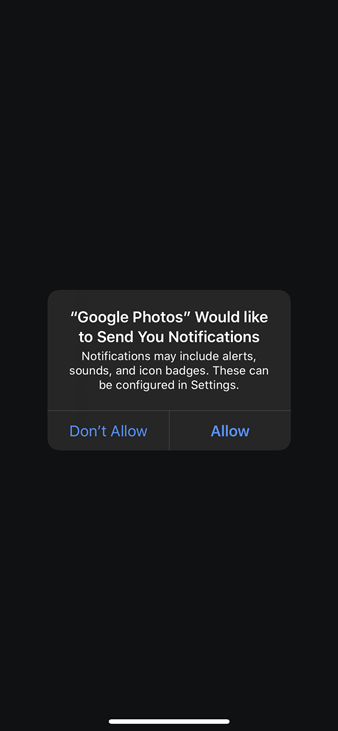
- When prompted to allow notifications, choose your preference. (Note that if you don’t allow notifications, you won’t be notified when Google Photos automatically creates animations and videos for you, or when it prepares memories for you, and all of these features are great.)
- Sign in to your Google account or create a new one. If you have more than one Google account, choose the one that you want to link with your Apple album in the long run.
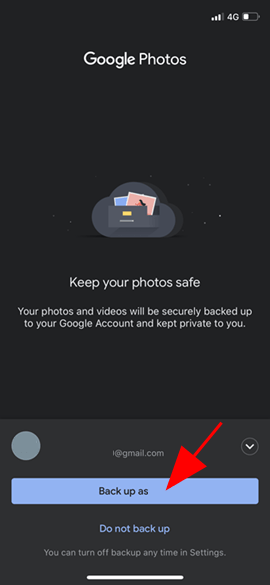
- At Backup settings, Google Photos will ask for your preference about backups.
If you want free unlimited storage, choose High quality (free unlimited storage). This way, your photos and videos will be compressed a little to reduce file sizes and save space. Photos will be reduced to 16MP maximum and videos higher than 1080P will be resized to high-definition 1080p. (TIP: Unless you’re a photographer or designer, you probably won’t notice the difference.)
If you want to back up your photos and videos at their full, original resolution, choose Original (limited to account storage). In this option though, you will only have 15GB of free space for storage. You can add more space for $1.99 per month per 100GB.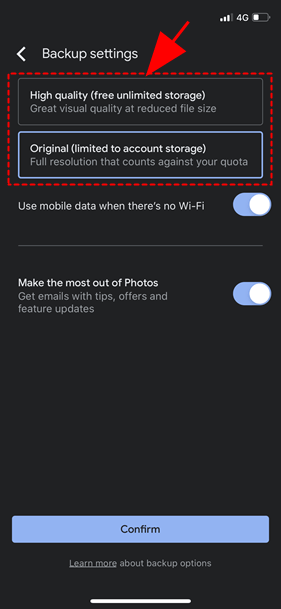
- In addition, you can also choose whether to Use mobile data when there is no Wi-Fi. If this option is turned off, your photos and videos will only back up when your iPhone is connected to Wi-Fi. If your data plan has a cap, this is probably the option you should choose.
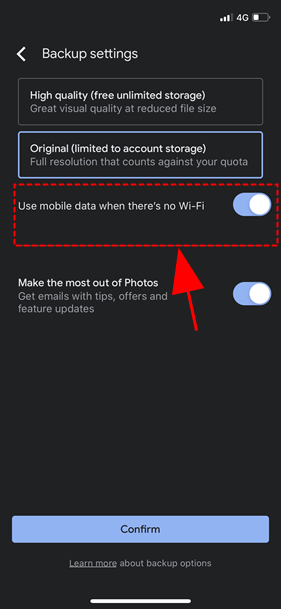
After that, tap Confirm.
Now you’re all set – Google Photos will back up your photos as you’ve set it to.
To check the status of your backups, tap your account profile photo in the top right corner. You’ll see one of the following status messages:
- Backup complete
: Your upload is complete and you have no more items waiting to back up
- Backup is off
: Backup and sync is turned off. To turn on backup, tap Turn on backup.
- Backing up: Your photos and videos are currently backing up. You’ll also find the number of items remaining.
- Preparing backup or Getting ready to back up: Your photos and videos are getting ready to back up.
- Waiting for connection
or Waiting for Wi-Fi
: To back up, change your settings (by enabling Use mobile data when there is no Wi-Fi) or connect to a Wi-Fi or mobile network.
IMPORTANT: Apple doesn’t like third-party apps to upload data in the background. So when you switch to another app or your phone goes to sleep, your backup will pause. There are some workarounds that can keep it backing up in the background for up to 10 minutes, but they’re unreliable. It’s best to assume you’ll need the Google Photos app open in front of you the whole time your photos are backing up. Yep, this is rubbish! (For what it’s worth, it works flawlessly on Android!)
Option 4: Back up iPhone photos to your computer, using Dropbox

Dropbox also has a free solution for automatically backing up all your photos and videos. It works much like Google Photos, but you get only 2GB of storage space for free (and you’ll use it a lot faster, because Dropbox doesn’t automatically compress your files).
When you have the Dropbox app installed, you can take a photo or shoot some video, and it will be automatically uploaded to your Dropbox. Then you can see them from any device with the Google Photos app installed, and also at https://www.dropbox.com/home.
The process for setting this up varies, depending on whether you’ve used Dropbox before.
Setting up automatic photo backup if you’ve used Dropbox before
- If you don’t already have Dropbox installed on your iPhone, install it now from the App Store.
- Open the Dropbox app and sign into your account.
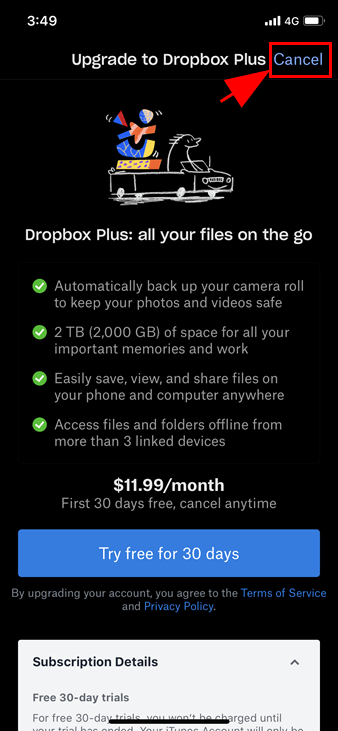
- If prompted to upgrade to Dropbox Plus, tap Cancel at the top right.
- When prompted to upload some photos, tap Skip at the top right.
- When prompted about notifications, tap Allow.
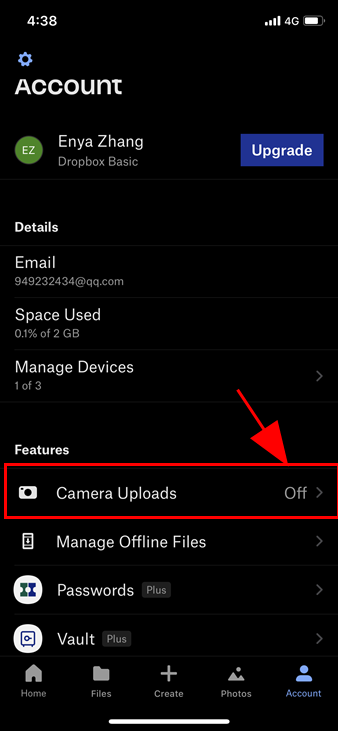
- At your Home screen, tap Account at the bottom right.
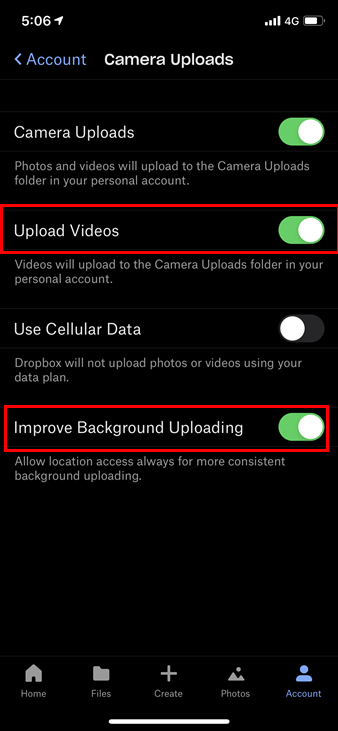
- Tap Camera Uploads.
- Turn Camera Uploads on then, when prompted to allow access to your photos, tap Allow Access to All Photos.
- Turn on Upload Videos and Improve Background Uploading.
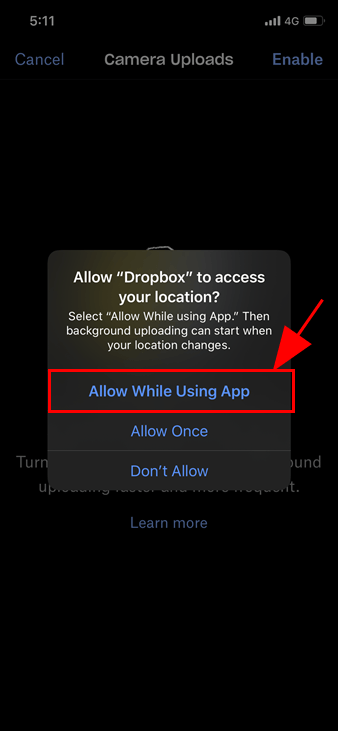
- When prompted to allow location access, tap Enable at the top right.
- Tap Allow While Using App.


Setting up automatic photo backup if you haven’t used Dropbox before
If you haven’t used Dropbox before:
- Using the App Store, install Dropbox.
- Open the Dropbox app and sign in or register for an account.
- When prompted to upgrade to Dropbox Plus, tap Cancel at the top right.
- When prompted to upload some photos, tap Skip at the top right.
- When prompted about notifications, tap Allow.
- If prompted to “Take All Your Files with You”, tap Skip at the top right.
- At your Home screen, tap Account at the bottom right.
- Tap Camera Uploads.
- When prompted to connect a computer or upgrade, tap Connect a Computer, and follow the prompts to download and install Dropbox on your computer. When prompted to allow access to your camera, tap OK. Once Dropbox is installed on your computer, tap Done on your iPhone. (When prompted to choose between backing up to your computer’s hard drive and upgrading to back up to Dropbox’s cloud storage, choose your computer’s hard drive. Don’t worry, your photos and videos will still be backed up to Dropbox’s cloud. This appears to be just an attempt to extract a bit of money out of unsuspecting customers.)
- When prompted to allow access to your photos, tap OK.
- Turn on Upload Videos and Improve Background Uploading.
- When prompted to allow location access, tap Enable at the top right.
- Tap Allow While Using App.


That’s it. Dropbox will now back up your photos and videos automatically.
IMPORTANT: Apple doesn’t like third-party apps to upload data in the background. So when you switch to another app or your phone goes to sleep, your backup will pause. There are some workarounds that can keep it backing up in the background for up to 10 minutes, but they’re unreliable. It’s best to assume you’ll need the Dropbox app open in front of you the whole time your photos are backing up. Yep, this is rubbish! (For what it’s worth, it works flawlessly on Android!)
Bonus tip: Earn free space by referring Dropbox to your friends
Dropbox storage getting full? Don’t worry. Dropbox has a referral program that allows you to earn up to 32GB of free storage.
- If you’re using a Dropbox Basic account, you can get 500MB by referring Dropbox to one friend, and get up to 16GB maximum (that’s 32 friends joining Dropbox through your invite).
- If you’re a paid user of Dropbox, you can get 1GB per referral and earn up to 32GB.
Here is how to invite friends to join Dropbox from your iPhone:
- Open Dropbox on your iPhone.
- Tap the Account icon > the gear icon
- Scroll down to the bottom and tap Tell Friends About Dropbox.
- Enter the email addresses of any friends you wish to invite, and then tap the Send button.


That’s it – now you have referred Dropbox to your friends.
Option 5: Back up iPhone photos to a NAS
“NAS” stands for Network Attached Storage. It’s basically a big, standalone hard drive that connects to your router with an ethernet cable. You can then save files to it and access those files, even when your computer is shut down.

Some NAS devices enable you to back up your photos and videos in a similar way to iCloud, Google Photos and Dropbox. I.e. You can take a photo or shoot some video, and it will be automatically uploaded to your NAS, via an app on your phone.
Synology is one brand of NAS that you can do this with. Simplistically speaking, this is how it works:
- Choose an appropriate NAS device and buy it
- Buy and install at least one hard drive in it
- Connect it to your router with an ethernet cable
- Install Synology’s operating system on it
- Install the DS Photo app on it
- Install the DS Photo on your iPhone, and connect it the DS Photo app on your NAS
- Tell the DS Photo iPhone app to automatically back up new photos and videos, and choose the folder on your NAS where they’ll go
Some of these steps are actually a little complex, and too long to detail here. But Synology documents the entire process very clearly, and their tech support is excellent. You don’t have to be an engineer to figure it out, but it’s definitely harder and more time-consuming to set up than iCloud, Google Photos or Dropbox.
Obviously this method requires some investment up-front, whereas the cloud backup methods don’t. But if you have a lot of photos and videos, and you pay for extra cloud storage with Apple, Google or Dropbox, it doesn’t take long for those payments to add up.
IMPORTANT: Apple doesn’t like third-party apps to upload data in the background. So when you switch to another app or your phone goes to sleep, your backup will pause. There are some workarounds that can keep it backing up in the background for up to 10 minutes, but they’re unreliable. It’s best to assume you’ll need the DS Photo app open in front of you the whole time your photos are backing up. Yep, this is rubbish! (For what it’s worth, it works flawlessly on Android!)
If you have any other suggestions, leave a comment below to tell us. Or if you have any issue with the backup process, feel free to comment below for further help.

![How to copy photos from iPhone to PC [SOLVED]](https://www.supereasy.com/wp-content/uploads/2018/11/phone-690134-768x512.jpg "How to copy photos from iPhone to PC [SOLVED]")
![MacBook Pro Keyboard Not Working [FIXED]](https://www.supereasy.com/wp-content/uploads/2019/02/apple-1846281_1280-768x512.jpg "MacBook Pro Keyboard Not Working [FIXED]")

![[SOLVED] How to cancel Apple Music subscription](https://www.supereasy.com/wp-content/uploads/2020/09/Apple-Music-768x536.png "[SOLVED] How to cancel Apple Music subscription")

")
")
")

 in 2024")
")