FIX: The file is too large for the destination file system

14 Revisions

Get “The file is too large for the destination file system” error when you transfer your files to a portable hard drive? Don’t give up hope. Follow this guide to solve it.
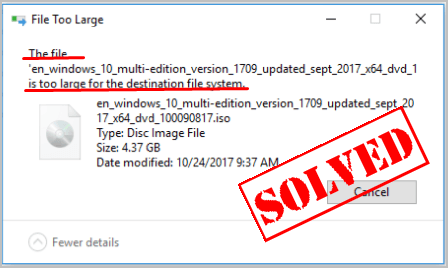
Just now you want to transfer you videos, photos or other files from your Windows computer to a portable hard drive, like a WD drive. But the transfer fails and you are seeing an error message popping up : The file is too large for the destination file system.
You must be very confused because you’re totally sure that there are exactly enough free space of your portable device. So why does this problem happen?
Don’t panic though. We certainly know your frustration and have got the answer for you.You’ll learn the reason and the solutions for the file is too large for the destination file system:
Why does the The file is too large for the destination file system error happen?
First things first, learn what the file system is: A file system is used by your operating system to control how data is stored and retrieved on your portable hard drive. Its most commonly seen types on Windows system are: exFAT, FAT, FAT32, and NTFS.
What you should pay attention to are these two types: FAT32 and NTFS. They’re the most popular file systems in Windows system. FAT32 is widely supported because of its best compatibility and almost all the flash drive throughout the world ships with the FAT32 file system. But the maximum single file size it can support is 4GB. That’s to say, if your any single file is larger than 4GB to transfer, the transfer would fail although your flash drive has much more free space. That’s why you encountered the error: The file is too large for the destination file system.
If you would like to proceed to transfer your files to the flash drive, all you can do is convert the file system of your flash drive from FAT32 to NTFS. NTFS is the most widely used file system in PC currently. It’s able to support any file reach up to 16TB.
Here’s how to convert your file system:
You’ll learn 3 methods to convert your file system from FAT32 type to NTFS type:
Important: For Method 1 & 2, all your data on your flash drive would be lost if you don’t have any backup. If you aren’t able to do backup before the format, but you want to keep the important files on your drive, choose Method 3 & 4 then.
- Convert your file system in Windows File Explorer
- Convert your file system in Disk Management
- Convert your file system via Command Prompt
- Convert your file system via a third party tool
Method 1: Convert your file system in Windows File Explorer
You can easily format the file system in Windows File Explorer.
Here’s how:
1) On your keyboard, press the Windows logo key ![]() and E at the same time to open the Windows File Explorer.
and E at the same time to open the Windows File Explorer.
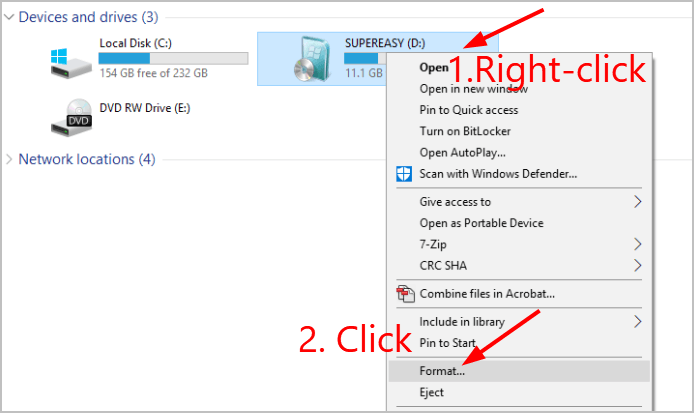
2) Find and right-click on your portable hard drive and select Format…
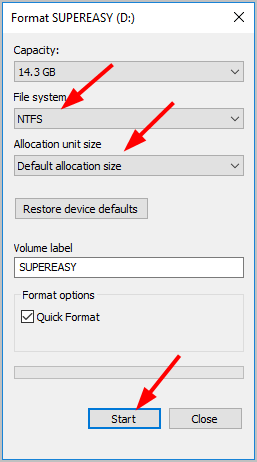
3) Set File system to NTFS, Allocation unit size to Default allocation size. Then click Start.
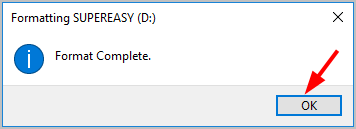
4) Click OK. You’ll then see the file system has converted to NTFS. Close the window.

Success! Now you’re able to transfer your videos, photos or other files to you portable hard drive.
Method 2: Convert your file system in Disk Management
It’s also easy to convert your file system in Disk Management. Follow these:
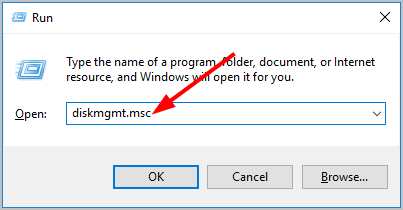
1) On your keyboard, press the Windows logo key ![]() and R at the same time to invoke the Run box.
and R at the same time to invoke the Run box.
2) Type diskmgmt.msc and press Enter.
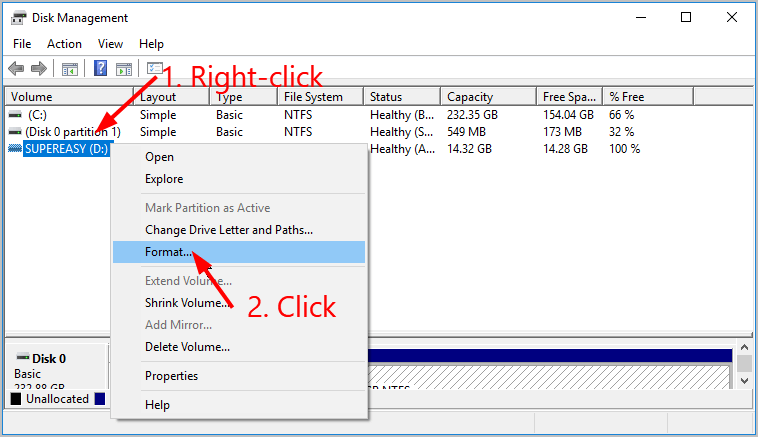
3) Find and right-click on your portable hard drive and select Format…
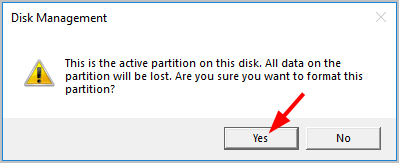
4) Click Yes when prompted to confirm the format.
5) Set File system to NTFS, Allocation unit size to Default. Then click OK.

6) You’ll then see the file system of your hard driver has converted to NTFS.
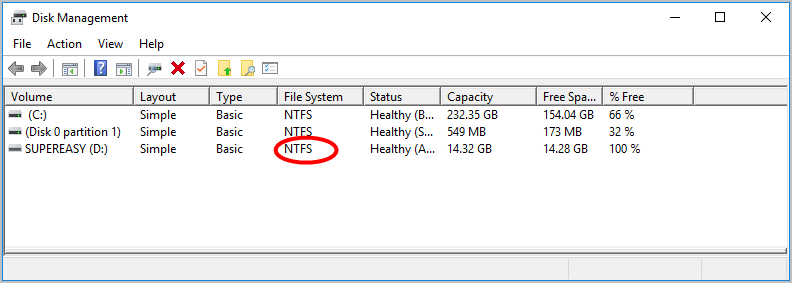
Great! Now you’re able to transfer your videos, photos or other files to you portable hard drive.
Method 3: Convert your file system via Command Prompt
If somehow, you can’t access the File Explorer on Windows, neither the Disk Management. You can still convert your file system via Command Prompt. Do as these steps:
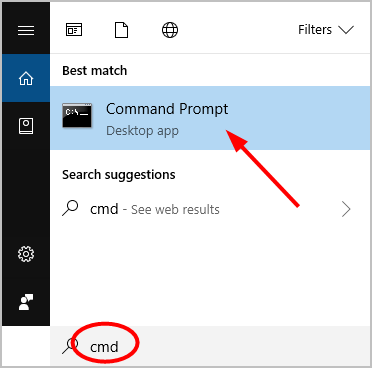
1) Type cmd in the search box from the Start menu. Then click Command Prompt from the result.
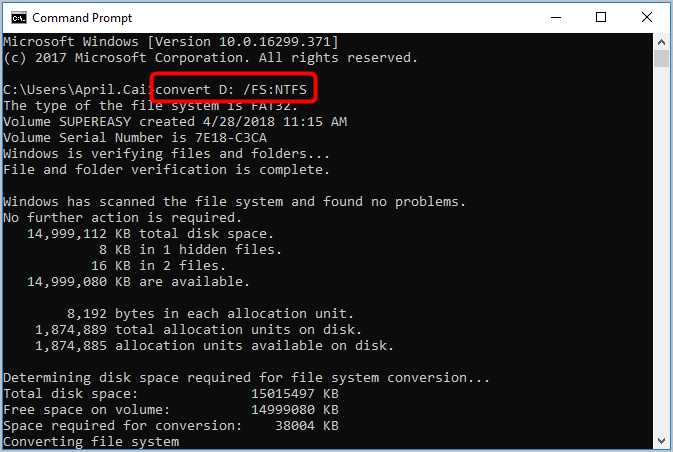
2) On the open black window, type convert drive letter: /FS:NTFS. For example, my drive letter is D, then I should type convert D: /FS:NTFS. Press Enter to run the command. Windows should then identify and scan the current file system of your hard drive, then convert the file system to NTFS.
Tada! Now you’re able to transfer your videos, photos or other files to you portable hard drive.
Method 4: Convert your file system via a third party tool
You can also convert your file system without data loss by using a third-party tool. There’re many third party tools you can find on the Internet. Make sure to choose a well-known and experienced one in case of any unexpected damage to your file or drive.
![How to Fix “Share My Location Unavailable” [With Pictures]](https://www.supereasy.com/wp-content/uploads/2018/09/img_5b924a89f168b.png "How to Fix “Share My Location Unavailable” [With Pictures]")


![[SOLVED] Instagram couldn’t refresh feed | quickly & easily!](https://www.supereasy.com/wp-content/uploads/2020/02/2020-02-12_16-31-23-768x432.jpg "[SOLVED] Instagram couldn’t refresh feed | quickly & easily!")

![How to Use Windows Snipping Tool to Take Screenshots [With Pictures]](https://www.supereasy.com/wp-content/uploads/2019/07/snipping-tool.png "How to Use Windows Snipping Tool to Take Screenshots [With Pictures]")
")
")
")

 in 2024")
")